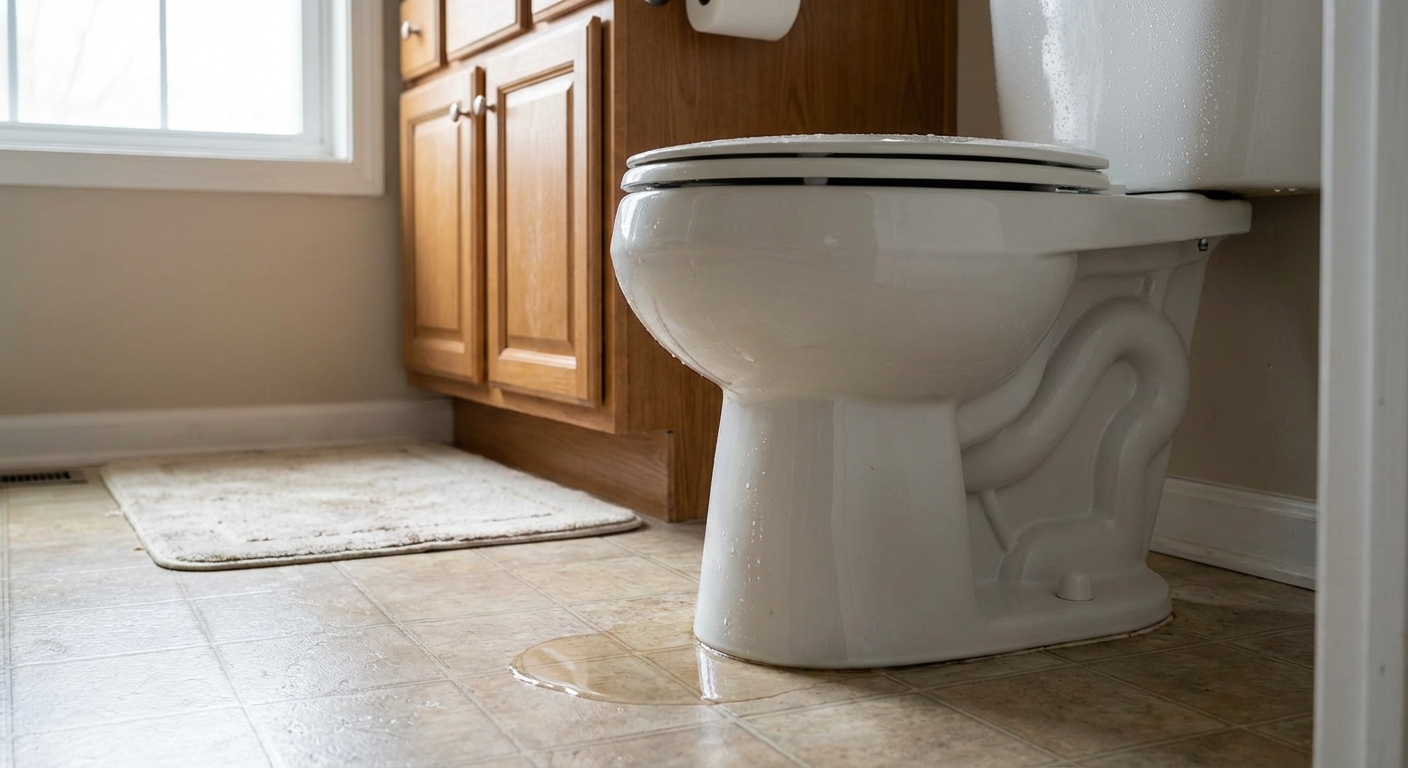
If you've ever walked into the bathroom and found a mysterious puddle around the base of the toilet, your first thought is probably: leak. Fair. But if the water is coming from the outside of the tank, you might be dealing with toilet tank sweating, which is usually just condensation.
I've chased this one around my own 1970s ranch more than once. It feels like a plumbing problem, but most of the time it's a humidity + cold water problem. The good news is you can usually fix it without replacing the toilet.
Why toilet tanks sweat
Condensation happens when warm, humid air hits a surface that's cold enough to drop that air below its dew point. A toilet tank is basically a porcelain cold drink sitting in a warm bathroom.
- Cold supply water refills the tank after a flush.
- Humid bathroom air from showers and baths surrounds the tank.
- The tank surface gets cold, moisture in the air turns into droplets, and those droplets run down to the floor.
This is most common in summer, in muggy climates, in small bathrooms with weak fans, or in homes with very cold incoming water.
Condensation or a leak?
Before you buy anything, make sure you aren't missing an actual leak. Here's a quick, reliable check.
Step 1: Dry everything
Wipe the tank dry, including the bottom edge where water likes to hide. Dry the floor around the toilet too.
Step 2: Watch where the water starts
- Condensation: droplets form across the outer tank surface, often fairly evenly. Water trails run down the sides.
- Supply line leak: wetness starts at the shutoff valve, compression nut, or the fill valve connection under the tank.
- Tank-to-bowl leak: water appears under the tank bolts or in a slow trickle down the back of the bowl.
- Wax ring leak: water shows up around the base after flushing, and it isn't coming from above. (Quick note: base puddles can have multiple causes, so confirm it isn't running down from the tank or a fitting.)
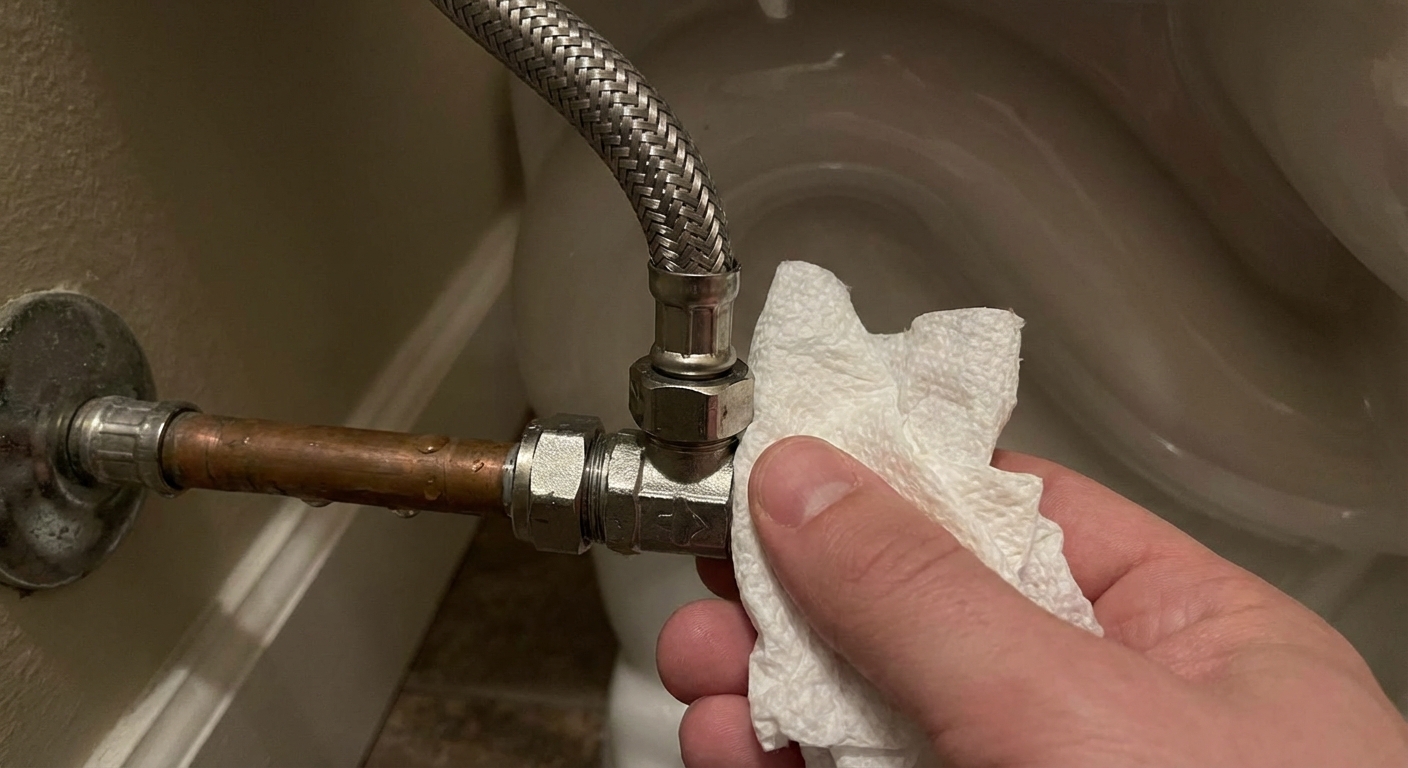
Step 3: Do the paper towel test
Wrap a dry paper towel around these spots: the supply connection under the tank, the shutoff valve, and the tank bolts. Flush once and wait 5 to 10 minutes. If the towel gets wet at a fitting, that's a leak, not sweat.
My rule: if water is appearing on the porcelain walls of the tank like a cold glass on a summer day, I treat it as condensation first.
Also worth checking: sometimes it's the bowl sweating, not the tank. If the tank is dry but the outside of the bowl feels clammy, that can still make a puddle at the base.
How to stop tank condensation
You can attack the problem from a few angles: reduce humidity, warm the tank surface, or warm the refill water. Start with the easiest fixes and work your way up.
Fix 1: Improve ventilation
If your fan is weak or rarely used, the bathroom stays humid long after a shower. That humid air is what feeds condensation.
- Run the fan longer: 20 to 30 minutes after showers. A simple timer switch helps a lot.
- Let moisture escape: leave the shower curtain or door partially open after showering.
- Crack a window if you have one, even for 10 minutes.
- Clean the fan grille and make sure it's actually exhausting outdoors, not into an attic.
Rough rule of thumb: after a hot shower, the bathroom mirror should start clearing within 15 to 20 minutes with the fan running. If it stays foggy much longer, your ventilation probably isn't keeping up (fan CFM, duct runs, and makeup air all matter).
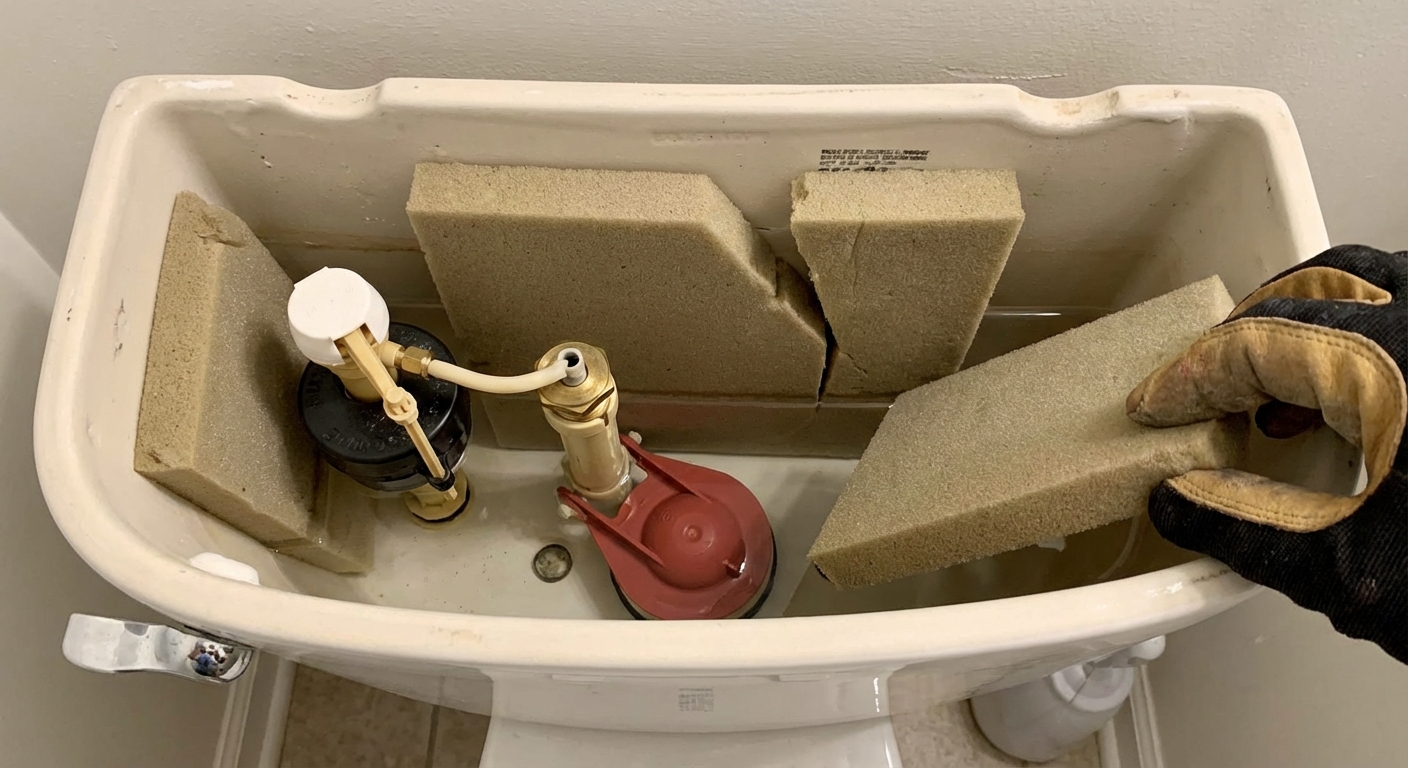
Fix 2: Use a tank insulation kit
A tank liner kit adds a thin foam barrier to the inside of the tank. That barrier keeps the porcelain from getting as cold, which makes it harder for condensation to form.
Pros: cheap, DIY-friendly, no plumbing changes. Cons: takes some patience, and you need to keep clear of moving parts.
Quick install tips
- Turn off the shutoff valve and flush to drain most of the water. Sponge the rest so the surfaces are dry.
- Clean and dry the inside of the tank well. Older tanks can have a film on the porcelain, and adhesive won't stick to damp or dirty surfaces.
- Keep insulation away from the flush valve, flapper, and float. If anything rubs, you can create a running-toilet problem.
- Don't block the overflow tube.
- Give the adhesive time to cure before refilling fully, if the kit instructions call for it.
My first time doing this, I trimmed a panel too tight and it nudged the float arm just enough to mess with the fill level. The fix was simple, but it taught me to leave a little breathing room around every moving part.
Fix 3: Install an anti-sweat valve
An anti-sweat valve is a small mixing valve that blends a little warm water into the toilet supply line so the tank refills with water that isn't ice-cold. Warmer refill water means a warmer tank surface, which means less condensation.
Where it goes: usually near the shutoff valve, connecting to the toilet supply and a nearby hot water line (often the sink supply).
- Pros: very effective in muggy climates, works even if your fan is decent.
- Cons: more parts and plumbing connections, needs access to a hot water line, and it can slightly increase hot water use.
Code and install note: follow the manufacturer instructions and local plumbing code. Some setups may require specific backflow prevention or a particular connection method.
DIY or pro? If you're comfortable shutting off water, making supply connections, and checking for leaks, many homeowners can handle it. If your shutoff valves are old, corroded, or you don't have an accessible hot line, a plumber is worth it.
Fix 4: Reduce humidity with a dehumidifier
If your bathroom is chronically humid (or it's a basement bath), a small dehumidifier can make a bigger difference than you'd think. In my experience, this is especially helpful when the fan is decent but the house stays sticky in summer.
- Run it during the muggy season and aim for comfortable indoor humidity.
- Make sure it can drain easily (bucket or hose), and keep the filter clean.
- If multiple rooms feel humid, whole-house humidity control might be the real fix.
What not to do
- Don't ignore it. Repeated wet floors can swell baseboards, loosen vinyl, stain grout, and encourage mildew.
- Don't wrap the tank exterior with random foam. It looks rough, traps grime, and can interfere with the lid and internal access.
- Don't confuse sweating with a cracked tank. If you ever see a hairline crack that's actively weeping, replace the tank or toilet. Porcelain failures aren't patch-and-hope repairs.
- Don't overtighten tank bolts while troubleshooting moisture. That can crack the tank.
- Don't crank up your water heater just to fix a sweating tank. It's inefficient and increases scald risk. If you need warmer refill water, use an anti-sweat valve made for the job.
When to stop and investigate
Condensation is common, but if something feels off, trust that instinct.
- If water is pooling fast and you can't confirm it's condensation.
- If the floor feels soft, spongy, or stained around the toilet.
- If you notice sewage odor, dirty water, or moisture that seems to come from under the toilet.
At that point, stop using the toilet if you can and figure out the source, or call a pro. Water damage gets expensive in a hurry.
Quick decision guide
If it only happens after showers
- Run the fan longer or add a timer switch.
- Improve airflow by cracking a door or window.
If it happens daily in warm, humid weather
- Start with ventilation, then add a tank insulation kit.
- If it still sweats, consider an anti-sweat valve.
- If the whole room stays humid, add a small dehumidifier.
If you see water but the tank is dry
- Check for bowl condensation and wipe the bowl dry to see if it returns.
- Re-check the supply line, tank bolts, and tank-to-bowl gasket.
- Use the paper towel test and look for drips under the tank.
FAQ
Is a sweating toilet tank normal?
It's common, especially in humid bathrooms, but it isn't something you should live with. Persistent condensation can damage flooring and trim over time.
Can a sweating tank cause mold?
Yes. Constant moisture around the toilet base can feed mildew on caulk, along baseboards, and in flooring seams, especially if the bathroom stays humid.
Will a tank insulation kit make my toilet run?
It shouldn't if installed with clearance around the float, fill valve, and flapper. Most “my toilet started running after the kit” stories come from insulation touching a moving part.
Does an anti-sweat valve waste hot water?
It uses some hot water, but typically only a small amount mixed into the refill. If your tank is sweating heavily, the tradeoff is often worth it to prevent water damage.
My bottom line
If your toilet tank is sweating, you're usually looking at a physics problem, not a broken toilet. Start by getting humidity under control, then move to a tank insulation kit if needed. If you live in a muggy area or your incoming water is consistently cold, an anti-sweat valve is the most reliable long-term fix.
And if anything about the moisture pattern looks like a leak instead of fairly uniform droplets, take the extra five minutes to test it. It's a lot cheaper than replacing a soft, water-damaged floor later.
About Marcus Vance
Content Creator @ Grit & Home
Marcus Vance is a lifelong DIY enthusiast and self-taught home renovator who has spent the last decade transforming a dilapidated 1970s ranch into his family's dream home. He specializes in budget-friendly carpentry, room-by-room renovations, and demystifying power tools for beginners. Through his writing, Marcus shares practical tutorials and hard-learned lessons to help homeowners tackle their own projects with confidence.