A toilet that rocks is not just annoying. It can break the wax seal, loosen plumbing connections, and eventually rot the subfloor. The good news is that most “wobbly toilet” calls come down to a few predictable causes and a fix you can do in an afternoon.
One quick note before we start: wobble is a stability problem. A leak is a sealing problem. They can be related, but the diagnostic steps are different. I’ll show you how to tell what you’re dealing with, then walk you through the right fix.
First, confirm wobble or leak
Do this 2-minute check before you touch a wrench.
Quick checklist
- Rock test: Put one hand on the tank (low, near the bowl) and one on the bowl rim. Gently rock. If the base shifts, you have a stability issue.
- Dry and inspect: Dry the floor around the base with a towel. Look closely for other sources first: a dripping supply line, stop valve, or sweat/condensation on the tank dripping down to the floor.
- Flush test: After everything is dry, flush 2 to 3 times and watch the base. If moisture appears at the base after flushing, that points to a seal issue (often the wax ring) and you should plan on pulling the toilet.
- Paper towel test: Press a paper towel around the base after a flush. Dampness or brownish staining can suggest a failed wax ring, but it can also be old mop water or rusty hardware. If you see it, confirm with repeated flush tests and check the supply line for drips.
If it rocks but stays dry through flush tests, you can often fix it with tightening and shims. If it rocks and you see water after flushing, skip ahead to the wax ring and flange sections.
Common causes
1) Loose closet bolts (most common)
The toilet is held down by two closet bolts (one on each side of the base). Over time, the nuts can loosen from small movements or a compressing wax ring. Once it starts moving, it tends to get worse.
2) Uneven floor or tile high spots
Bathrooms are famous for slightly uneven tile, grout ridges, or a floor that slopes toward a drain or doorway. A toilet base needs full contact. If it sits on two high points, it will rock forever unless you shim.
3) Compressed or failed wax ring
A wax ring is designed to seal, not to act like a cushion. If the toilet has been rocking, the wax can deform. Sometimes you get wobble first, then a leak later. Sometimes you get both at once.
4) Broken or low toilet flange
The flange is the ring that anchors the toilet to the floor and connects to the drain pipe. If it is cracked, loose, or set too low (common after new tile), the bolts cannot clamp the toilet properly and the wax ring may not compress correctly.
Tools and supplies
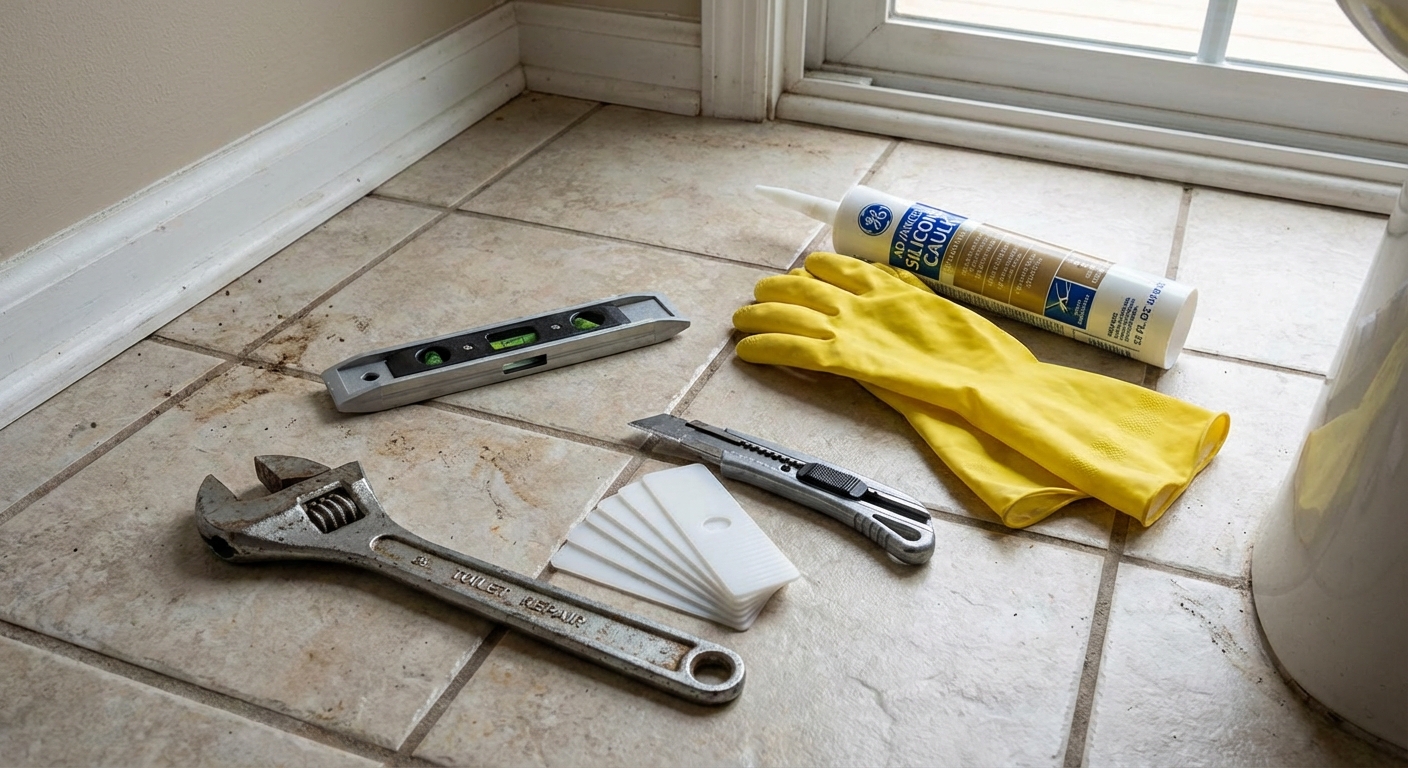
- Adjustable wrench or deep socket (usually 1/2 in)
- Small level (or a straight scrap of wood as a reference)
- Plastic toilet shims (preferred) or composite shims
- Utility knife
- Rags and a small bucket
- Optional: wet/dry shop vac (great for pulling the last water from the bowl and tank)
- Optional: new closet bolt kit, wax ring (or wax-free seal), and a flange repair ring
- Optional: 100% silicone (mildew resistant) for caulking the base
- Optional: gloves and eye protection (scraping old wax is messy)
Skip wood shims. They can absorb water and turn into a science experiment if a leak ever happens.
Fix #1: Tighten closet bolts
This is where most people go wrong: they crank the nuts down like they are tightening lug nuts. Toilets are porcelain. Porcelain cracks. Tighten slowly and evenly.
Step-by-step
- Pry off the bolt caps at the base on both sides.
- Check for movement at the bowl while you lightly snug one nut, then the other. Alternate sides.
- Tighten until the toilet stops shifting, then give each nut another small turn (think: 1/8 turn, not 1 full turn).
- Do not overtighten. If the nut suddenly gets very tight but the toilet still rocks, the problem is likely an uneven floor, a flange issue, or a compressed wax ring.
- Recheck for rocking and stop if stable.
If the bolt spins
If the nut just spins without tightening, the bolt may not be captured in the flange slot anymore. You might need to pull the toilet and replace the bolts, or repair the flange if the slot is broken.
Fix #2: Shim the base
If tightening helps but you still feel a tiny rock, shimming is the “do it once and forget it” solution. The goal is full support under the base, not wedging it up like a chair leg.
Step-by-step
- Identify the low side. Rock the toilet and note which edge lifts.
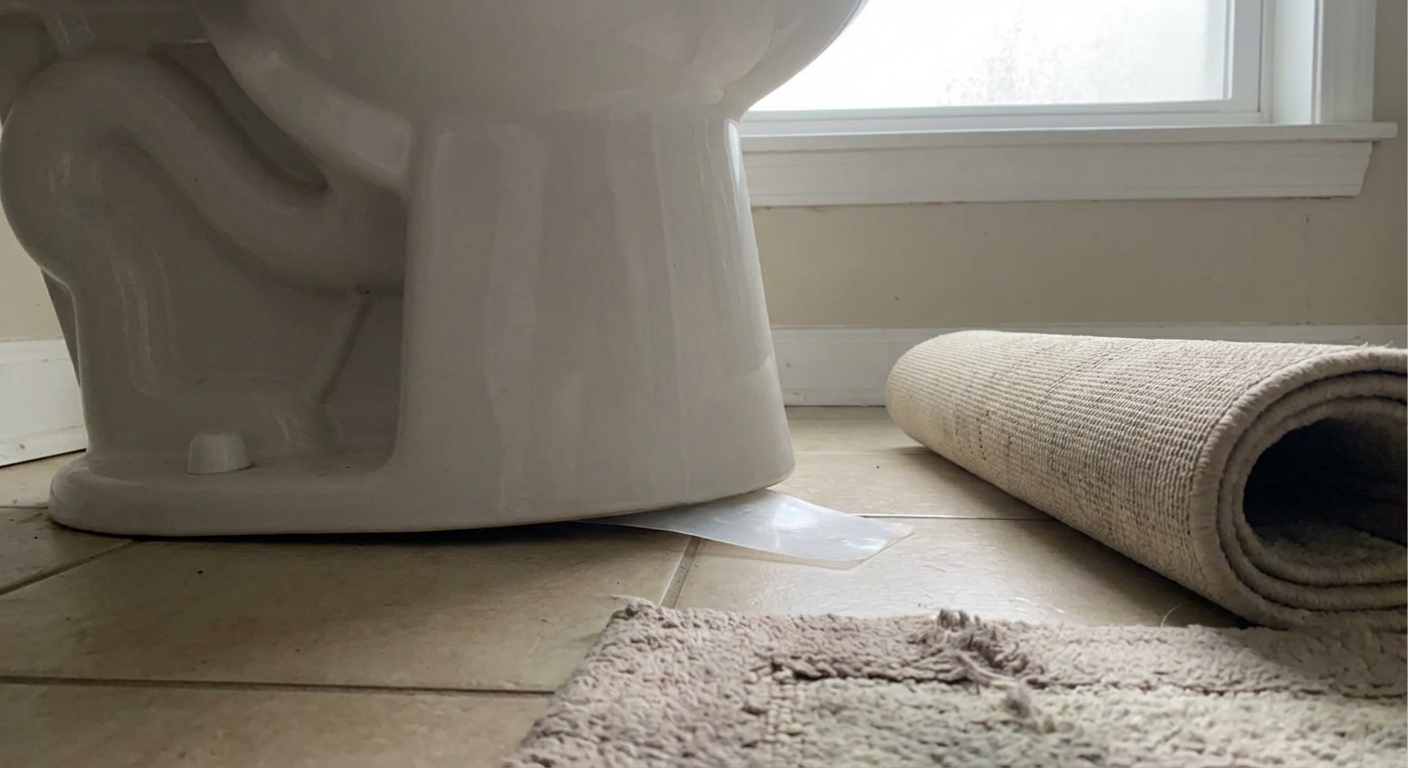
- Slide in a plastic shim on the lifting side, as close to the rocking point as possible. Keep shims at solid contact points, and if you can, tuck them where they are less visible (usually the side or back rather than the very front).
- Add a second shim if needed on the same side or the opposite side to remove any remaining movement.
- Snug the closet bolts again (alternate sides, small turns).
- Trim excess shim flush with the base using a utility knife.
How many shims is too many? A couple is normal. If you need a stack or you have a big visible gap, treat that as a clue. You may be dealing with a low flange, a damaged flange, or a floor/subfloor problem that needs a real fix.
Should you caulk after shimming?
In most bathrooms, yes. A thin bead of silicone makes it look finished and helps keep mop water from getting under the base. My rule is this:
- Leave a small gap at the back (an inch or two) so if the wax ring ever fails, you will see water instead of trapping it under the toilet.
- Do not use caulk to “glue” a wobbly toilet still in motion. Stabilize first, caulk second.
- Check local expectations if you are dealing with an inspection, HOA rules, or a strict building code interpretation. Some inspectors prefer (or require) full caulk coverage for sanitation, even though it can hide leaks.
When bolts and shims fail
If you cannot get the toilet stable with snug bolts and shims, stop and plan on pulling the toilet. Usually one of these is happening:
- The wax ring is crushed or leaking.
- The flange is cracked, loose, or too low.
- The subfloor around the flange is damaged and flexing.
At this point, you are not “overthinking it”. You are preventing the expensive version of this problem.
Fix #3: Replace the wax ring

If there is any leaking at the base after flushing, or the toilet rocks badly even with snug bolts, replacing the seal is the smart move.
Steps
- Shut off the water at the stop valve behind the toilet.
- Flush and hold the handle down to drain the tank. Sponge out remaining water from the tank and bowl into a bucket. Pro tip: a wet/dry shop vac makes this fast and much less messy.
- Disconnect the supply line from the bottom of the fill valve (have a towel ready).
- Remove bolt caps and nuts at the base.
- Break the seal by rocking the toilet gently, then lift straight up. Set it on an old towel or a piece of cardboard. Toilets are heavier and more awkward than they look, so lift with your legs and get help if you need it.
- Scrape off old wax from the toilet horn and the flange using a plastic scraper or a putty knife. Dispose of wax in the trash.
- Inspect the flange (cracks, looseness, height). Fix flange issues before setting the toilet back down.
- Install new closet bolts if the old ones are corroded or loose in the slots.
- Install the new seal. Wax ring goes on the toilet outlet or on the flange depending on the product directions. For beginners, wax-free seals can be more forgiving, but a standard wax ring works great when the flange height is correct.
- Reset the toilet. Line up bolts, lower straight down, and press firmly to compress the ring. Do not twist aggressively once it contacts the wax.
- Tighten nuts evenly until snug and stable. Add shims if the floor is uneven.
- Reconnect water, turn on the valve, and do several test flushes while checking for moisture.
Wax ring sizing tips
- Standard wax ring: Works when the flange sits on top of (or slightly above) the finished floor.
- Extra-thick wax ring or wax ring with horn: Helpful when the flange is slightly low. (If the flange is very low, fix the flange height instead of stacking wax.)
- Stacking two wax rings: Sometimes used in the field, but it is a last resort. It can work, but it is not my first choice for a long-term fix.
Fix #4: Repair the flange
The flange is the foundation for everything here. If it is damaged, your toilet can rock no matter how tight the bolts are.
Signs the flange is the issue
- The closet bolts will not stay upright or slide around.
- The flange slots are cracked or missing pieces.
- The flange moves when you push on it.
- The flange sits noticeably below the finished floor (common after tile or LVP over an old floor).
Option A: Repair ring
A stainless steel repair ring (sometimes called a flange saver) screws into the subfloor and provides new bolt slots.
- Remove the toilet and clean the area.
- Fit the repair ring over the existing flange and align it.
- Pre-drill holes if needed, then screw it down into solid subfloor.
- Install new closet bolts in the repair ring slots.
Option B: Flange extender
If the flange is below the finished floor, use a flange extender kit to bring the sealing surface up. This is a more reliable fix than relying on extra-thick wax alone.
- Dry fit extenders to reach close to finished floor height.
- Use the gasket or sealant recommended by the kit.
- Screw the extender down evenly.
- Reset toilet with a standard wax ring or the seal recommended for the extender.
Option C: Replace the flange
If the subfloor is damaged or the flange is severely broken, replacement may be required. This can range from “not bad” to “call a plumber” depending on pipe type and access.
- Call a pro if you have cast iron, you see major subfloor rot, or the drain piping moves when you touch it.
- DIY is possible with PVC and good access, but take your time and follow the flange manufacturer's instructions exactly.
Common mistakes
- Cranking down bolts to stop wobble. This can crack the base or tank and still not fix the root cause.
- Skipping shims. An uneven floor will win every time.
- Caulking a toilet that still moves. The movement continues underneath and the seal fails again.
- Reusing an old wax ring. Once it is compressed, it is done.
- Ignoring soft flooring. If the floor feels spongy around the toilet, stability fixes are temporary until the subfloor is repaired.
- Forgetting the finishing steps. After the toilet is stable, trim excess bolt length if needed (carefully), then reinstall caps for a clean look.
When to call a pro
I am all for sweat equity, but there are a few red flags worth respecting:
- Water damage or a soft subfloor around the toilet
- Visible mold or persistent sewage smell
- Cracked porcelain anywhere on the toilet
- Cast iron drain issues or a flange that cannot be anchored to solid wood
In those cases, a plumber or a bathroom remodel pro can save you from turning a small wobble into a structural repair.
Quick FAQ
Is it normal for a toilet to rock a little?
No. A properly installed toilet should feel solid. Even slight movement can break the seal over time.
Can I just tighten the bolts and ignore it?
If the floor stays dry through flush tests and the toilet becomes stable with gentle tightening, you are probably fine. If it loosens again within days or weeks, plan on pulling it and checking the flange and wax ring.
Should I use grout around the base instead of caulk?
Some installers grout toilets on tile floors. It can look clean, but it can also hide leaks. For most homeowners, a silicone bead with a small gap at the back is the safer choice, unless local inspection norms require full caulk.
What if the rocking is coming from the tank, not the base?
That is a different fix. Tank-to-bowl bolts and the tank gasket may need tightening or replacement. Do not overtighten those either, porcelain is unforgiving.
Simple rule
Bolt it, shim it, seal it. Bolts hold it down, shims remove the rock, and the wax ring seals the drain. If any one of those pieces is compromised, the toilet will eventually move or leak.
If you want the fastest path: snug the bolts, shim until it is dead solid, then consider a neat silicone bead (leave that small gap at the back). If you see moisture after flushing, pull it and replace the wax ring while you are in there.
About Marcus Vance
Content Creator @ Grit & Home
Marcus Vance is a lifelong DIY enthusiast and self-taught home renovator who has spent the last decade transforming a dilapidated 1970s ranch into his family's dream home. He specializes in budget-friendly carpentry, room-by-room renovations, and demystifying power tools for beginners. Through his writing, Marcus shares practical tutorials and hard-learned lessons to help homeowners tackle their own projects with confidence.