A toilet that won't flush all the way is one of those problems that feels dramatic, even when the fix is simple. You push the handle, the bowl sort of swirls, and then everything just… gives up. The good news is a weak flush usually comes down to not enough water moving fast enough, or water not getting where it needs to go.
I've wrestled with this exact issue more than once in my old 1970s ranch. The first time I assumed I needed a new toilet. Turns out the flapper was closing too soon and the rim jets were crusted up. Thirty minutes later the flush was back to normal and my wallet stayed closed.
Below is a practical, no-jargon checklist. Start at the top and stop when your flush is strong again.
What a “weak flush” usually means
Most weak flush symptoms fall into one of these buckets:
- Low tank water: not enough water volume to create a strong siphon.
- Flapper closes too soon: water stops dumping mid-flush.
- Rim jets or siphon jet are clogged: water enters the bowl weakly or unevenly.
- Partial clog in the trapway: the bowl fills and drains slowly, or takes two flushes.
- Vent stack issue: the toilet struggles to siphon, often with gurgling in nearby drains.
Safety note: You're working with clean water from the tank for most of this. Still, wear gloves if you're cleaning jets or plunging, and keep cleaners away from kids and pets.
Tools and supplies
- Small cup or measuring cup (for bailing tank water if needed)
- Rubber gloves
- Old toothbrush or small nylon brush
- Paper clip or zip tie (for poking rim holes)
- White vinegar (great for mineral buildup)
- Toilet plunger (the kind with a flange)
- Optional: adjustable wrench (only if you end up removing the fill valve cap)
- Optional: towels (for splash protection)
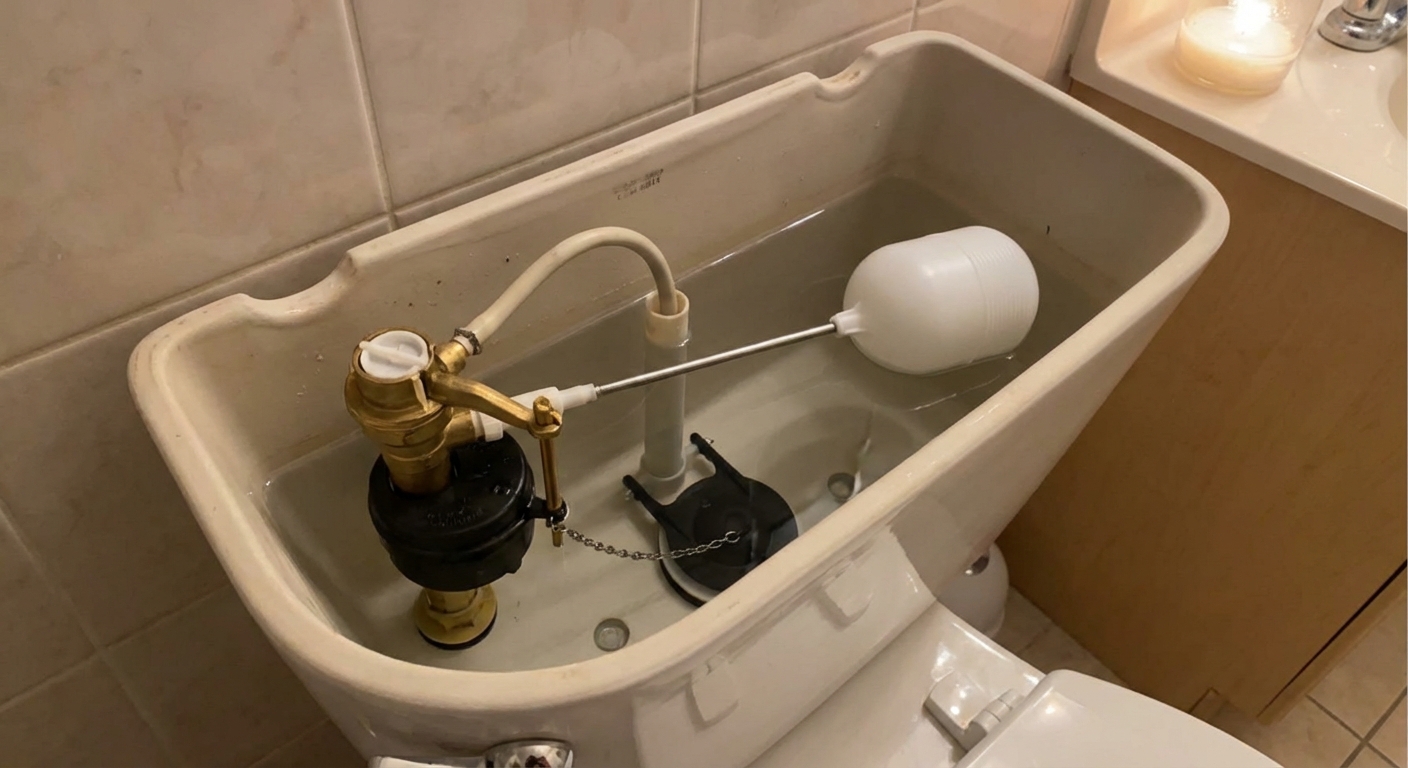
Step 1: Check the tank water level
If the tank isn't filling high enough, you don't get enough “dump” to start a strong siphon. Pop the lid and look inside. Typically, toilets flush best when the water line sits about 1/2 to 1 inch below the top of the overflow tube (that vertical tube in the middle), but the easiest guide is the one your toilet gives you.
Pro tip: Many tanks have a fill line stamped or printed on the porcelain (or on the flush valve/overflow tube) to show the proper water level. If you see a mark, follow that first.
What to do
- If the level is low: adjust the fill valve/float so the tank fills higher.
- If the level is fine: move to Step 2.
How to adjust common fill valves
- Float cup (modern style): There's usually a screw or a pinch clip on the side of the fill valve. Turn the screw or slide the clip to raise the float, which raises the shutoff level.
- Float ball (older style): Gently bend the metal rod upward a tiny amount, or use the adjustment screw if yours has one.
Also check for slow refill
If your tank refills really slowly (or never quite seems to reach the right line), make sure the shutoff valve is fully open. Also look for a kinked supply line, or sediment in the fill valve. Some fill valves have a small screen that can clog over time, especially after water work on the street.
Quick test: After adjusting, flush once and watch the refill. Confirm the water stops at the new level and doesn't run into the overflow tube.
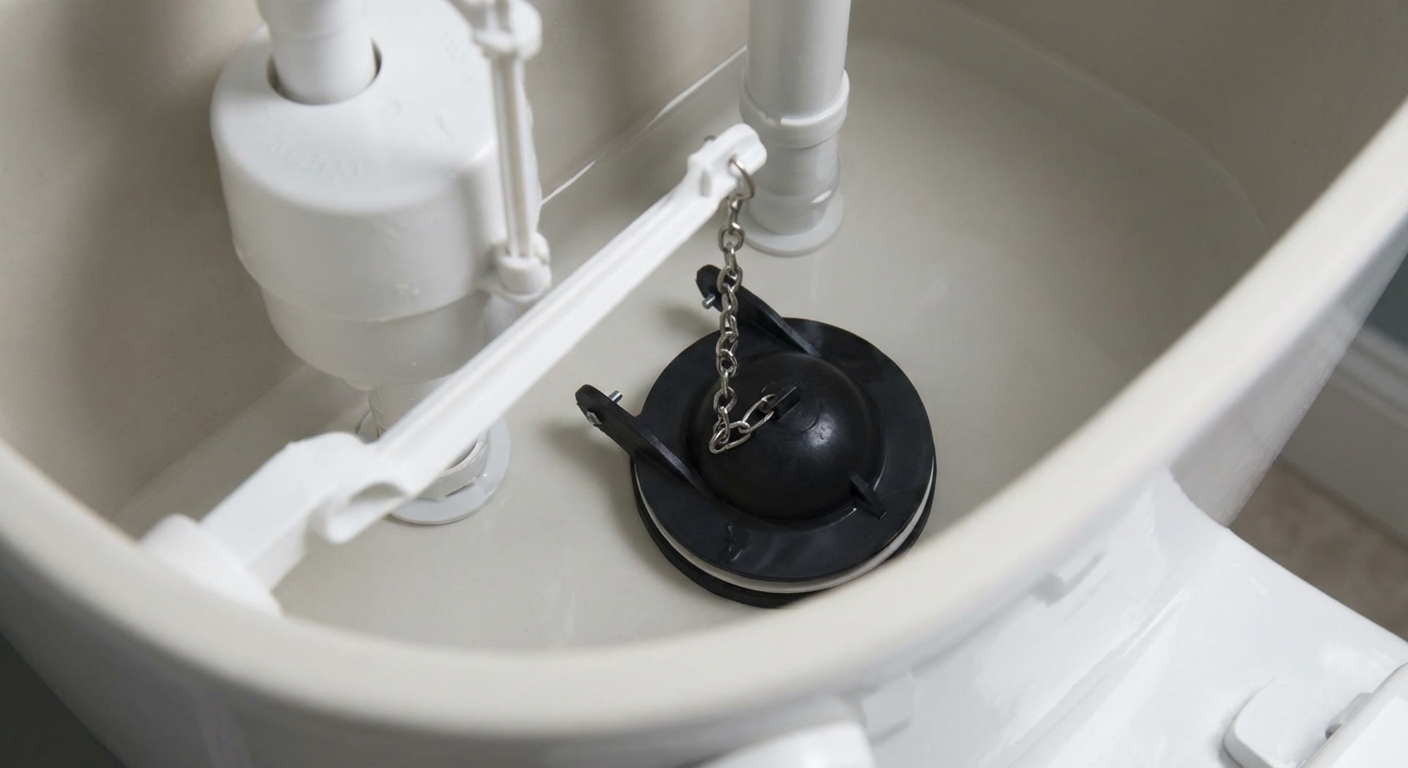
Step 2: Make sure the flapper stays open
When you flush, the flapper should lift and stay open long enough for most of the tank to empty quickly. If it drops too soon, you get a half-hearted flush.
Signs this is your problem
- The flush starts strong then abruptly stops.
- Holding the handle down makes the flush much better.
- The chain looks too tight or too slack.
Quick checks (before buying parts)
- Make sure the handle has normal tension and isn't loose.
- Check that the lift arm isn't hitting the tank lid.
- Watch the chain during a flush. It shouldn't catch on the float or rub the overflow tube.
Fix: adjust the chain
- Turn off the water at the shutoff valve if you want to work dry, but it's not required.
- Look at the chain between the flush lever and the flapper.
- Aim for about 1/2 inch of slack when the flapper is closed.
- If the chain is too tight, it can keep the flapper from seating properly (causing a leak) or stop it from hinging and lifting smoothly.
- If the chain is too loose, the flapper may not lift far enough.
Fix: replace a flapper that's waterlogged or warped
If your flapper is swollen, stiff, cracked, or feels heavy (some absorb water over time), it may not float and stay open properly. Flappers are inexpensive and usually tool-free to swap.
- Turn off water at the shutoff.
- Flush and hold the handle to drain the tank.
- Unclip the flapper ears from the overflow tube pegs.
- Match the old flapper at the store. Size matters (many are 2 inch, some are 3 inch), and some toilets prefer brand-specific shapes.
- Install the new one and reattach the chain.
Note: canister and dual-flush toilets
If you don't have a rubber flapper (some newer toilets use a canister-style seal, and many dual-flush toilets do too), the same idea still applies. If the seal is dropping too quickly or not lifting fully, check the linkage and replace the seal if it's worn.
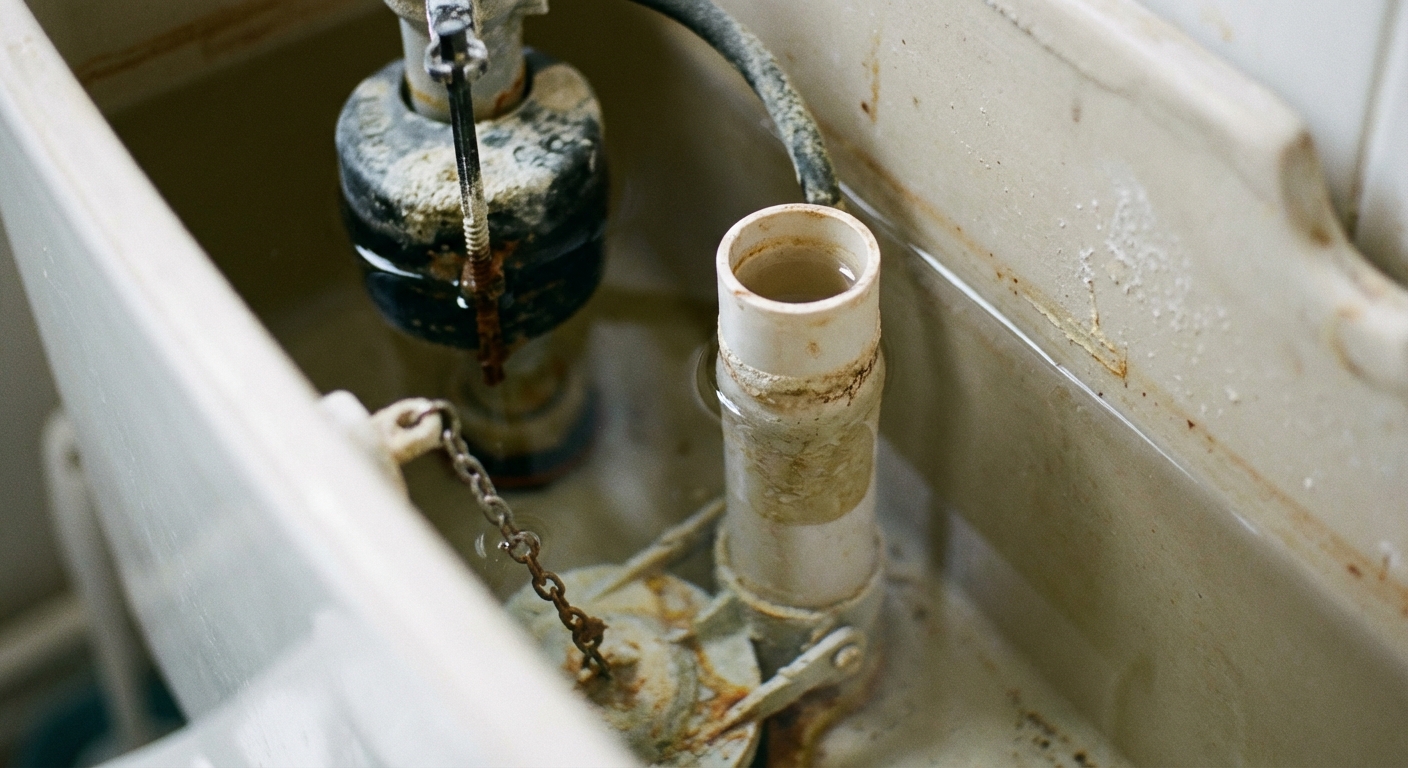
Step 3: Check the refill tube
This one is sneaky. That little refill tube from the fill valve should shoot water into the overflow tube during refill. That water restores the bowl to its normal standing water level after a flush.
If your bowl water ends up low after each flush, the next flush can feel weaker on many toilets because the siphon has less “starting point.” The bigger red flag is simply this: a low bowl level often means the bowl isn't being refilled correctly, so you're not getting consistent performance flush to flush.
What to look for
- The small tube is dangling loose, spraying inside the tank.
- The clip that holds it to the overflow tube is missing.
Fix
- Clip the refill tube so it points into the overflow tube.
- Don't shove it far down into the overflow tube. It should discharge above the water line to prevent back-siphoning.
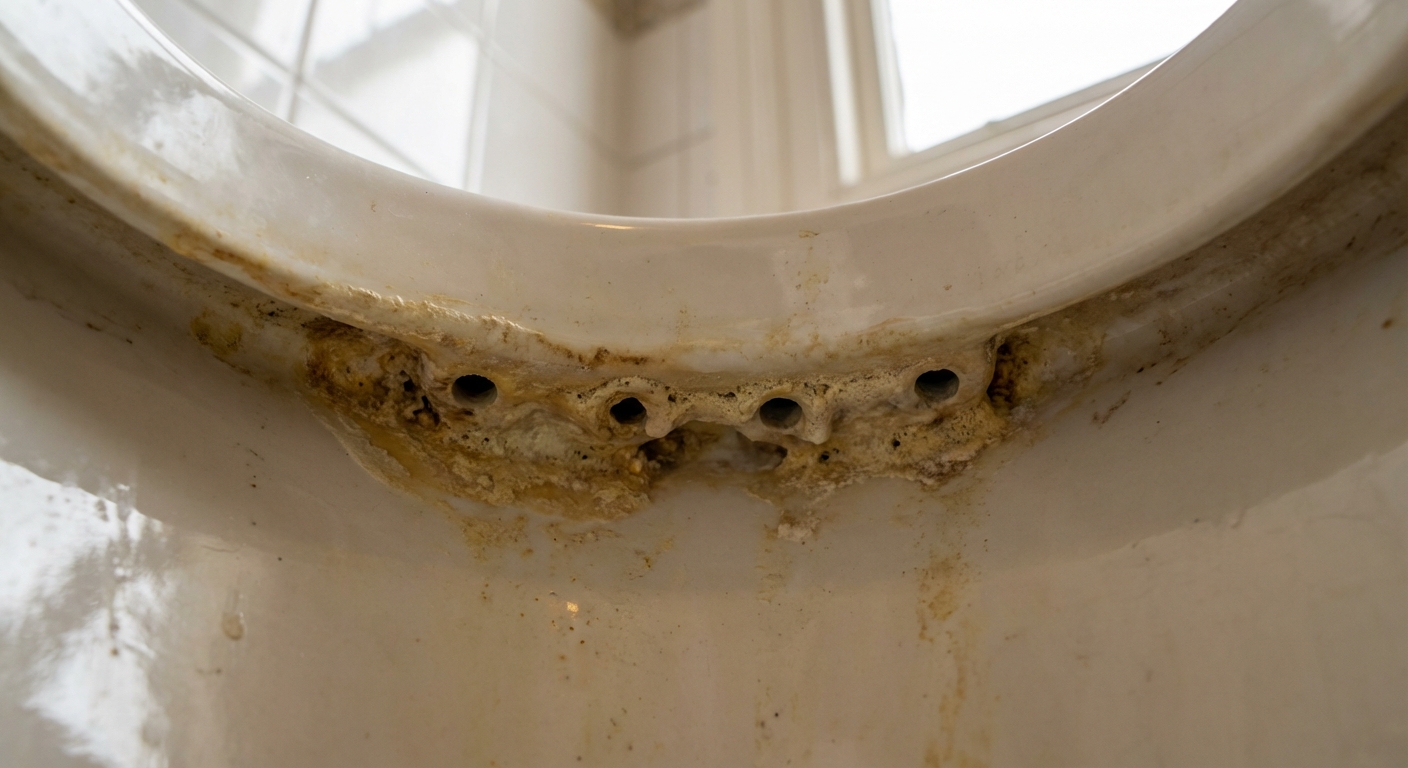
Step 4: Clean rim jets (and the siphon jet)
Under the rim are small holes called rim jets. They send water around the bowl to start the swirl and push waste toward the trap. Mineral buildup can choke those holes, especially if you've got hard water. Many toilets also have a siphon jet (a larger opening near the bottom of the bowl) that adds a strong push to start the siphon. If that jet is crusted up, flush power drops fast.
Easy cleaning method
Turn off the water at the shutoff valve.
Flush to lower the water in the tank and bowl.
Optional pro tip (works shockingly well): From inside the bowl, place small pieces of duct tape over the rim jet holes (just the ones you can reach). This helps hold vinegar in the rim channel so it actually soaks instead of immediately running into the bowl.
Pour vinegar into the overflow tube in the tank (about 2 cups). Let it sit 30 to 60 minutes. For heavy scale, a longer soak (even overnight) can help, and you may need a second round.
Scrub the rim jets from below with a toothbrush or small nylon brush.
Open stubborn holes carefully with a straightened paper clip or zip tie. You're loosening mineral crust, not gouging porcelain.
Clean the siphon jet (if your bowl has one). Look for a larger jet opening near the bottom of the bowl. Scrub mineral buildup with the brush and a little vinegar. Avoid metal tools that can damage the glaze.
Turn the water back on and flush 2 to 3 times to rinse. (If you taped the jets, remove the tape first.)
My mistake to help you avoid one: I once used a metal pick a little too aggressively and scratched the glaze under the rim. It still worked, but it made that spot more likely to collect gunk later. Use something softer when you can.
Step 5: Check for a partial clog
If the tank dumps normally but the bowl rises high, drains slowly, or needs two flushes, you likely have a partial obstruction in the trapway. This is common with “flushable” wipes, too much paper, or a small object that made it past the bowl but got hung up.
Start with the right plunge technique
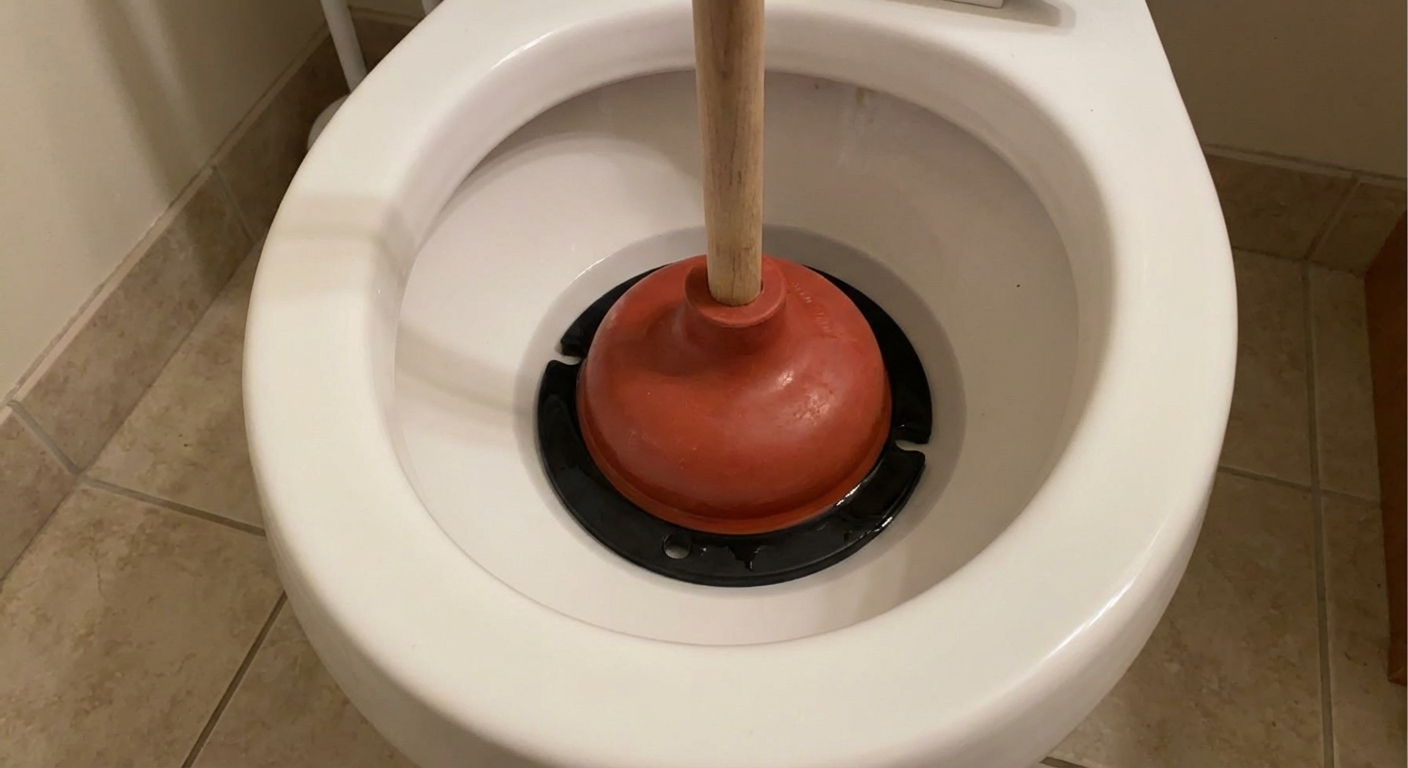
- Put towels down if you're worried about splash.
- If the bowl is near overflowing, don't flush again. Plunge first.
- Use a flange plunger (the one with an extra rubber sleeve). A flat sink plunger rarely seals well enough.
- Make sure there's enough water in the bowl to cover the plunger cup.
- Start with a gentle push to burp air, then pump firmly 10 to 15 times while maintaining the seal.
- Let the bowl settle, then flush once.
If plunging helps but doesn't fully fix it
That's a clue you're close. Plunge again, and be mindful of what caused it. If your household uses wipes, even the ones labeled flushable, that's often the culprit.
If you keep getting partial clogs, a toilet auger is the next step. It's still a simple homeowner tool, but since this guide is focused on “no special tools,” treat that as your escalation option.
Step 6: Rule out vent issues
Plumbing vents let air into the drain system so the toilet can siphon properly. If the vent is blocked, the toilet may struggle to pull a strong siphon. You'll often notice this along with other symptoms.
Clues of a vent problem
- Weak flush plus gurgling in the toilet or nearby sink/shower drain.
- The toilet flush changes depending on weather. This can happen with a partially blocked vent, but it's not a sure diagnosis by itself.
- Multiple fixtures in the same bathroom drain slowly.
What you can do from the bathroom
- Check whether the issue is isolated to one toilet or affects a whole bathroom group.
- Listen for gurgling when you flush and when other fixtures drain.
- If you suspect a vent blockage, it's often safer to call a plumber, especially if roof access is sketchy or you're not comfortable working at height.
Quick weak-flush checklist
- Tank level: typically 1/2 to 1 inch below overflow tube top, or at the stamped fill line.
- Handle and chain: nothing snagging, about 1/2 inch slack.
- Flapper or seal: lifts fully and stays up long enough. Correct size/type.
- Refill tube: clipped into overflow tube, not dangling.
- Rim jets and siphon jet: vinegar soak and brush.
- Partial clog: plunge with a flange plunger.
- Vent clues: gurgling, multiple slow drains, inconsistent siphon.
When to call a pro
I'm all for sweat equity, but here are the moments when I personally tap out:
- You've tried the tank-level, flapper, and jet cleaning steps and the toilet still barely moves waste.
- Plunging does nothing and the toilet threatens to overflow.
- You suspect a vent blockage and roof work isn't safe for you.
- Multiple toilets or drains are backing up. That can indicate a main line issue.
A good plumber can diagnose venting and drain line restrictions quickly. Sometimes paying for one visit saves you from replacing parts that weren't the problem.
Also worth saying: a few older low-flow toilet models are just weak performers. If yours has always been underwhelming (even when everything is clean and adjusted), replacement can be the long-term fix.
FAQ
Why does my toilet flush better when I hold the handle down?
That almost always points to the flapper or seal dropping too soon, or the chain/linkage not lifting it fully. Adjust the chain slack first, then consider replacing the flapper or seal if it's old or waterlogged.
Can low bowl water cause a weak flush?
It can. A low standing bowl level often means the refill tube isn't restoring the bowl properly after each flush. Fixing that gives you more consistent siphon performance and keeps the trap seal where it should be.
Will cleaning rim jets really help?
If you've got hard water, absolutely. Clogged rim jets reduce the swirl and momentum that help kick off the siphon. Vinegar and a brush are often enough to bring a toilet back to life, but tough scale may take repeated soaks.
Should I use chemical drain cleaner in a weak-flushing toilet?
I avoid it. The best reason is safety: if you end up plunging or augering afterward, chemical splash is a real hazard. Some products can also be harsh on certain pipes and fixtures. Start with mechanical fixes like plunging and cleaning jets.
About Marcus Vance
Content Creator @ Grit & Home
Marcus Vance is a lifelong DIY enthusiast and self-taught home renovator who has spent the last decade transforming a dilapidated 1970s ranch into his family's dream home. He specializes in budget-friendly carpentry, room-by-room renovations, and demystifying power tools for beginners. Through his writing, Marcus shares practical tutorials and hard-learned lessons to help homeowners tackle their own projects with confidence.