When an under-sink reverse osmosis (RO) faucet suddenly slows to a sad trickle or stops completely, it usually comes down to a handful of predictable issues. The trick is checking them in the right order so you do not waste money swapping parts that are still fine.
I have been there, crouched in a cramped sink cabinet, convinced I “broke the whole system” because the faucet went dry after a filter change. Most of the time, it is a valve, tank pressure, a clogged filter, a drain-side restriction, or an automatic shutoff doing something unhelpful.
Before you start
- Clear the cabinet and put down a towel. RO systems love to drip at the worst time.
- Have a bowl for catching water and a flashlight.
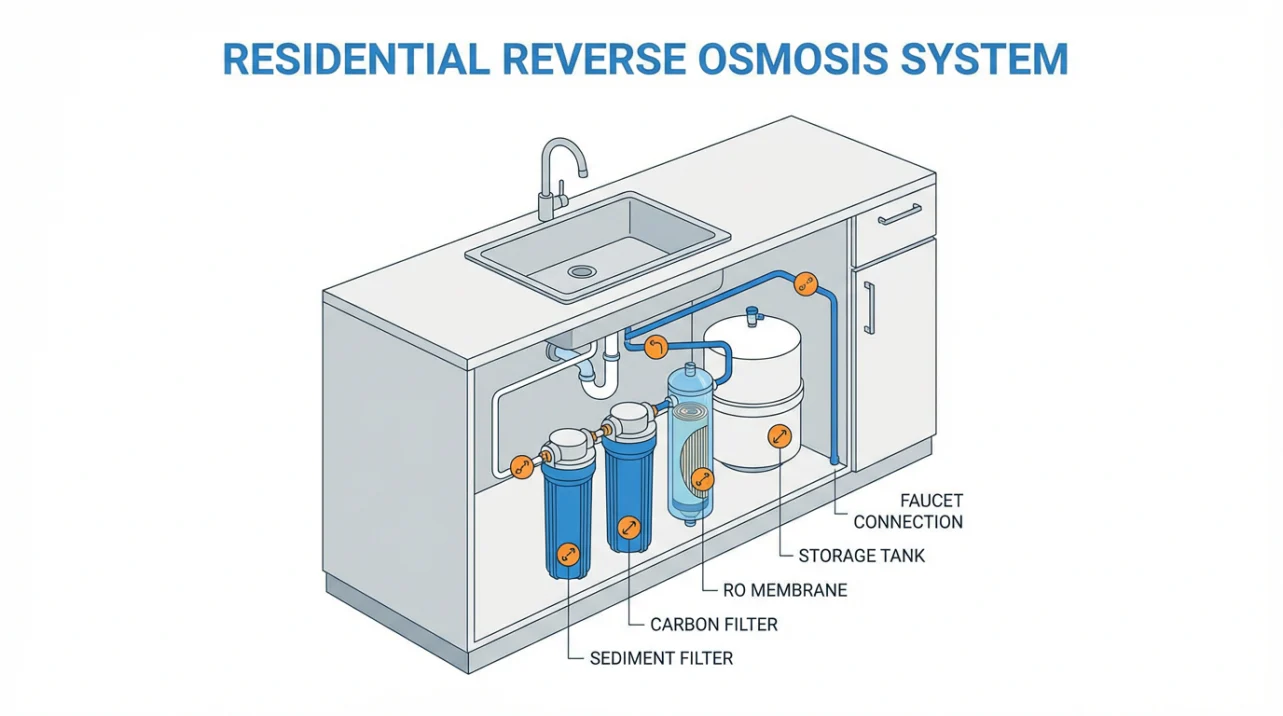
- Know your pieces: feed water valve (cold line), prefilters, RO membrane housing, storage tank, auto shutoff valve (ASO), check valve (often at the membrane outlet), drain line and air gap (if you have one), and the RO faucet.
- If you see active leaking, shut off the feed valve immediately.
Tools that help: tire pressure gauge (0 to 20 psi is perfect), bicycle pump, adjustable wrench, and filter wrench (if your housings are tight).
Start here: no water or slow
Two common symptoms
- No water at the RO faucet: often a closed valve, empty tank, tripped leak shutoff, a stuck ASO, or a hard clog in the feed or drain.
- Very slow flow: often low tank pressure, partially clogged prefilters, a fouled membrane, a clogged faucet tip screen, or low household water pressure.
Either way, work through the steps below in order. The early checks are fast and free.
Step 1: Valves and tubing
A. Feed water valve
Make sure the RO feed valve is fully open. If it is a small quarter-turn valve, the handle should be parallel with the tubing line when open.
B. Tank valve
The storage tank has its own valve on top. If it is closed, you will get little to no water even if the system is making it.
C. Kinked tubing
Look for tubing caught behind the tank or smashed by stored cleaners. One tight bend can cut flow dramatically.
D. If you just changed filters
If the problem started right after maintenance, suspect a simple installation issue:
- Filter cartridges not fully seated.
- O-rings twisted, missing, dry, or pinched.
- Housings cross-threaded and not sealing.
- Push-to-connect fittings not fully inserted.
Quick caution: If you disconnect any tubing, put a towel and bowl down first. There is almost always residual water in the lines.
Step 2: Tank checks
An RO faucet is usually fed by the storage tank. If the tank is under-pressurized, waterlogged, or empty, your faucet will act dead or painfully slow.
A. The quick lift test
- Close the tank valve.
- Lift the tank carefully in place (or slide it forward a bit).
- Heavy: it likely has water in it.
- Very light: it is probably empty, meaning the system is not producing water or cannot fill.
B. Tank air pressure (common slow-flow fix)
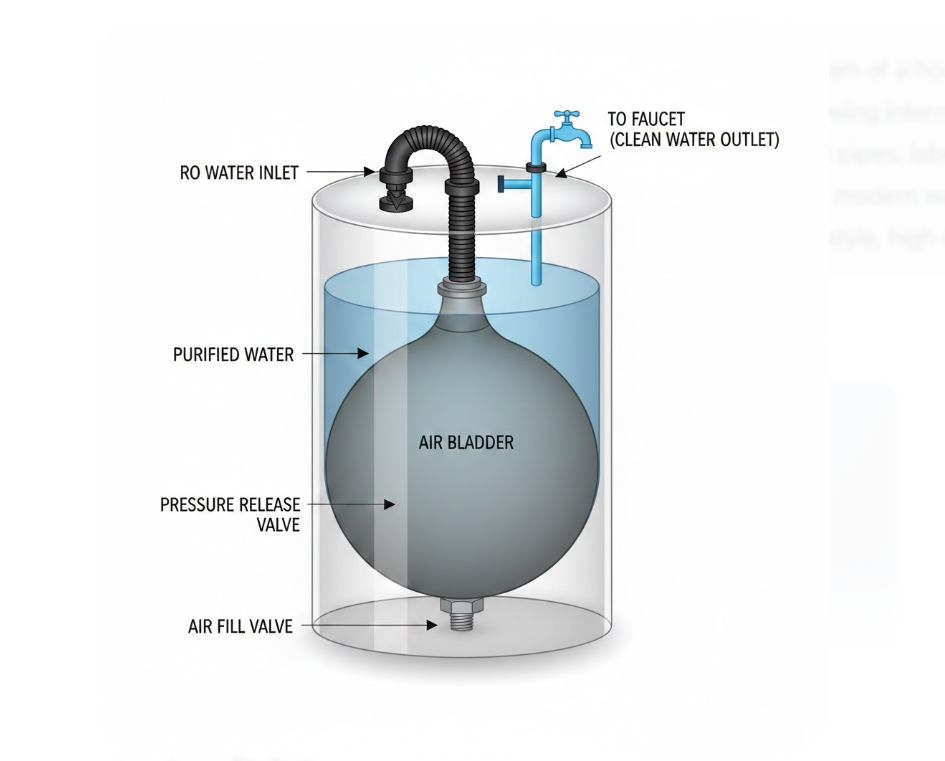
RO tanks have an air bladder and a Schrader valve like a bike tire. Low air pressure means weak faucet flow.
- Shut off the feed water to the RO system.
- Open the RO faucet and keep it open.
- Open the tank valve (if it is not already). Let water run until it stops completely. This step empties the tank.
- Once flow stops, leave the faucet open for another 30 to 60 seconds to fully depressurize.
- Check the air pressure at the tank Schrader valve.
Typical target: many tanks want roughly 5 to 8 psi when the tank is empty. Check the tank label or your manual for your exact spec.
- If pressure is low, add air with a bicycle pump in small bursts, then re-check.
- If water comes out of the air valve, the bladder is likely ruptured and the tank usually needs replacement.
C. Full tank but weak faucet
If the tank is full (heavy) and your tank precharge is in spec, but faucet flow is still weak, suspect a restriction after the tank. The two usual culprits are the postfilter and the faucet tip screen (see Step 6 and Step 7).
Step 3: Drain and air gap
This one surprises people. An RO system needs a clear path to the drain for the concentrate (waste) water. If the drain line or air gap is restricted, it raises backpressure at the membrane, which reduces purified water production. The result is often an empty tank and a slow or dead faucet.
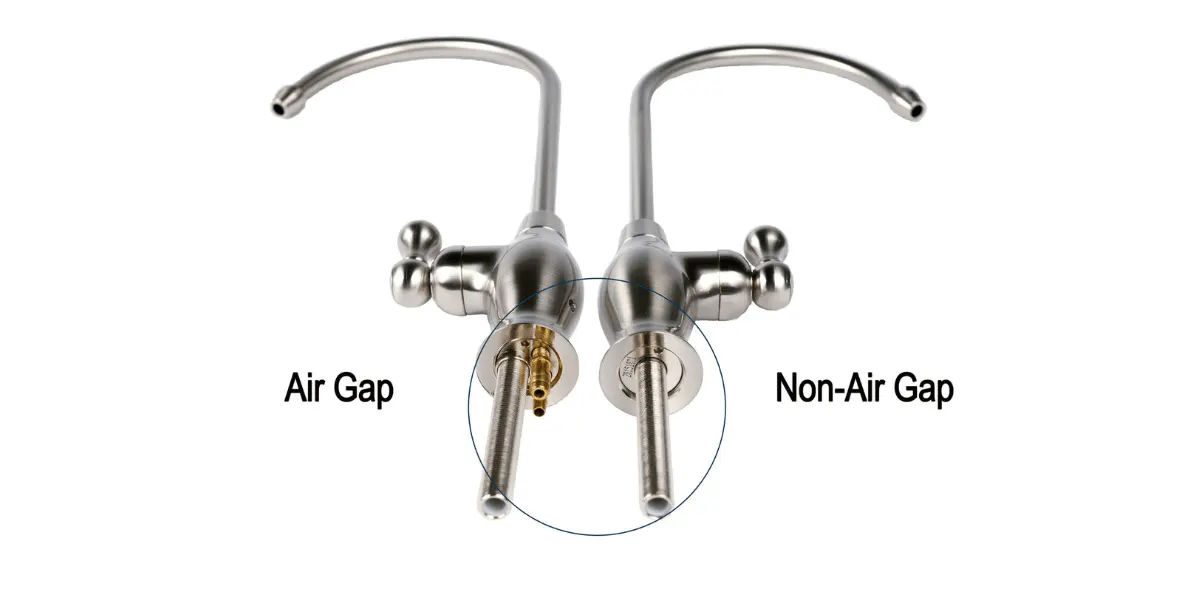
A. If you have an air gap
Many RO faucets include an air gap, and you will see two drain-related tubes under the sink. When an air gap clogs, you may also hear gurgling or see water spit from the air gap opening.
- Check the larger drain tube for kinks or a sagging loop where water can sit.
- Inspect the air gap body under the faucet for buildup.
- Clean the air gap parts if accessible, and flush the drain tube.
B. Drain saddle alignment
The drain saddle clamp must align with the hole drilled in the drain pipe. If it shifts, it can choke off drain flow and hurt production.
- Look at the saddle position on the drain pipe.
- If you can, confirm the drilled hole is not partially covered by the saddle gasket.
Step 4: Feed restriction
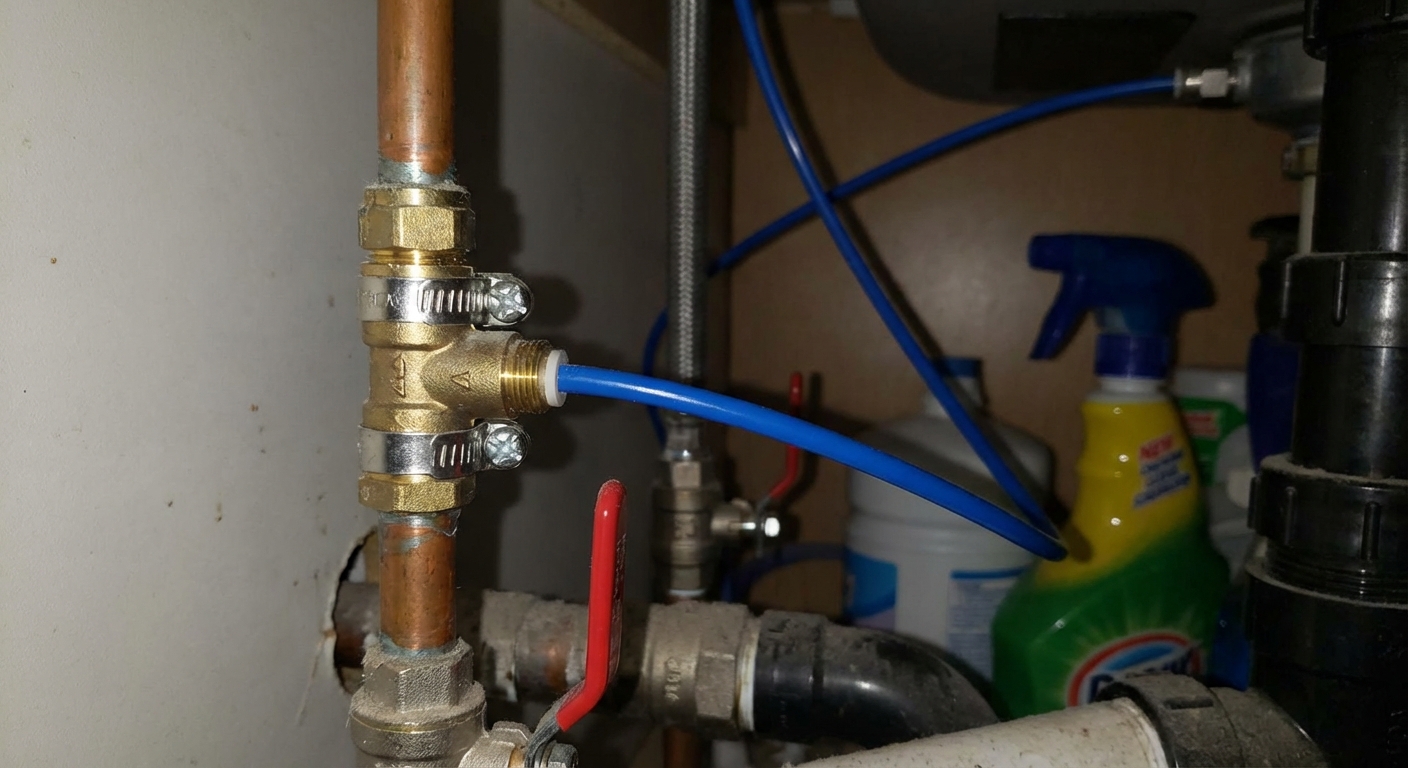
Some older installs use a piercing saddle valve on the cold water line. They are cheap and common, and they also clog and fail more than anyone wants to admit.
A. Signs of a failing saddle valve
- RO production slows over weeks or months.
- You get decent flow for a second, then it fades.
- Turning the valve does not change anything.
B. What to do
- Confirm it is fully open.
- If it is a piercing type, it may be partially blocked with mineral buildup.
- Long-term fix: replace with a proper angle stop adapter or a dedicated tee off the cold line. It is more reliable and less leak-prone.
If you are not comfortable modifying supply plumbing, this is a good point to call a plumber. It is a small job, but it is still on the pressurized side of your system.
Step 5: Leak shutoffs
Many modern RO kits include a leak detector puck or a leak-sensing shutoff valve. If it gets wet, it can shut off water to prevent a flood. Great idea, until a small drip or a wet sponge triggers it and you forget it exists.
A. What to check
- Is the leak sensor sitting in a damp spot?
- Are the batteries dead or corroded?
- Does the shutoff valve have a manual reset button or lever?
B. Fix
- Dry the cabinet floor and the sensor completely.
- Replace batteries if needed.
- Reset the shutoff per the manufacturer instructions.
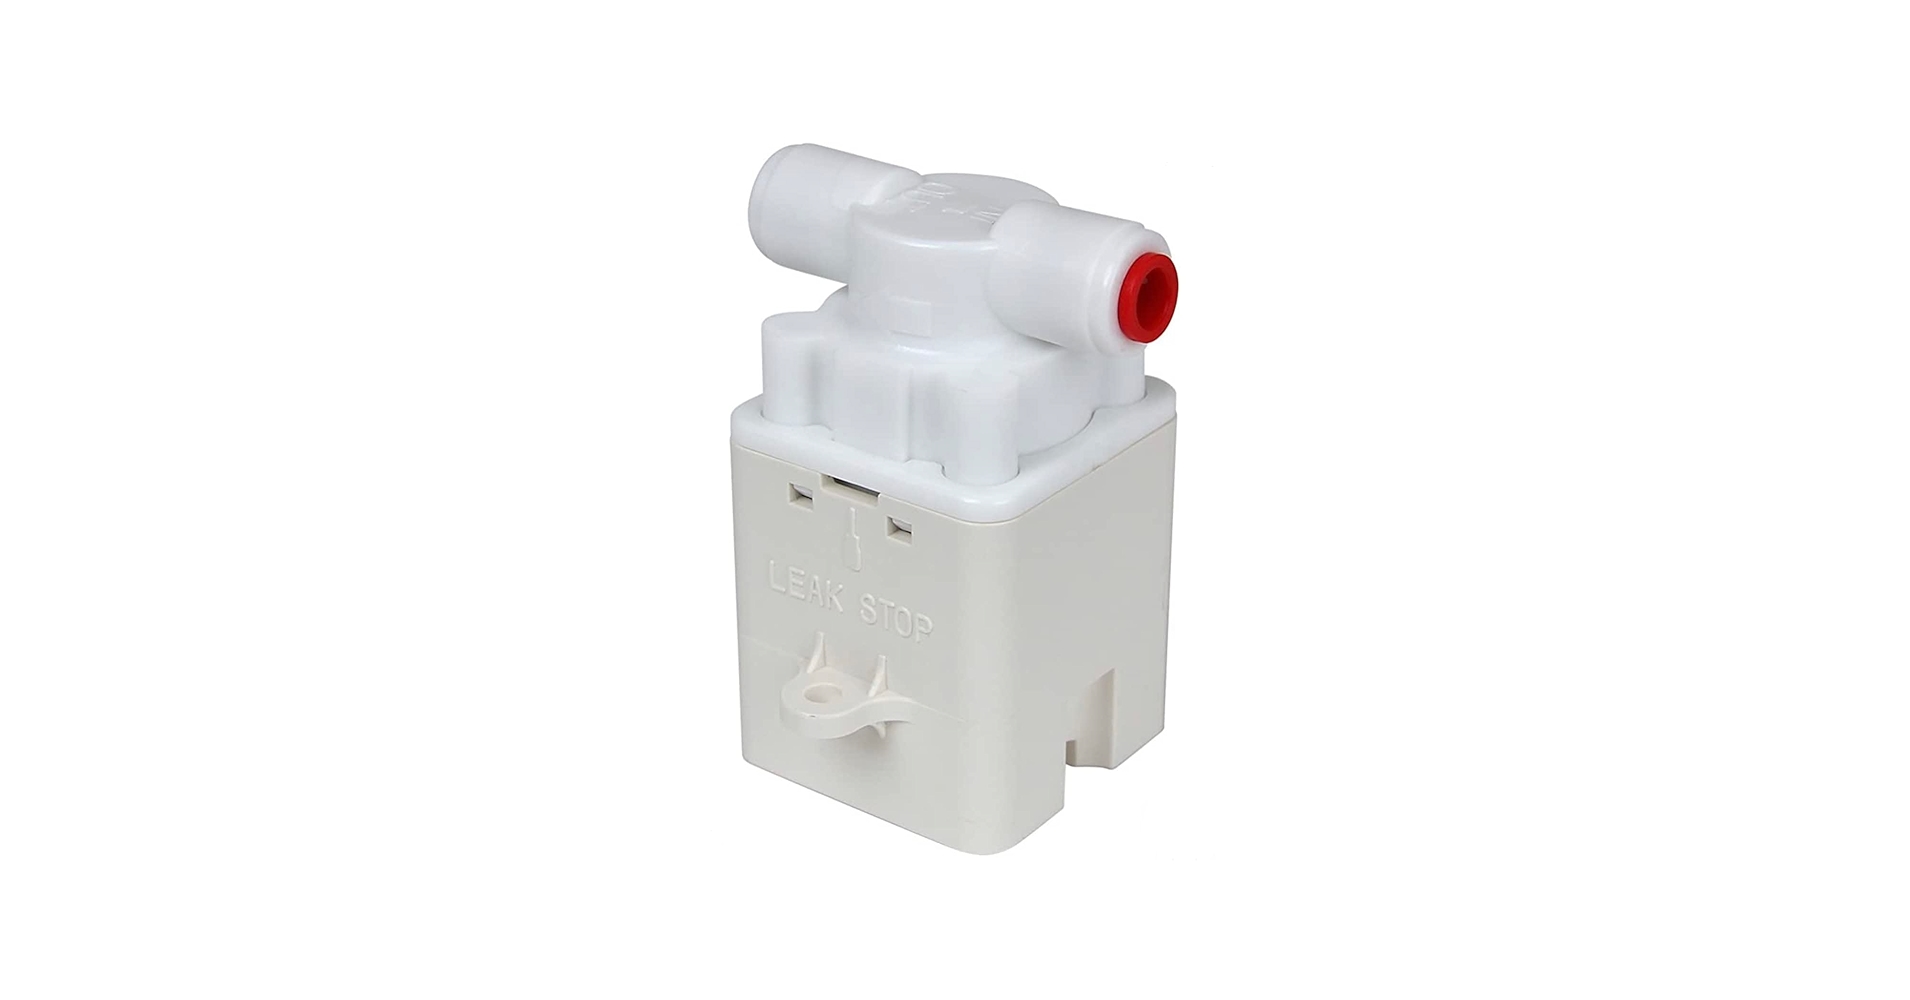
Step 6: ASO and check valve
You will often see a small, blocky auto shutoff valve (ASO) mounted on the manifold or near the filters, with four tubes going in and out. Its job is to stop feed water when the tank is full. When it fails or gets stuck, it can cause two classic headaches: the system never quite fills the tank, or it keeps running and sending water to the drain when it should be off.
A. Simple checks
- Listen at the drain: When the tank is full and you are not using the faucet, the drain should eventually go quiet. If it seems to run constantly for hours, the ASO or check valve is a suspect (or you have a tank that never reaches shutoff pressure because of low feed pressure).
- Look for “stuck after maintenance” behavior: If everything was fine until a filter change, a tube may be swapped, not fully seated, or the ASO may be stuck.
B. What to do
- Double-check tubing routing against your system diagram (easy to mix up similar-colored lines).
- Re-seat push-to-connect fittings at the ASO and the check valve connections (push in firmly).
- If the system constantly drains or will not produce despite good feed pressure and new prefilters, the ASO or check valve may need replacement. These parts are not expensive, but they are easy to misdiagnose, so confirm the basics first.
Note: Many systems have a separate inline flow restrictor on the drain (concentrate) line. If it is missing, clogged, or the wrong size for your membrane, performance can be weird. If you suspect it, match it to your membrane GPD rating.
Step 7: Faucet tip screen
Some RO faucets have a tiny outlet screen or aerator-like insert. It can clog with carbon fines after a filter change and mimic low flow even when the tank is fine.
- If your faucet tip unscrews, remove the screen and rinse it.
- Run a short flush into a bowl, then reinstall.
Step 8: Filters and membrane
If valves are open, the tank is properly pressurized, the drain path is clear, and you still have slow or no flow, the next suspects are clogs in the filter stages.
A. Prefilters
Most RO systems have one sediment prefilter and one or two carbon blocks before the membrane. When these clog, they choke the whole system.
- Common interval: every 6 to 12 months, depending on your water quality and usage.
- If your water is heavy in sediment, you may need to change them sooner.
Budget tip: If you are troubleshooting, prefilters are usually the first parts worth replacing because they are relatively inexpensive and they protect the membrane.
B. RO membrane
A fouled membrane can reduce production so much that the tank never really fills, which looks like slow flow all the time.
- Typical interval: every 2 to 5 years.
- If prefilters were neglected, the membrane often fails sooner.
Clues your membrane is the issue: the system runs a lot, the tank fills very slowly, and performance does not improve after replacing prefilters.
C. Postfilter
Many systems have an inline postfilter after the tank. If it clogs, you can have a full tank but weak faucet flow. If your tank feels heavy and your tank precharge is correct, swapping the postfilter is a smart move.
Step 9: Purge and refill
This is where a lot of “my RO stopped working” stories come from. After replacing filters or the membrane, you need to let the system refill and purge air.
- Turn on the feed water.
- Open the RO faucet for 1 to 2 minutes to push out trapped air, then close it.
- Let the tank fill. This can take a few hours to overnight depending on membrane GPD rating, incoming pressure, and water temperature.
- Most manufacturers recommend dumping the first full tank after a filter or membrane change, then refilling.
Pressure check
RO systems are picky about feed pressure. Many standard under-sink systems perform best around 50 to 80 psi and may struggle when household pressure drops below roughly 40 psi (check your model specs). Low pressure can look like every other problem because the tank just never fills properly.
Cheap-to-expensive checklist
- Confirm feed valve and tank valve are open, and tubing is not kinked.
- Check the tank: weight, then precharge pressure (often 5 to 8 psi) with tank empty per the tank label/manual.
- Check faucet tip screen if your faucet has one.
- Check drain path: air gap and drain saddle alignment.
- Inspect saddle valve and feed restriction issues.
- Check leak detector shutoffs and reset if tripped.
- Check ASO, check valve, and drain flow restrictor issues (especially constant draining or no shutoff).
- Replace prefilters (sediment and carbon).
- Replace postfilter if tank is full but faucet is weak.
- Replace membrane if production remains low after prefilters.
When to call a pro
DIY-friendly troubleshooting can get you far, but I recommend a plumber or RO service tech if:
- You have a pressurized leak you cannot stop quickly.
- You need to replace a saddle valve with a tee and you are not comfortable on supply plumbing.
- Your home water pressure is consistently below about 40 psi and you suspect you need a booster pump.
- You have replaced filters, confirmed tank precharge, and checked drain and ASO basics, but the system still will not produce water.
Prevent it next time
The best troubleshooting is the kind you do not have to do. Two habits help the most:
- Change prefilters on schedule so the membrane stays healthy.
- Check for tiny drips after any maintenance. A slow drip can trigger a leak sensor or rot your cabinet floor.
If you want, tell me your RO brand, whether you have an air gap faucet, and what symptom you have (no water, slow flow, or constant draining). I can help you narrow it to the most likely culprit.
About Marcus Vance
Content Creator @ Grit & Home
Marcus Vance is a lifelong DIY enthusiast and self-taught home renovator who has spent the last decade transforming a dilapidated 1970s ranch into his family's dream home. He specializes in budget-friendly carpentry, room-by-room renovations, and demystifying power tools for beginners. Through his writing, Marcus shares practical tutorials and hard-learned lessons to help homeowners tackle their own projects with confidence.