🚨 In a DIY emergency or rush?
Skip the details and jump straight to our 30-second cheat sheet for the most crucial info.
When a vacuum loses suction, the cause is usually boring, fixable, and hiding in the same handful of places: a full bag or bin, a clogged filter, a blockage in the airflow path, or a brush roll that is not spinning like it should.
I like vacuum troubleshooting because it rewards being methodical. If you check the right things in the right order, you can usually get your pickup back in 10 to 30 minutes without buying a new machine.
Scope note: This guide is for upright, canister, and stick or cordless vacuums (not wet/dry shop vacs or robot vacs).
Safety first (and why order matters)
Before you touch anything that spins, unplug the vacuum. If it is a cordless stick vac, remove the battery.
- Start with the easiest, most likely causes. Full bag or bin and dirty filters account for a huge chunk of suction complaints.
- Work from intake to exhaust. You are following the air path: floor head to hose to bin or bag to filters to exhaust.
- Change one thing at a time. That way you actually learn what fixed it, and you avoid creating a new problem.
- When to stop. If you see smoke, get a persistent burning smell, or the vacuum keeps tripping thermal protection even after you clear clogs and clean filters, discontinue use and consider service.
30-second diagnosis
Scenario A: It sounds normal, but pickup is weak
This points to a clog, dirty filter, wrong height setting, an open suction vent, or a brush roll issue.
Scenario B: It sounds higher pitched than usual
Often means restricted airflow. Think clogged hose, packed bin screen, blocked cyclone ports, or a filter that is so dirty the vacuum is starving for air.
Scenario C: It sounds strained, hot, or keeps shutting off
Many vacuums have thermal protection. A blockage, blocked exhaust vent, or badly clogged filter can cause overheating and auto shutoff.
Scenario D: It makes a burning rubber smell
Commonly a slipping belt on an upright, usually because the brush roll is jammed with hair or thread.
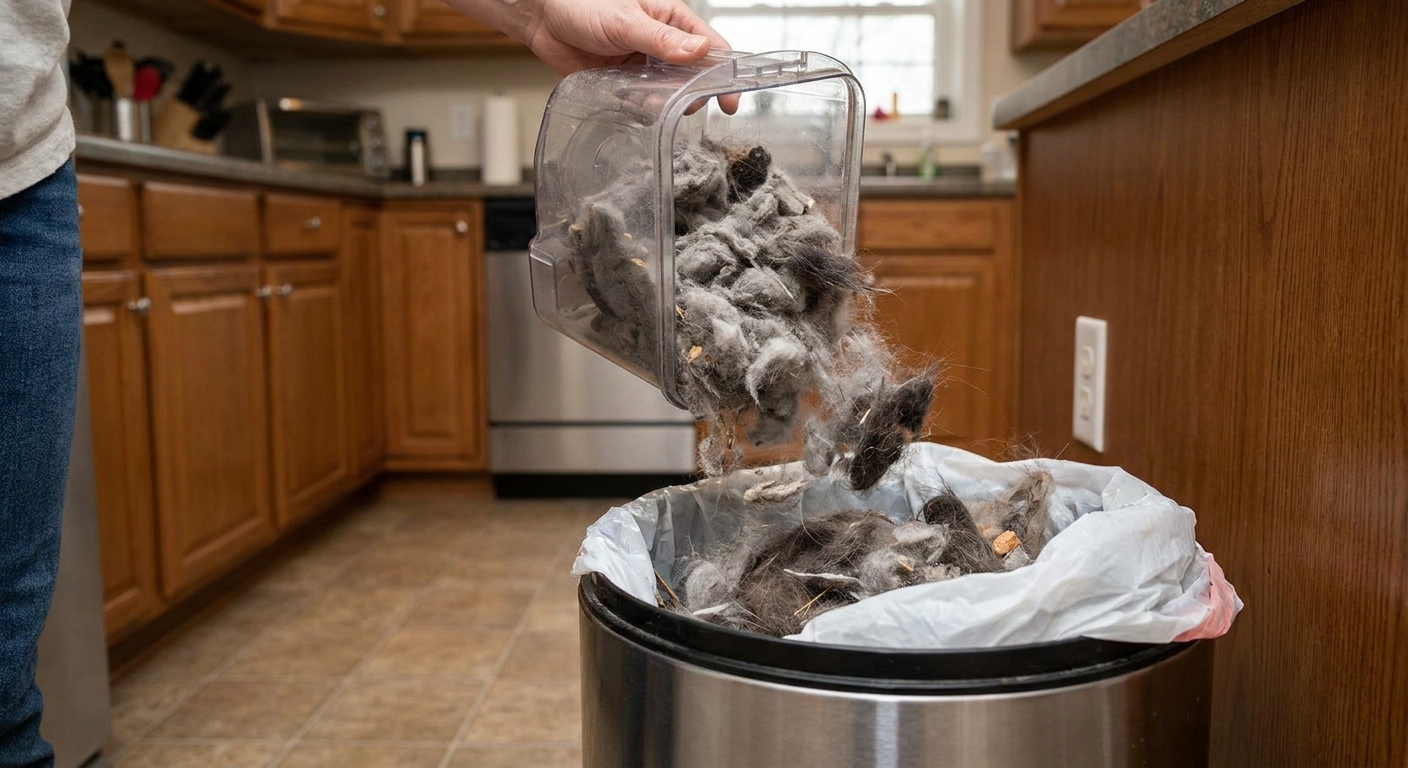
Step 1: Check the bag or empty the bin
If you have an upright or canister with a bag, replace it. If you have a bagless bin, empty it and clean the dust cup sealing surfaces.
- Bagged vacuums: A bag can be “not full” and still be clogged in the pores, especially after fine dust (drywall, baking soda, fireplace ash, carpet powder). Replace it to eliminate variables.
- Bagless vacuums: Do not pack debris down. If the bin is over the MAX line, airflow drops fast. Also check the cyclone shroud, bin screen, and any small cyclone ports for a felt-like blanket of dust.
Quick at-home test: With the bin empty or a new bag installed, try vacuuming a small patch of hard floor. If pickup improves immediately, you just found your main problem.
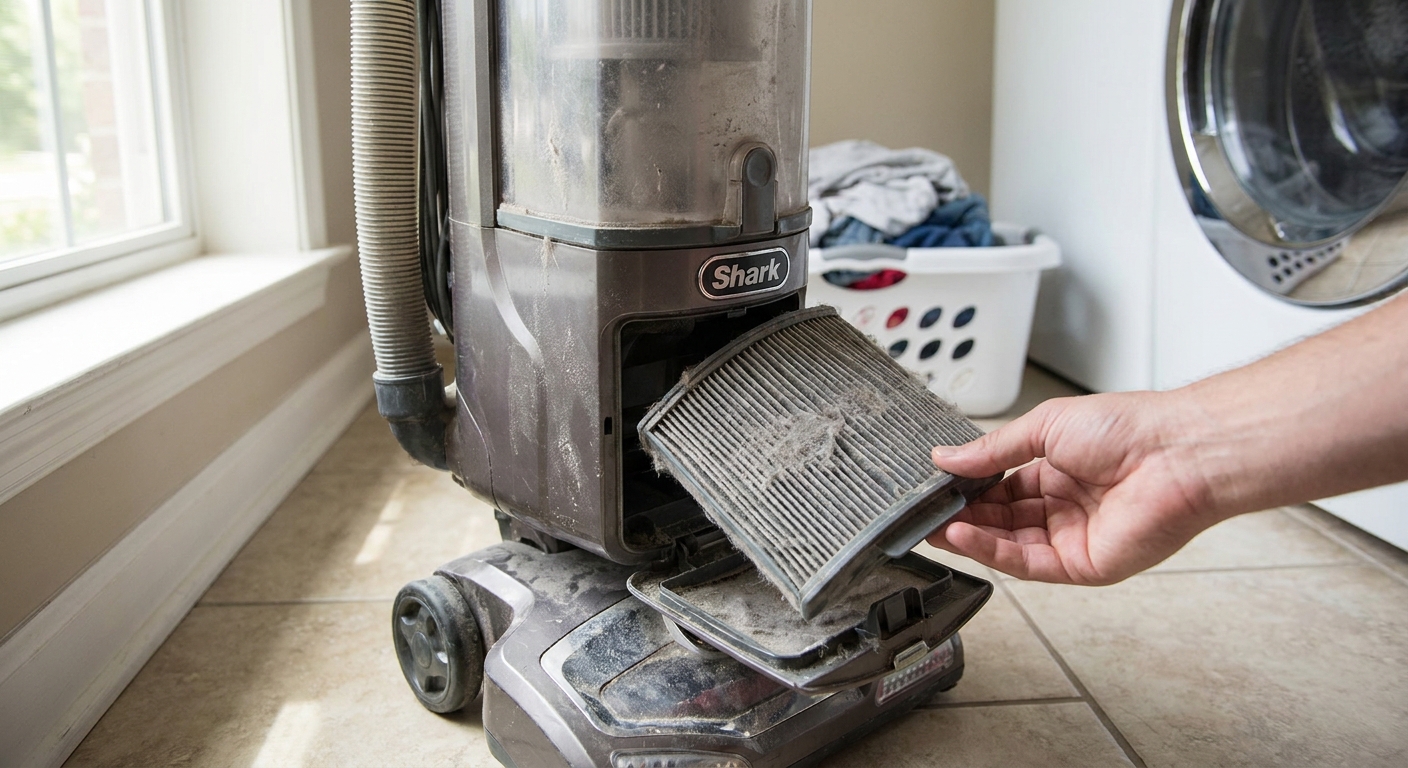
Step 2: Clean or replace filters
This is one of the most common suction fixes, and it is also one of the most ignored.
Many modern vacuums have at least two filters:
- Pre-motor filter: Often foam or felt. Protects the motor from fine dust.
- Post-motor or HEPA filter: Catches remaining fine particles before air exhausts back into the room.
Some models vary, especially certain budget bagged units, so use your manual as the final word on what is washable and what is not.
How to handle filters correctly
- Foam or washable filters: Rinse with cool water only. Avoid soap unless the manual explicitly allows a mild detergent. Squeeze, do not wring. Let it air dry fully, usually 24 hours.
- Pleated paper or true HEPA cartridges: Typically not washable. Replace if gray, dusty, or musty. Tapping them on a trash can can help a little, but it is not a real reset.
Quick at-home test (temporary, only if allowed): If your manual says the vacuum can run without the pre-motor filter, you can do a short 10 to 20 second test. Do it with an empty bin or fresh bag and no loose debris that could get pulled into the motor. If suction jumps up, that filter was restricting airflow. Put the filter back before regular use. Never run without the correct filters long-term, and do not do this if your manual warns against it.
Beginner mistake I have made: Putting a “washed” filter back in while it is still damp. Damp filters turn fine dust into a paste and can create a smell that never really leaves.

Step 3: Look for clogs in the hose, wand, and floor head
If the bag and filters are good but pickup is still poor, you likely have a blockage. Clogs love to hide in bends, elbows, and right where a hose meets a hard plastic connector.
Simple clog checks that work
- Upright vacuums: Check the intake at the base (where the floor head meets the body). Coins, socks, and small toys are frequent offenders.
- Canister vacuums: Remove the wand and look through it toward a light. If you cannot see light, you have a blockage.
- Stick vacuums: Check the narrow neck right above the brush head and the bin inlet. This area clogs easily with pet hair and carpet fuzz.
- Bagless bins: Check the cyclone ports, shroud, and screens again, especially if you vacuumed fine dust. A thin layer can act like a blanket.
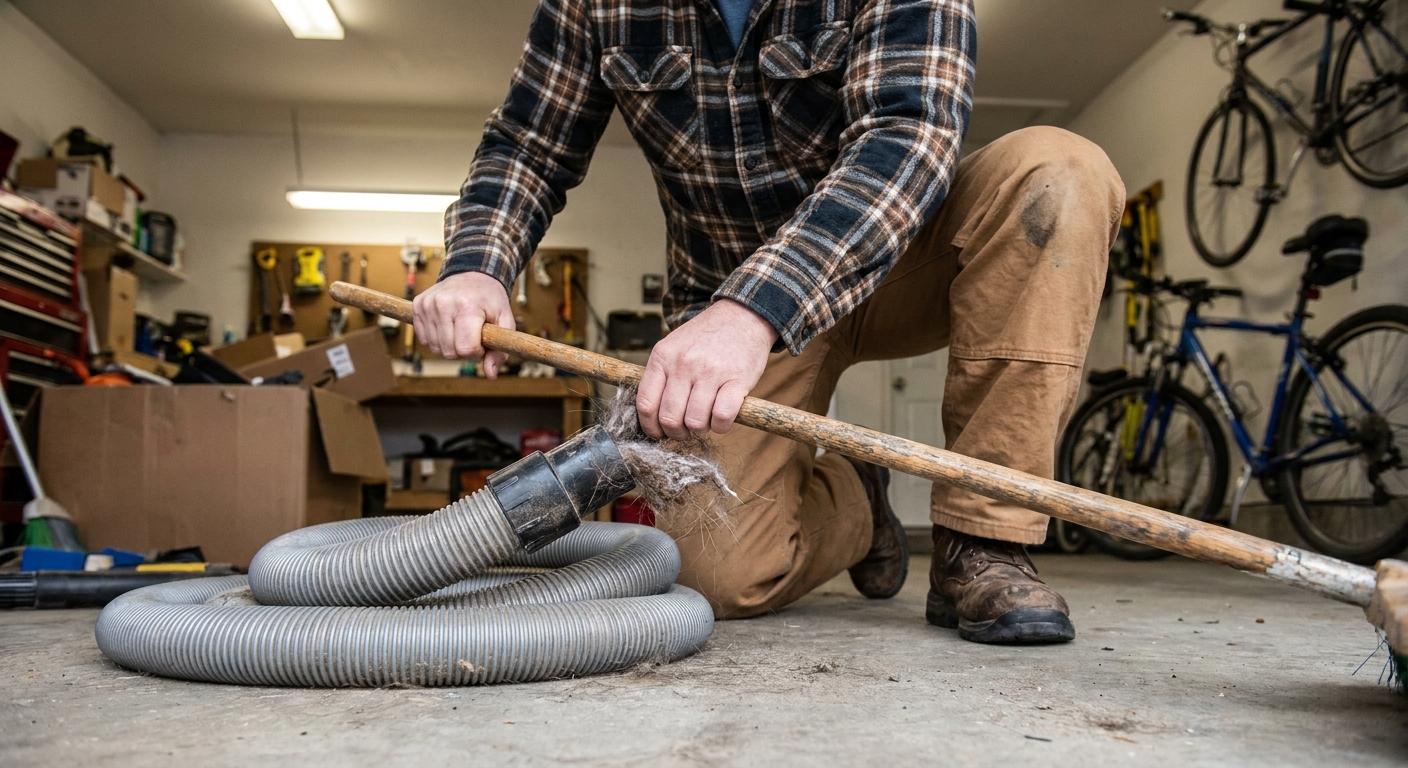
Clearing a clog without damaging your vacuum
- Use a broom handle or straightened coat hanger carefully (no sharp ends) to push debris out.
- If the hose is flexible, gently massage it to break up the plug.
- Avoid running water through hoses that are not designed for it, especially if electrical contacts are nearby (common on powered heads and some cordless models).
Quick at-home test: Disconnect the hose from the vacuum (and from the handle if possible). Turn the vacuum on briefly and place your hand at the suction port. Strong suction at the port but weak suction at the nozzle usually means a clog in the hose, wand, or head.
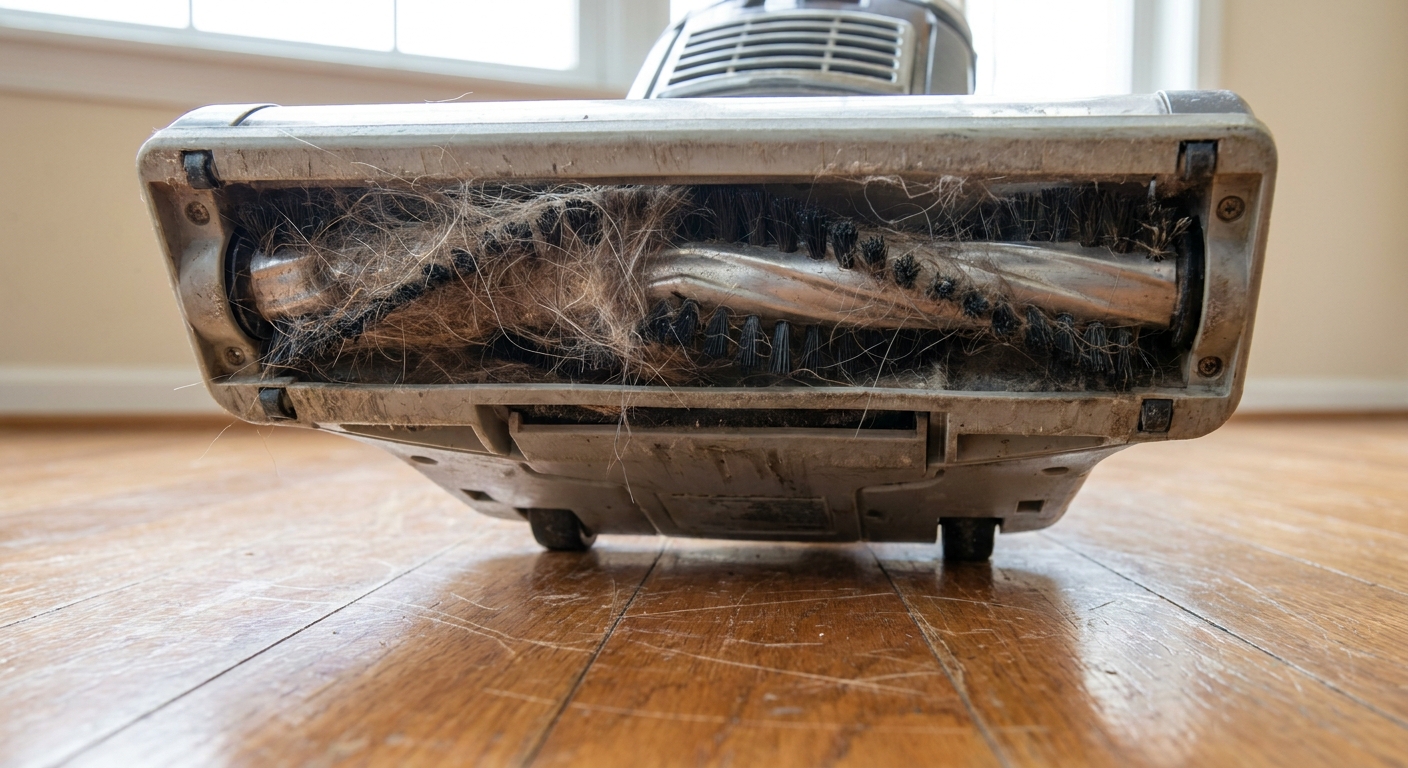
Step 4: Inspect the brush roll
On carpet, suction is only half the story. The brush roll agitates fibers so dirt can be lifted. When it is jammed, pickup drops and you can also get that hot rubber smell.
What to look for
- Hair wrapped tight at the ends (it can bind the bearings).
- String, thread, and carpet fringe wrapped around the bristles.
- A brush roll that looks polished or melted in one spot (often from a belt slipping).
Clean it the right way
- Unplug, flip the vacuum over, and remove the brush roll cover if your model has one.
- Use scissors or a seam ripper to cut hair along the groove, then pull it out.
- Spin the brush by hand. It should rotate freely. If it feels gritty, stiff, or wobbly, the bearings may be failing.
For stick vacs with soft roller heads: Remove the roller and peel off hair and fuzz. Soft rollers can pack with fine dust along the ends, which creates drag and reduces pickup.
Step 5: Check the belt (uprights especially)
If the motor runs but the brush roll does not spin, the belt is a prime suspect. Belts stretch with age and can also snap.
Signs the belt is the issue
- Brush roll not spinning, or spinning intermittently.
- Burning rubber smell when vacuuming carpet.
- Black rubber dust near the brush roll area.
Quick at-home test: With the vacuum unplugged, try turning the brush roll by hand. Some resistance is normal because of the belt, but it should not feel like it is glued in place. If it is jammed, clean the brush roll first. If it spins freely but never spins during use, the belt is likely broken or too loose.
Thrifty tip: Use the correct belt. “Close enough” belts can slip, squeal, and add strain and heat.
Step 6: Confirm the height setting and suction controls
This sounds basic, but it is a real cause of “lost suction” calls.
- Uprights with height adjustment: If the head is set too low, it can seal to plush carpet and starve airflow. Too high and it will not pick up embedded grit.
- Canisters with a sliding suction vent: Many handles have a bypass vent. If it is open, suction at the floor head drops a lot. Close it and retest.
- Stick vacs with eco mode: Make sure you are not in the lowest power setting for a deep carpet job.
Quick at-home test: On carpet, start one notch higher than you think you need. If the vacuum suddenly glides and pickup improves, you were probably too low and choking airflow.
Model-specific trouble spots
Upright vacuums
- Base air path: Clogs form right behind the brush roll housing.
- Internal hose: Many uprights have a short internal hose from the floor head to the bag or bin. It is a hidden clog magnet.
- Brush roll on/off: Some models shut the brush off in upright position. Make sure it is reclined and brush mode is enabled.
Canister vacuums
- Wand joints: Debris loves to hang up at the connection points.
- Bag mount: If the bag is not seated correctly, you can lose suction and leak dust.
- Powerhead wiring: If the brush does not spin, check for broken wires at the swivel or a tripped reset on the head if your model has one.
Stick and cordless vacuums
- Battery voltage: A weak battery can mimic suction loss. Some models also manage power aggressively to protect the battery, so performance can drop as charge falls even if nothing is clogged.
- Dust cup gasket: If the bin does not seal tightly, air leaks reduce pickup.
- Micro-clogs: Narrow passages clog faster. Check the bin inlet and the neck above the brush head.

When it is not a clog
Most suction problems are maintenance. But sometimes the vacuum is telling you something more serious.
Red flags for motor trouble
- Electrical smell (sharp, hot, plastic smell) that persists after cleaning filters and removing clogs.
- Sparking visible through motor vents (a small amount on some brushed motors can be normal, but heavy arcing is not).
- Won’t stay running even with clean filters and clear airflow.
- Rattling or grinding that is new and loud.
Red flags for seal or housing leaks
- Dust puffing out around the bin, bag door, or filter cover.
- Whistling air leak that you can pinpoint around a seam.
- Gaskets flattened or torn on the bin, filter door, or hose connections.
Simple at-home tests before you call it
- The “hand over the port” test: If suction at the main port is weak even with bin empty and filters clean, you may have a motor issue, an internal leak, or a hidden blockage.
- The “tissue flutter” leak test: With the vacuum running, lightly hold a tissue near seams and doors. If it gets sucked toward a door gap, that is an air leak point reducing effective suction at the floor.
- Heat check: If the body gets unusually hot quickly, shut it down and recheck airflow and exhaust vents. Persistent overheating can point to motor wear or chronic restriction.
If you hit these red flags, it can still be repairable, but it is usually a parts decision: a new motor, new seals, or replacing the unit depending on age and model.
A no-nonsense troubleshooting order
- Empty bin or replace bag.
- Clean or replace pre-motor filter.
- Check and replace post-motor or HEPA filter if needed.
- Check for clogs: floor head, hose, wand, bin inlet, cyclone ports or screens.
- Clean brush roll and end caps.
- Check belt tension or replace belt (uprights).
- Verify height setting and suction vents or modes.
- Check exhaust vents and covers for blockage.
- Check seals and gaskets for leaks.
- If suction is weak at the main port with everything clean: suspect motor, internal leak, or an internal blockage.
Do it in this order and you avoid the classic mistake of tearing into the brush head when the real issue was a filter that has not been cleaned in far too long.
FAQ
How often should I clean vacuum filters?
For washable pre-motor filters, a good starting point is every 1 to 3 months depending on use, pets, and whether you vacuum fine dust. HEPA filters are often replaced every 6 to 12 months, but follow your model guidelines.
Why does my vacuum have strong suction at the hose but not at the head?
That usually means the floor head is clogged, the brush roll is jammed, the belt is slipping, or the head is set too low on plush carpet and starving airflow. An open suction bypass vent on the handle can also cause a big drop.
Can a full bin cause a vacuum to overheat?
Yes. A packed bin or clogged filter restricts airflow, and airflow is how many vacuums keep the motor cool.
The 30-Second Cheat Sheet
Essential takeaways for: Vacuum Lost Suction? Fix It Step by Step
Do these in order (most suction fixes happen in steps 1 to 3)
- Empty the bin or replace the bag. Fine dust can clog a bag before it looks full.
- Clean or replace the pre-motor filter. If it is foam, rinse and dry 24 hours. If it is pleated paper, replace.
- Check the HEPA or post-motor filter. Replace if gray, dusty, or musty (usually not washable).
- Hunt clogs along the air path. Floor head intake, hose ends, wand joints, bin inlet, and any elbows. Check cyclone ports and screens on bagless models.
- Clean the brush roll. Remove hair and string, especially at the ends where it binds bearings.
- Check the belt (uprights). Burning rubber smell or brush not spinning often means a stretched or broken belt.
- Verify height and suction controls. Too-low head on plush carpet can choke airflow. Close any bypass vent on canister handles.
Fast tests
- Port test: Strong suction at the main port but weak at the head usually means a clog or head issue.
- Short filter test (only if allowed): If the manual permits, briefly run without the pre-motor filter (10 to 20 seconds) with an empty bin or fresh bag and no debris in the airstream. If suction jumps, that filter is restricting airflow. Put it back before regular use.
- Tissue leak test: Tissue pulled toward a door seam means an air leak that reduces pickup.
When to stop and suspect a bigger problem
- Smoke, persistent burning smell, or repeated thermal shutoffs even after clearing clogs and cleaning filters
- Weak suction at the main port even with clean filters and no clogs
- Persistent electrical smell, heavy sparking, loud grinding
- Dust blowing out around the bin, bag door, or filter cover (failed gasket or poor seal)
💡 Tip: Scroll up to read the full article for detailed, step-by-step instructions.
⬆️ Back to topAbout Marcus Vance
Content Creator @ Grit & Home
Marcus Vance is a lifelong DIY enthusiast and self-taught home renovator who has spent the last decade transforming a dilapidated 1970s ranch into his family's dream home. He specializes in budget-friendly carpentry, room-by-room renovations, and demystifying power tools for beginners. Through his writing, Marcus shares practical tutorials and hard-learned lessons to help homeowners tackle their own projects with confidence.