🚨 In a DIY emergency or rush?
Skip the details and jump straight to our 30-second cheat sheet for the most crucial info.
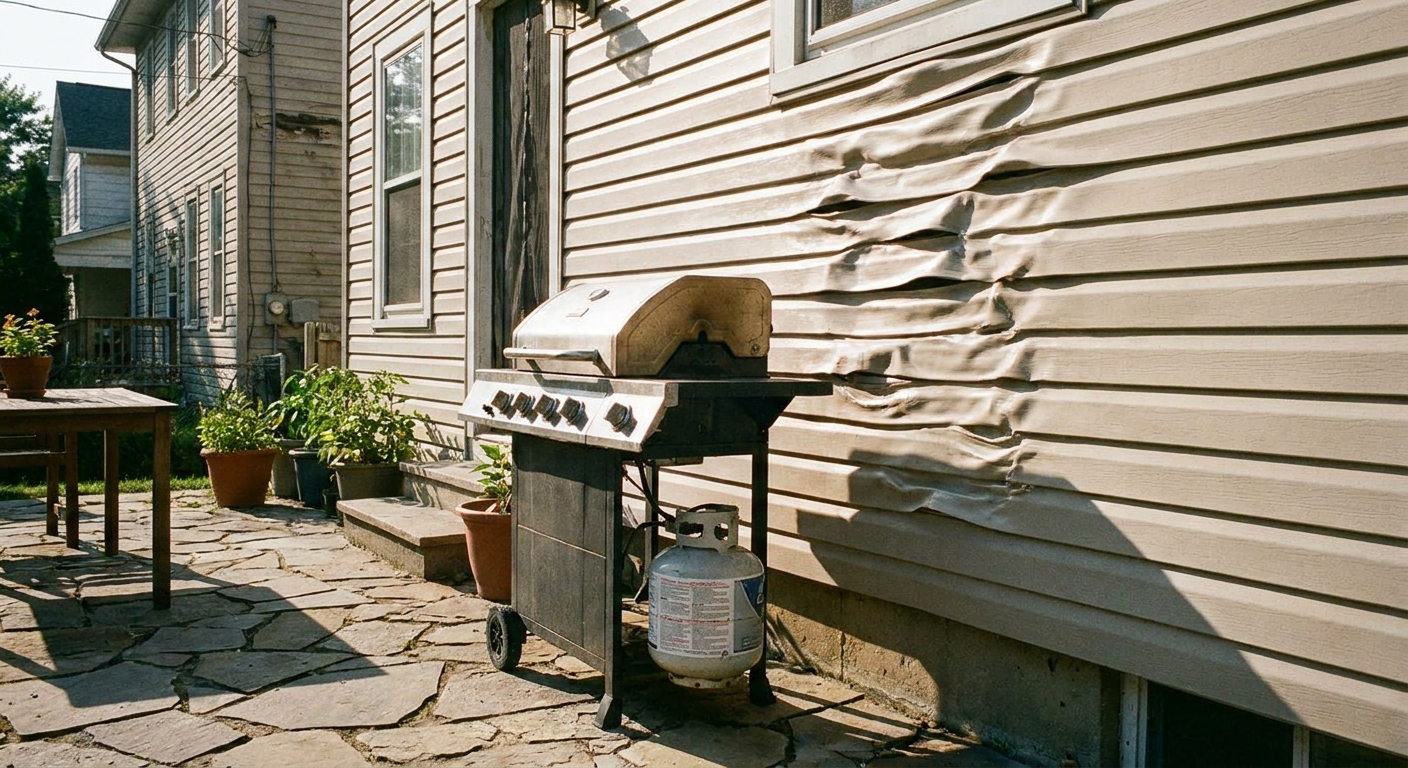
Nothing ruins a laid-back cookout mood like walking around the corner and seeing your vinyl siding look like a candle left too close to a flame. I have been there. Vinyl is tough in rain and wind, but it is not built for sustained radiant heat from a grill, smoker, or patio heater.
The good news: most cases are preventable, and the fix is usually a straightforward panel replacement. The trick is knowing what to change so it does not happen again.
Why vinyl warps near a grill
Vinyl siding is essentially plastic cladding. It can soften and deform when it gets hot enough. That heat usually comes from one or more of these:
- Radiant heat from the lid and back of the grill reflecting onto the wall.
- Flare-ups when grease ignites and the fire rolls toward the rear of the cookbox.
- Exhaust direction on certain grills and smokers where hot air exits toward the house.
- Wind pushing heat and flames sideways, right into the siding.
- Low-and-slow still radiates heat. Even if the cook chamber is running 250 to 350°F, the metal at the back of the grill and the exhaust stream can be much hotter than you think, especially up close.
If you also notice nearby trim, light fixtures, hose bib covers, or a GFCI cover looking wavy, that is another clue the wall is getting heat soaked, not just nicked by a one-time flare.
Clearance: what to follow
There is no single magic number because grills vary, siding varies, and wind is a wild card. Here are the two rules I follow:
- Rule 1: Read your grill manual. Manufacturers often specify minimum clearance to combustible surfaces. In practical grilling terms, treat vinyl as a combustible surface unless your manual says otherwise. Some manuals call for 24 inches, others 36 inches or more, especially for rear and side clearances.
- Rule 2: When in doubt, go farther. As a conservative baseline, I aim for at least 36 inches between the hottest parts of the grill and the siding, and more if I am using a high-heat sear burner, cooking extra greasy food, or dealing with wind. Think of 36 inches as a starting point, not a guarantee.
Also: your local fire guidance, HOA rules, and the specific wording in your manual can be stricter than any rule of thumb. When they disagree, follow the stricter requirement.
Watch what is above and around the grill too. Eaves, soffits, railings, privacy screens, and deck boards can all be heat targets.
Important: If your grill is under a covered porch, check the manual for overhead clearance and ventilation requirements. A roof overhead setup can trap heat and smoke and raise the temperature at the wall faster than you think.
Fast triage
Use this as a quick gut-check before the next cookout:
- Stop and move the grill today if you see ongoing softening, bubbling, or a shiny, sticky surface on the siding. That may mean it is actively overheating.
- Stop and inspect if the melted area is close to an exterior light, outlet, service conduit, or gas meter. Heat can potentially damage wiring insulation and plastic covers. If you suspect any heat damage to electrical components, get a qualified electrician to take a look.
- Proceed with caution if the damage looks old and you have already increased clearance, but add a heat strategy before you replace panels so you do not repeat the problem.
Prevention that works
1) Move the grill
I know this sounds obvious, but it is the most reliable solution: create distance.
- Pull the grill out from the wall before lighting it, not after it is hot.
- Pick a parking spot marked by pavers or a deck mat so it is easy to put it back in the right place every time.
- If space is tight, consider rotating the grill so the back is not aimed at the wall, as long as the manual allows the new orientation.
2) Add a heat shield
If moving is not realistic, shielding can help, but only if it is done safely.
- Freestanding grill heat shields: A metal barrier that sits behind the grill. Look for stainless or powder-coated steel designed for grill use.
- Wall-mounted heat shields: Non-combustible panels installed on standoffs so there is an air gap behind them. The air gap matters because it helps the shield shed heat instead of transferring it into the wall.
- Heat-resistant mats: Great for decks and pavers under the grill, but they do not protect siding unless paired with a vertical shield.
My caution flag: Avoid improvised setups like raw plywood with foil, painted sheet goods, or anything that can trap heat against vinyl. You want a non-combustible surface plus airflow, not a heat sandwich.
3) Control flare-ups and exhaust
- Clean grease trays and drip pans regularly. Grease fires spike heat fast.
- Trim excess fat and use a drip pan for long cooks.
- Pay attention to wind direction. A breezy day can turn safe clearance into oops clearance.
- If your grill vents hard out the back, consider a rear deflector accessory made for your model, or re-position the grill so exhaust is not aimed at siding.
4) Quick fuel-type note
- Gas grills often exhaust out the back or above the lid and can roast a wall during long preheats and high-heat sears.
- Charcoal grills can run very hot with the lid open, and radiant heat off the bowl can be intense close to surfaces.
- Pellet smokers and some cabinet smokers can push steady heat for hours, which can heat-soak nearby vinyl even at lower cooking temps.

Replace melted vinyl siding
Once vinyl is heat-deformed, it does not really unmelt. You can sometimes reduce the worst bulges with gentle heat, but it is hard to make it look right again, and you risk making it worse. Replacing the affected pieces is usually the cleanest path.
Tools and materials
- Vinyl siding zip tool
- Hammer and galvanized roofing nails
- Utility knife or tin snips (depending on siding thickness)
- Tape measure and square
- Replacement siding pieces (matching profile, color, and exposure)
- Exterior-rated caulk (only where appropriate, not for locking seams)
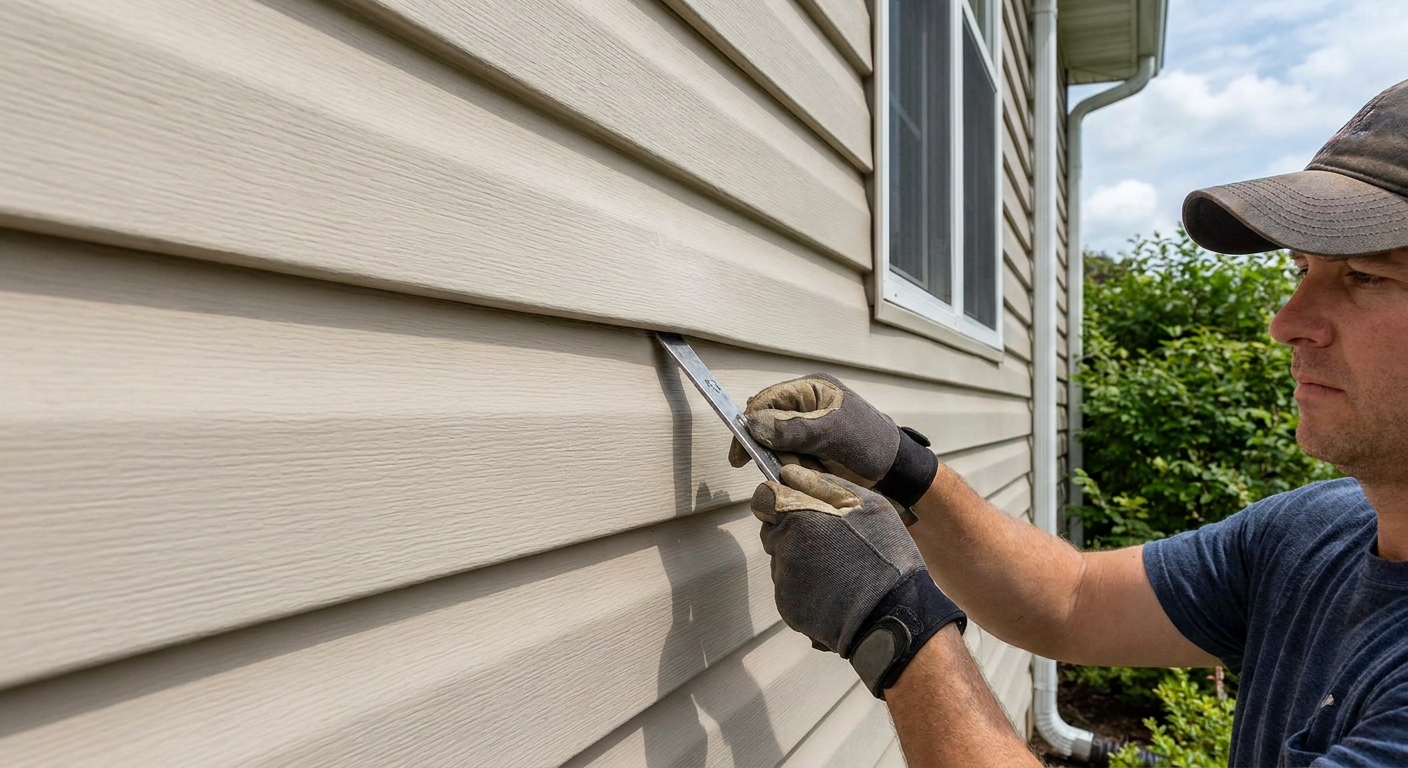
Step-by-step
- Identify the siding profile. Take a piece or a clear photo to your supplier. Match the panel style and size, not just the color.
- Unzip the panel above the damaged one. Use the zip tool to unlock the bottom lip of the panel above so you can access nails.
- Remove nails from the damaged panel. Pull nails straight. Do not pry against the sheathing too aggressively.
- Slide out the damaged panel. If it is fused or brittle, cut it into sections and remove carefully.
- Cut the new panel to length. Leave the correct expansion gap at ends, especially in warm weather.
- Nail it correctly. Nails go in the center of the slots, and they should not be driven tight. Vinyl needs to move. This is a common beginner mistake, and it causes buckling later.
- Re-lock the panel above. Snap the seam back together with your hand, then confirm it is fully engaged along the run.
- Step back and check alignment. If the course lines do not match, something is not seated or nailed right.
Matching reality check: Older colors and profiles get discontinued. If you cannot match it, you may need to replace a larger section, swap in a piece from a hidden area (like behind a downspout), or talk with a siding pro about options. In some cases, homeowners also look into coatings rated for vinyl, but product choice and prep matter a lot.
Matching color tip: Even if you find the exact color name, sun fade can make the wall look different than a brand-new piece. If the mismatch will bother you, replace a larger, less noticeable section or steal a piece from a hidden area and put the new piece in the hidden spot.
Check behind the siding
Most of the time, the siding takes the damage and the house underneath is fine. Still, it is worth checking:
- Housewrap: Look for brittle, shrunken, or torn wrap when you open the area.
- Sheathing: Check for darkened or charred spots. Heat discoloration is a sign you need more clearance or shielding before reinstalling.
- Moisture path: Make sure flashing and overlaps go back the way they were. Do not create a leak while fixing a melt.
If you see charring, scorch marks, or melted electrical components, consider bringing in a pro for a safety check.
Heat shields: install notes
If you decide to install a wall-mounted shield, here is what I look for as a budget-friendly but safe setup:
- Non-combustible panel: metal or cementitious board designed for exterior exposure.
- Standoffs for an air gap: even a small gap helps reduce heat transfer.
- Fastened into structure: hit studs or solid blocking, not just siding.
- Edges finished: avoid sharp edges and make sure water cannot get trapped behind it.
I still keep distance. A shield is a backup plan, not a permission slip to park the grill inches from the house.
When to call a pro
- Damage is near a window, door, or J-channel area where water management is easy to mess up.
- Damage is near electrical service equipment, outlets, lights, or anything that looks heat-distorted.
- You see scorch marks, smell burnt wood, or suspect heat made it into the wall cavity.
- You cannot match the siding profile and need a larger, cleaner-looking repair plan.
Insurance documentation tips
Most homeowners never need to involve insurance for a couple of melted panels. But if you have broader damage, heat affected wiring, or you are dealing with a fire incident, documentation matters.
What to capture
- Wide photos showing the grill location relative to the wall, deck, and roof overhang.
- Close-up photos of the warped siding, including a tape measure in frame for scale.
- Model info of the grill and any accessories involved.
- Date-stamped notes: when you noticed damage, what you were cooking, and weather conditions (windy days matter).
- Receipts for replacement materials and any professional inspection.
Before you repair: take photos first. I have learned the hard way that “I already fixed it” can make things harder if you later discover hidden damage.
Simple prevention checklist
- Confirm your grill manual clearance to combustibles.
- Treat vinyl as combustible unless your manual says otherwise.
- Keep a conservative buffer of at least 36 inches when possible, and go farther in wind or high heat.
- Pull the grill out before lighting, every time.
- Use a proper freestanding or wall-mounted heat shield if space is tight.
- Clean grease management parts to reduce flare-ups.
- Replace melted panels and nail them correctly so they can expand and contract.
If you want one takeaway: move the grill first, then use shielding as insurance.
The 30-Second Cheat Sheet
Essential takeaways for: Vinyl Siding Melted Near a Grill: Prevent and Fix It
What’s happening
- Warped or wavy vinyl near a grill is heat damage, usually from radiant heat, flare-ups, or exhaust aimed at the wall.
- Once vinyl melts, it rarely returns to a clean, flat look. Replacement is the real fix.
Clearance (quick guidance)
- Check your grill manual first for clearance to combustible surfaces. Treat vinyl as combustible unless your manual says otherwise.
- If you do not know, 36 inches is a conservative starting point from the hottest parts of the grill to the siding, and more for high-heat searing, windy days, or grills that exhaust toward the wall. Local fire guidance and your manufacturer may require more.
Best prevention
- Move the grill farther from the house before lighting it.
- Add a heat shield (freestanding behind the grill or wall-mounted with an air gap).
- Reduce flare-ups: clean grease trays, use drip pans, and watch wind direction.
Fix in a nutshell (panel replacement)
- Unzip the panel above with a zip tool, remove nails, slide out the damaged piece.
- Install new siding with nails centered in slots and not driven tight so vinyl can move.
- Re-lock the panel above and confirm the seam is fully engaged.
Insurance-ready documentation
- Take wide and close photos before repairs.
- Photograph a tape measure next to damage for scale.
- Save grill model info, receipts, and notes (date, cook type, wind).
💡 Tip: Scroll up to read the full article for detailed, step-by-step instructions.
⬆️ Back to topAbout Marcus Vance
Content Creator @ Grit & Home
Marcus Vance is a lifelong DIY enthusiast and self-taught home renovator who has spent the last decade transforming a dilapidated 1970s ranch into his family's dream home. He specializes in budget-friendly carpentry, room-by-room renovations, and demystifying power tools for beginners. Through his writing, Marcus shares practical tutorials and hard-learned lessons to help homeowners tackle their own projects with confidence.