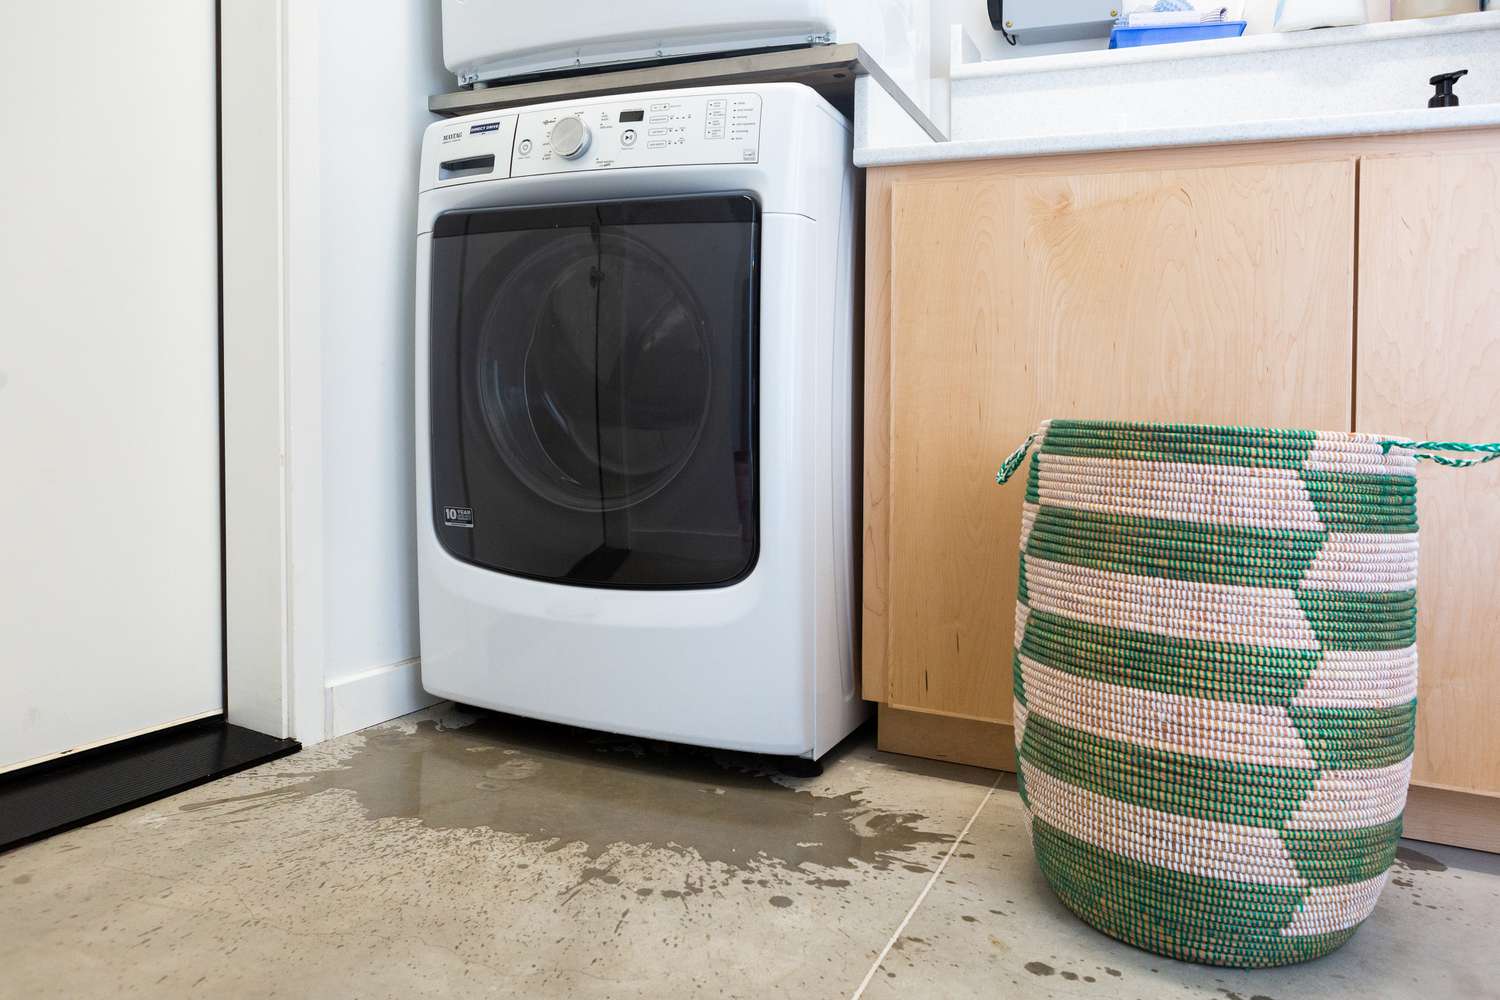
If you have ever walked into the laundry room and felt your sock go squish, you already know this truth: a leaking washing machine is never a “deal with it later” problem. The good news is most leaks come from a handful of repeat offenders, and in many cases you can narrow it down pretty quickly with a flashlight and a little patience.
I grew up holding the flashlight for my dad under sinks and behind appliances, so I approach washer leaks the same way: don’t guess, verify. This page walks you through quick safety steps, how to spot where the water is starting, and the most common causes with practical fixes.
First: make it safe
- Unplug the washer if water is near the outlet or power cord.
- If water is close to electrical and you cannot safely reach the plug, shut off the circuit at the breaker.
- Turn off the water at the wall valves behind the machine (hot and cold).
- Throw down towels or a shallow pan. If you have a wet/dry vac, this is its moment.
- Do not run another cycle “to see if it happens again” until you have a plan. That is how small leaks become warped floors.
If water is pouring out fast even when the washer is off, go straight to the water inlet valve section below. That can be a constant incoming water leak.
Find the source
Here is a simple way to narrow it down without tearing the whole machine apart.
1) When does it leak?
- During fill: often a loose or damaged supply hose, a dispenser area leak, or a faulty water inlet valve.
- During wash or agitation: front-loader door gasket, oversudsing, or an internal hose or tub seal issue.
- During drain or spin: drain hose, clogged pump filter (front-loaders especially), the drain pump or pump housing, or (less commonly) tub or seal problems.
- When the washer is off: inlet valve not closing fully, or a slow seep at a hose connection or wall valve.
2) Find the highest wet point
Water always travels. The key is finding the highest place that is wet. Use a flashlight and check:
- Back panel area around the two supply hoses and inlet valve.
- Detergent drawer area and the top front edge (leaks can run down the face).
- Front door area on front-loaders, especially the bottom of the gasket.
- Under the front lower access panel (where the pump filter is on many models).
- Where the drain hose connects to the standpipe or laundry sink.
Panel tip: If you remove an access panel, watch for sharp metal edges. Gloves help.
Front vs. top load leaks
Front-load washers
- Among the most common leak points are the door gasket and the drain pump filter.
- Other frequent culprits are the detergent dispenser and the internal hose that runs from the dispenser to the tub.
- Oversudsing is also more likely to show up as water at the door.
Top-load washers
- More often leak from supply hoses, the drain hose, or overflow due to too much detergent.
- If a top-loader is leaking during agitation, the tub seal or internal hoses can be involved, which sometimes pushes the repair into “call a pro” territory.
6 common causes and fixes
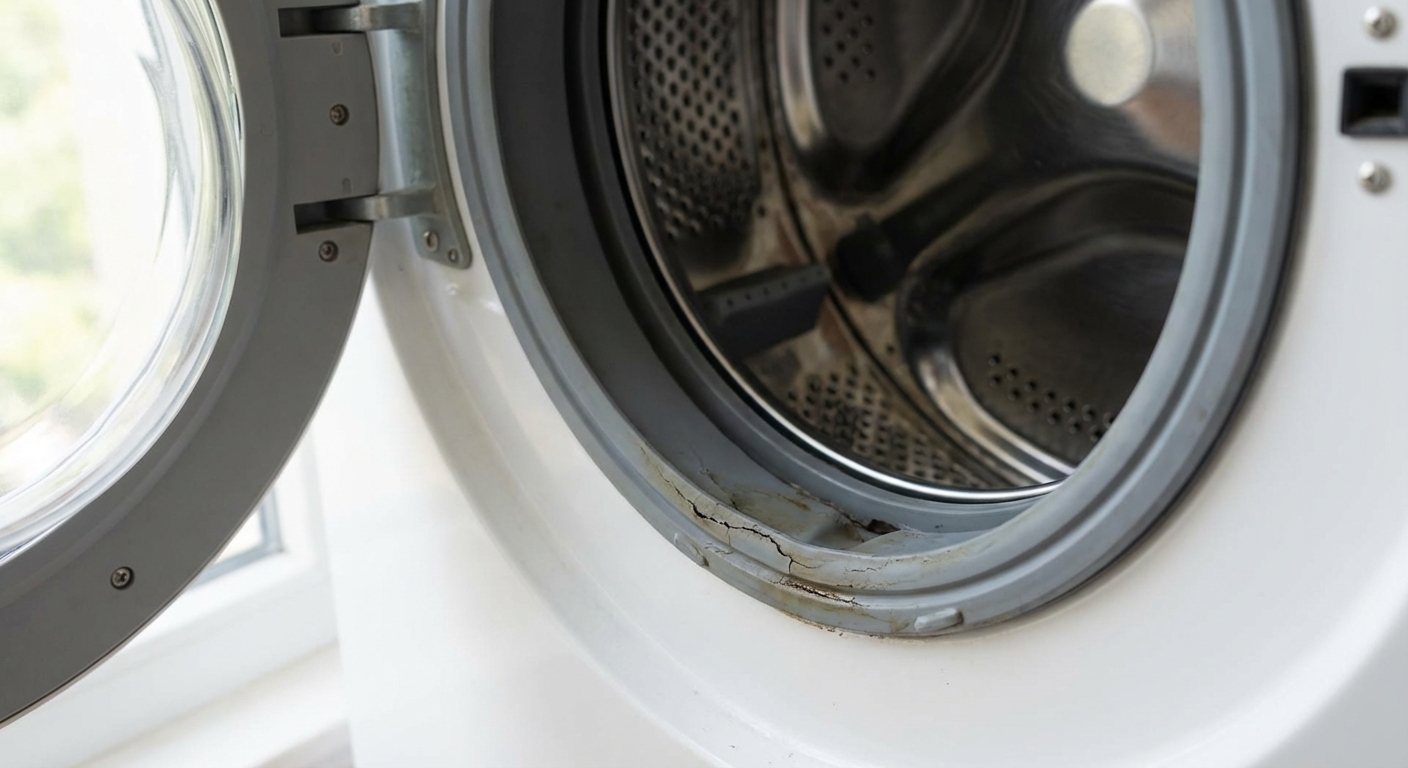
1) Door gasket damage (front-load)
If you have a front-loader and you see water near the front of the machine, the door gasket is the first place I look. That rubber boot gets abused by zippers, pet hair, coins, and the occasional rogue screw left in a pocket.
Clues it is the gasket:
- Water appears at the front, especially during wash or spin.
- You see tears, cracks, or a spot that looks rolled out of place.
- There is gunk or a small sock stuck in the bottom fold.
Fix:
- Wipe the gasket clean and check the bottom drain holes (some gaskets have small ports that clog).
- Inspect for a tear. Tiny pinholes sometimes respond to a gasket repair patch, but in my experience replacement is the real fix.
- If the gasket is just out of position, reseat it carefully. Make sure no laundry is trapped between the gasket and the door.
Replacement note: Door gaskets are DIY-friendly, but they can be fiddly because of retaining springs and clamps. Take photos as you disassemble so you can put everything back exactly the way it was.
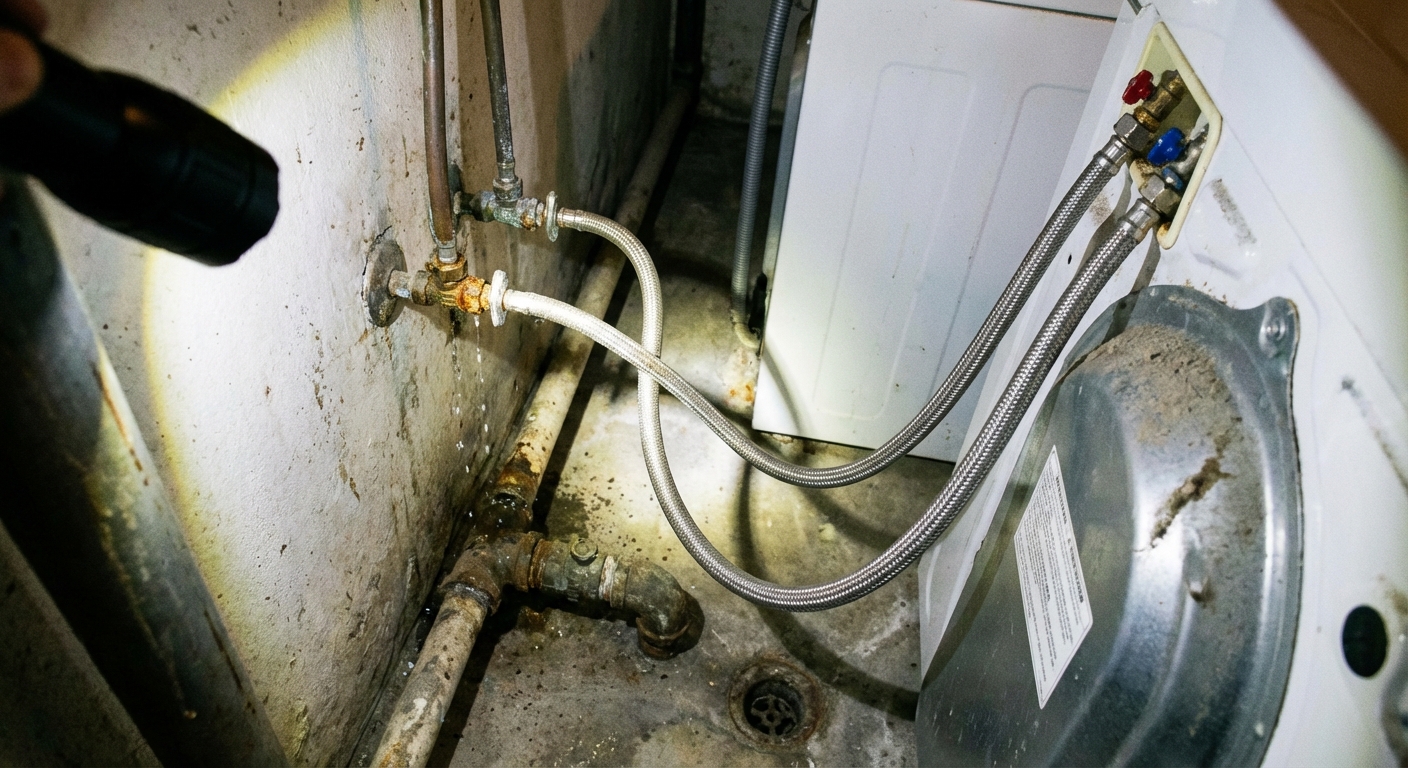
2) Leaking hose connections
This is the budget-friendly win. A surprising number of leaks are just a loose fitting or an aging rubber washer inside the hose coupling.
Clues it is a hose connection:
- Water shows up behind the washer or runs down the back panel.
- It leaks most during the fill portion of the cycle.
- You see drips at the wall valve, hose coupling, or where the hose meets the washer.
Fix (supply hoses):
- Turn off both wall valves.
- Dry everything with a towel.
- Hand tighten the hose couplings, then snug gently with pliers a quarter turn. Do not over-tighten, it can crack fittings.
- If it still leaks, replace the rubber washer inside the hose end, or replace the whole hose.
Pro tip: If your washer still has old black rubber fill hoses, consider upgrading to stainless braided hoses. They cost more, but they are cheap insurance against a burst hose.
Fix (drain hose):
- Check the drain hose for splits, pinholes, or a loose clamp at the pump outlet.
- Make sure the hose is secured at the standpipe or sink so it cannot whip out during drain.
- Confirm the standpipe is not overflowing because it is partially clogged.
- Double-check the drain hose height and how far it is shoved into the standpipe. If it is too low or jammed in tight, you can get siphoning or messy overflows that look like a washer leak.
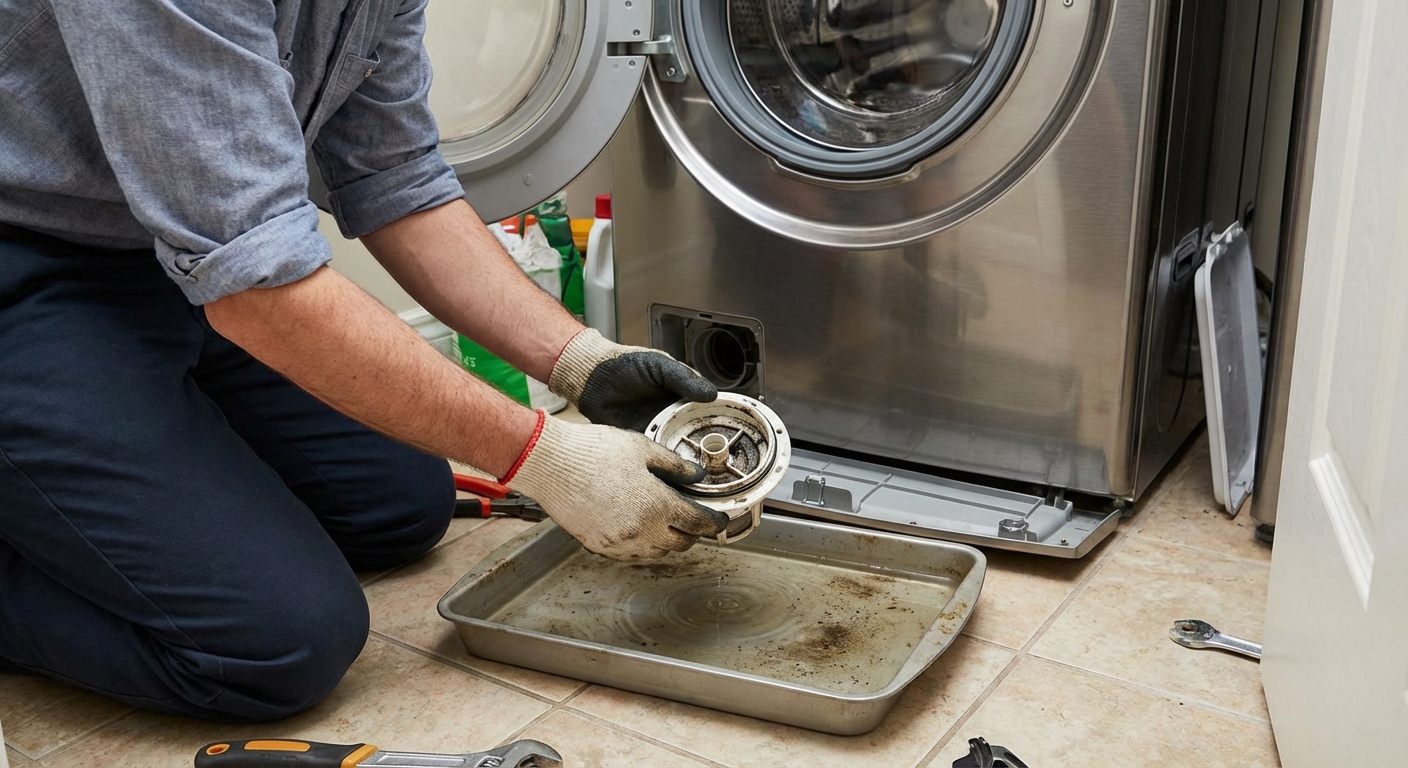
3) Clogged pump filter (front-load)
Many front-load washers have a little access door at the lower front. Behind it is a drain pump filter that catches coins, hairpins, and lint. When it clogs, water can back up and leak from the front bottom area.
Clues it is the pump filter:
- Leak seems to come from the bottom front.
- Washer drains slowly, makes a struggling pump noise, or throws a drain error.
- You have not cleaned that filter in, well, ever.
Fix:
- Unplug the washer.
- Place a shallow pan and towels under the access door.
- If your model has a small drain tube, use it to drain water first.
- Unscrew the filter slowly and let water drain out.
- Remove debris, rinse the filter, and clean the filter housing.
- Reinstall the filter snugly. A cross-threaded filter can leak, so start the threads carefully.
4) Drain pump or internal hose leak
If the puddle is coming from the bottom and you have ruled out the filter cap itself, the next suspects are the pump housing, the pump-to-tub hose, or a loose internal clamp. These leaks often show up most during drain and spin.
Clues it is the pump or an internal hose:
- Water appears during drain or right after spin starts.
- You see water trails near the pump area behind the lower front panel.
- The washer makes a grinding or rattling noise when draining (sometimes debris in the pump).
Fix:
- Unplug the washer and remove the lower access panel (varies by model).
- Inspect the pump body for hairline cracks and check the hose connections for drips.
- Snug a loose clamp. If a hose is swollen, split, or brittle, replace it.
- If the pump housing is cracked, replace the pump assembly.
5) Oversudsing
Oversudsing is sneaky because it looks like a leak, but it is really foam and water escaping where it should not. This is especially common in HE machines when you use too much detergent, or you use non-HE detergent in an HE washer.
Clues it is oversudsing:
- You see lots of foam inside the drum.
- Water or suds seep from the door area (front-loaders) or over the rim (some top-load situations).
- The washer seems to add extra rinse cycles or struggles to drain.
Fix:
- Pause the cycle and let suds settle. If needed, run a rinse and spin with no detergent.
- Switch to HE detergent if your washer calls for it.
- Use less. Most people need far less detergent than the cap suggests, especially in soft water.
- Clean detergent buildup from the dispenser drawer and the door gasket fold.
Quick dose guideline: For many concentrated HE liquid detergents in average to soft water, start around 1 to 2 tablespoons for a normal load and adjust from there. If you have hard water, use powder, or wash heavily soiled loads, follow the detergent label and tweak based on results. Your clothes should come out clean, not perfumed into submission.
6) Water inlet valve issues
The water inlet valve controls water entering the washer. If it sticks open or fails internally, you can get drips, constant slow filling, or a mystery puddle hours after laundry is done.
Clues it is the inlet valve:
- Water appears even when the washer is not running.
- The tub slowly fills by itself.
- Moisture is around the back top area where the supply hoses connect.
Fix:
- Turn off the wall valves. If the leaking stops, you have confirmed the leak is related to the incoming water supply (hose, connection, or inlet valve).
- Check and clean the small inlet screens (some models have removable screens where the hoses connect). Mineral buildup can prevent proper sealing.
- If the valve still seeps, replace the inlet valve assembly. It is typically accessed from the back panel or top panel, and it is usually held in with a couple of screws and wire connectors.
Take photos before unplugging wires so you put the connectors back in the right locations.
Other causes to check
- Detergent drawer or dispenser housing leak: Often shows up during fill as water running down the front.
- Dispenser-to-tub hose leak (common on some front-loaders): Water can drip inside the cabinet during fill.
- Pressure switch or air hose issues (less common): Can cause overfilling and overflow.
- Standpipe overflow: Not a washer leak, but it leaves the same puddle. Check for a slow drain or partial clog.
By location
- Front of a front-loader: door gasket, oversudsing, pump filter.
- Back of washer: supply hoses, inlet valve, drain hose routing, wall valve seep.
- Bottom front area: pump filter, pump housing, internal hose clamp or hose.
- Only during spin: door gasket (front-load), drain system issues, or tub or seal components.
- Near the drain pipe: standpipe overflow or drain hose problems.
Tools and parts
- Flashlight
- Towels and a shallow pan
- Slip-joint pliers
- Screwdriver set
- Replacement rubber hose washers or new fill hoses
- HE detergent (if applicable)
After any fix
Once you make a change, run a short cycle while you watch the likely leak area with a flashlight. I like a quick rinse and spin so you see both fill and drain without committing to a full load.
When to call a pro
I am all for DIY, but there are a few times it is smart to tap out:
- You suspect a tub seal failure or a cracked outer tub.
- Water has reached electrical components or you smell burning.
- The machine is under warranty. DIY work can complicate coverage.
- You cannot identify the source after checking hoses, gasket, filter, detergent use, and the standpipe.
My checklist
I have personally done the classic move of tightening a hose connection, feeling proud, and then realizing I did not check the rubber washer inside the coupling. Here is the checklist I now follow every time:
- Confirm the leak timing: fill, wash, drain, spin, or when off.
- Check hoses first. They are the simplest and cheapest fix.
- Front-loader: inspect and clean the gasket and pump filter.
- Watch for oversudsing. Use less detergent than you think you need, and adjust for your water hardness.
- If the washer fills when off, suspect the inlet valve.
- If the puddle is by the drain, rule out standpipe overflow.
If you are still unsure, write down where the puddle shows up and when it leaks before you call a technician. Those two details usually save time (and money).
About Marcus Vance
Content Creator @ Grit & Home
Marcus Vance is a lifelong DIY enthusiast and self-taught home renovator who has spent the last decade transforming a dilapidated 1970s ranch into his family's dream home. He specializes in budget-friendly carpentry, room-by-room renovations, and demystifying power tools for beginners. Through his writing, Marcus shares practical tutorials and hard-learned lessons to help homeowners tackle their own projects with confidence.