
If your washing machine won’t fill with water, it usually means one simple thing: water is not getting through the chain from the wall supply to the washer tub. The good news is that most “no fill” and “fills too slowly” problems come down to a clogged screen, a closed valve, or a fussy safety switch, not some mysterious electronic failure.
I’ll walk you through five fixes in the same order I troubleshoot my own machines: cheapest and easiest first, parts replacement last. I will also flag where top-loaders and front-loaders differ so you do not waste an afternoon chasing the wrong thing.
Before you start: quick safety and a 60-second check
- Unplug the washer before removing panels or touching wiring.
- Turn off both water supply valves before disconnecting hoses.
- Keep a bucket, old towels, and a small brush nearby.
60-second check
- Make sure the washer is not set to Delay Start or a Pause state.
- Confirm the cycle actually calls for water right away. Some cycles do a short drain or tumble first, especially on front-loaders.
- If your washer shows an error code (like IE, NF, FH, F8 E1), it often points to water inlet problems. Codes are brand-specific, so check your manual for the exact meaning.
Fix #1: Verify the wall supply valves are fully open
This sounds too obvious, but it is the number one “facepalm” fix. A valve can be bumped while cleaning, or turned off during a prior repair and never reopened.
What to do
- Locate the hot and cold shutoff valves behind the washer.
- Turn each valve counterclockwise until it stops (common on multi-turn valves). Lever-style valves should be parallel to the pipe when open.
- Try a fill again.
If it fills slowly
Partially open valves can cause slow fills and “water not detected” errors. Also check your home’s water pressure at a nearby sink. If the whole house pressure is low, the washer is just the messenger.
One more real-world note: older valves can fail internally even when “open.” If you have strong pressure elsewhere but the washer valves seem weak, that may be your culprit.

Fix #2: Check inlet hoses for kinks, clogs, and frozen lines
Water cannot flow if the hose is kinked behind the washer, pinched by the machine, or clogged with mineral buildup. In cold climates, hoses on an exterior wall can even freeze in winter.
What to do
- Pull the washer forward a bit and look for sharp bends in the hoses.
- Make sure the hoses are not crushed against the wall.
- If your laundry is on a cold exterior wall and it is freezing outside, check for a frozen pipe (other nearby faucets may also be weak).
Pro tip from my own mistakes
I once “fixed” a slow-fill problem by replacing a valve, only to realize I had shoved the washer back too hard and kinked the cold line. Give the hoses a little breathing room when you push the machine back.
Two sneaky hose issues
- Flood-safe hoses: Some hoses have an auto-shutoff that can trip and restrict flow. If you have these and the washer suddenly started filling slowly, try swapping to standard braided hoses (or reset per the hose instructions).
- Hose washer screens: Some hoses have small screen washers built into one or both ends. Those can clog too.
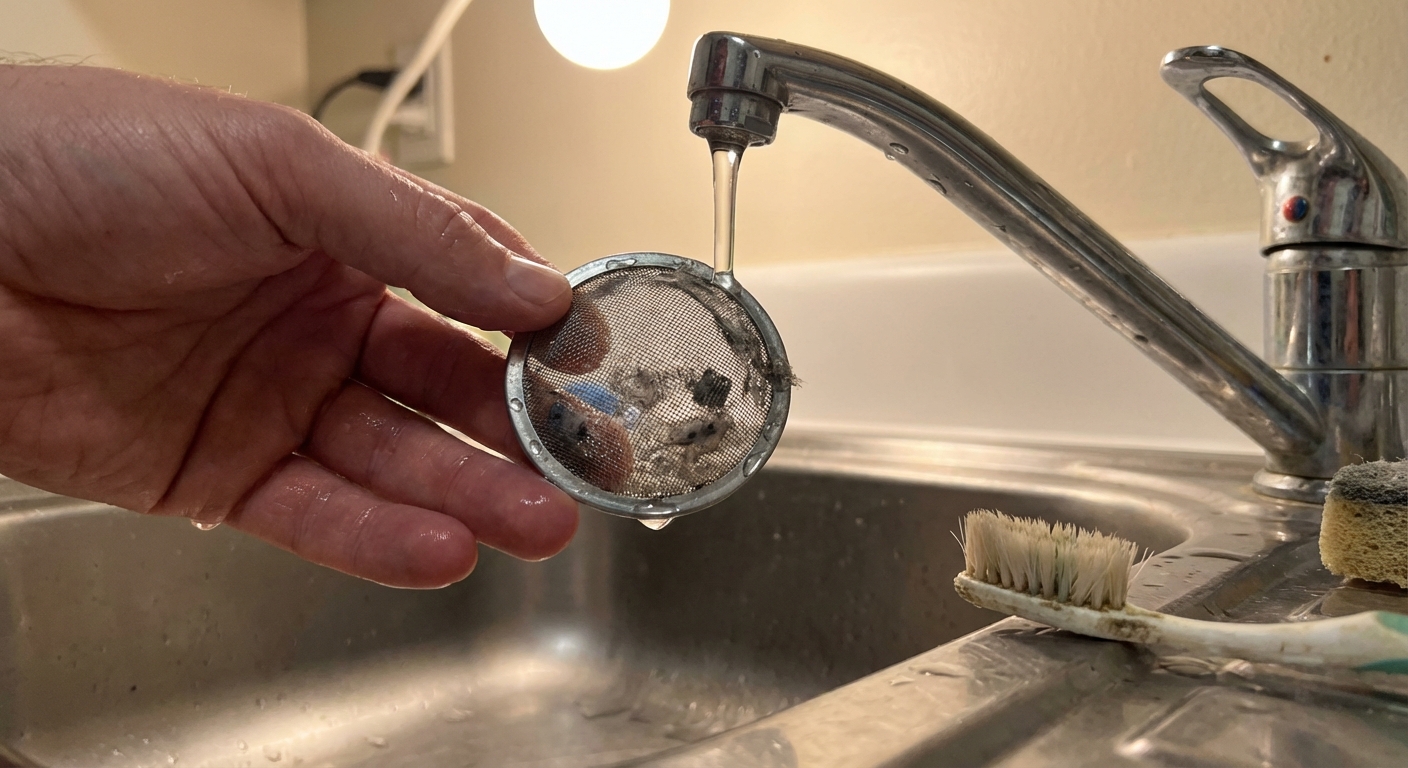
Fix #3: Clean the inlet screens (the most common real culprit)
Most washers have tiny mesh screens right where the hoses connect to the machine. They catch grit, rust flakes, and mineral scale. Over time, those screens clog and the washer either fills very slowly or not at all.
Quick reality check: On some models the screens are not removable, or they are integrated into the inlet valve or the hose washers. If a screen does not want to come out, do not force it. Clean it gently in place or follow the service manual for your model.
Tools and supplies
- Towels and a shallow pan
- Pliers (optional)
- Old toothbrush
- White vinegar (helpful for hard water scale)
Step-by-step
- Unplug the washer.
- Turn off both supply valves.
- Unscrew the hot and cold hoses from the back of the washer. Expect some water to spill.
- Look into the washer’s inlet ports for the small screen filters.
- Gently pull the screens out (some pop out with a small pick, others stay put and can be cleaned in place).
- Scrub with a toothbrush. If they are crusty, soak in vinegar for 15 to 30 minutes, then rinse.
- Also check the wall-valve end of the hoses for screen washers. If you see a little mesh screen in the hose washer, clean or replace it.
- Reinstall screens, reconnect hoses, turn water on, and test.
Top-load vs front-load note
Both styles usually have screens at the back inlet connections. Some front-loaders also have additional filtration or flow restrictions in the inlet assembly, but start with the simple screens first.
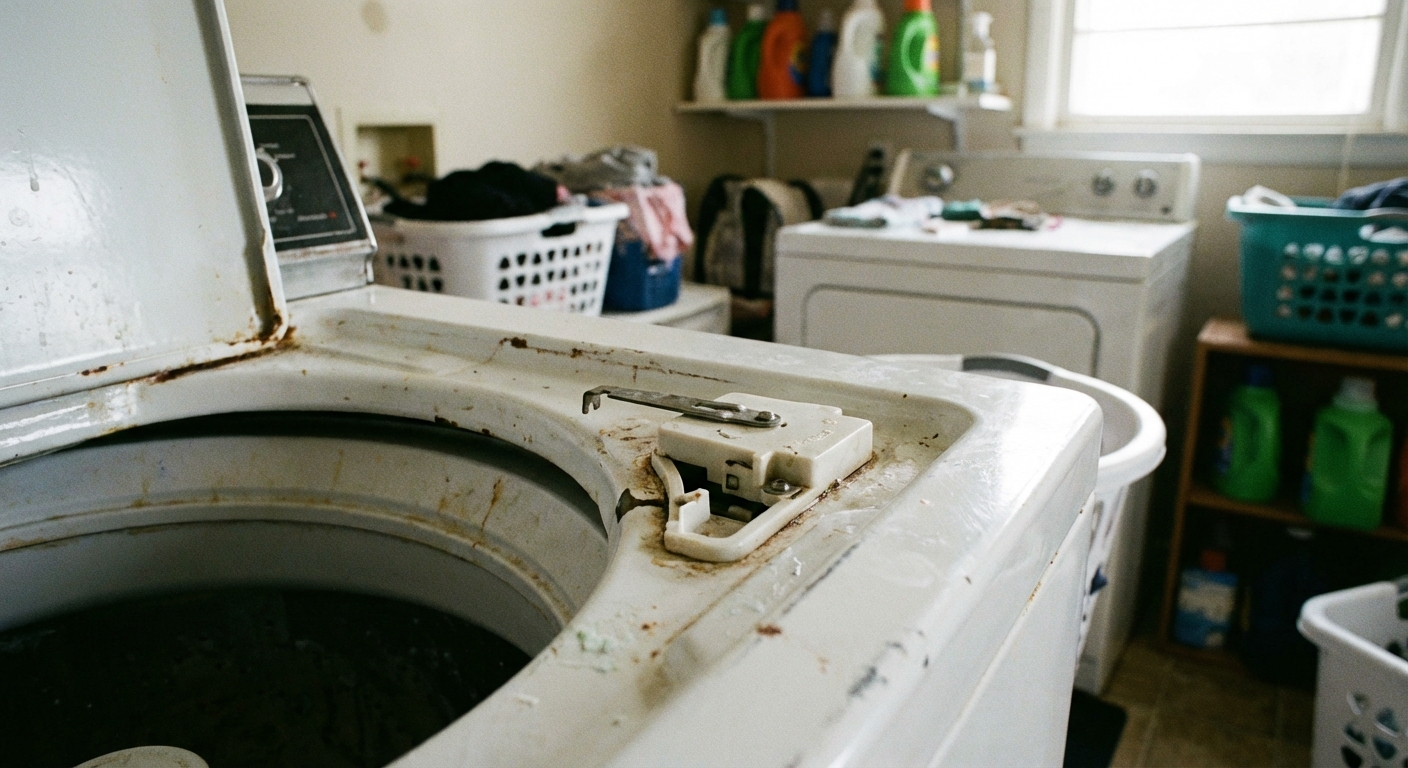
Fix #4: Check the lid switch (top-load) or door lock (front-load)
Washers are built to avoid filling when they do not sense a secure lid or locked door. If that safety switch fails, the machine may act dead during the fill step or start and then stop.
Signs this is your problem
- The washer won’t start filling but may hum or click.
- The washer fills only when you press down on the lid (top-load) or push the door inward (front-load).
- You see a door/lock indicator blinking on a front-loader.
Top-load: lid switch quick checks
- Open and close the lid firmly. Listen for a distinct click near the switch area.
- Inspect the lid strike (the little plastic tab that presses the switch). If it is broken, the washer never gets the “lid closed” signal.
- If your model has a lid lock, check that nothing is blocking it and that the lock engages.
Front-load: door lock checks
- Inspect the door gasket for a sock or buildup preventing a full seal.
- Close the door and confirm the machine indicates Locked before it should fill.
Repair approach: Broken lid strikes are often cheap and easy. Failed lid switches or a front-loader door lock assembly are usually a parts replacement job. If you are comfortable with a screwdriver and taking a few photos before unplugging connectors, it is very doable.
Fix #5: Check the water level pressure switch and hose (especially on top-loaders)
The washer needs to know how full it is. Many machines use a pressure switch connected to a small rubber or plastic air hose that senses water level. If that hose is cracked, loose, or clogged, the washer can misread the water level and you may see underfilling, overfilling, or a fill that starts then stops with an error.
Common symptoms
- Washer fills briefly, then stops and drains.
- Washer may throw a “level” or “pressure” related code.
- Inconsistent fill levels from load to load.
What to check
- Unplug the washer.
- Access the control area where the pressure switch lives (often behind the control panel on a top-loader, varies by model).
- Find the small hose running from the tub area up to the switch.
- Make sure it is securely attached, not kinked, and not cracked.
- Important safety warning: Never blow into the pressure switch itself. You can rupture the internal diaphragm.
- If you want to do the quick “is it blocked?” check, disconnect the hose from the pressure switch and gently blow through the hose only, towards the tub. Use light pressure only. It should feel clear. If it is blocked, clear it or replace the hose.
- Reconnect the hose firmly. A loose fit or tiny air leak can cause weird fill behavior.
Note: Some modern front-loaders use electronic pressure sensors, but the same idea applies. A bad sensor or a clogged air trap can mimic a fill problem.
Quick check: filling and draining at the same time (siphoning)
If it seems like the washer “won’t fill,” but you hear water briefly and the tub never builds level, it may be filling and immediately draining. This is usually a drain hose installation problem, not an inlet problem.
What to look for
- The drain hose is shoved too far down the standpipe.
- The standpipe is too short for the washer (check your manual, but many setups need roughly 39 to 96 inches of standpipe height).
- The drain connection is sealed airtight (it should not be an airtight seal).
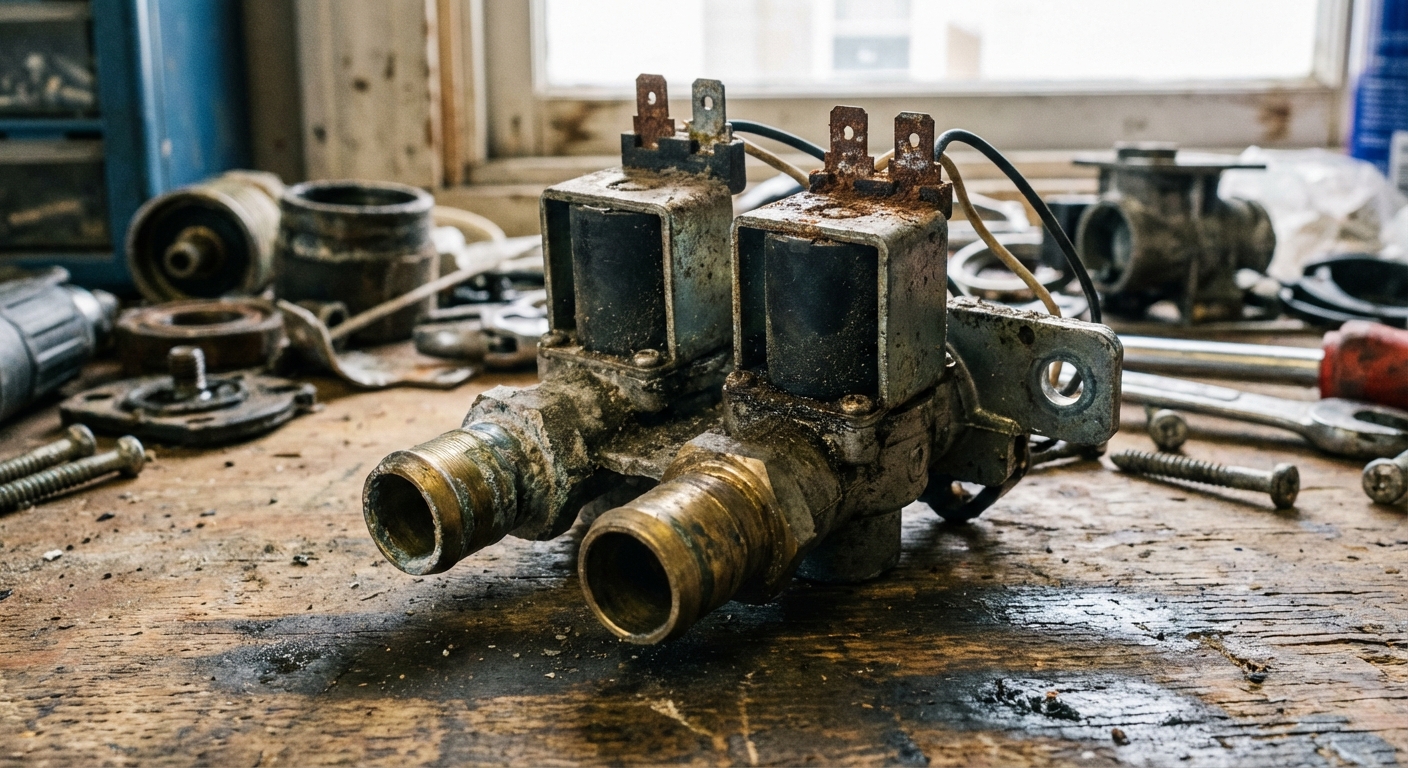
If none of the above worked: the inlet valve may have failed
The water inlet valve is the electrically controlled part that opens to let water into the machine. If it fails mechanically (stuck closed) or electrically (burned solenoid), the washer will not fill even though you have good water supply.
Clues pointing to a bad inlet valve
- You have strong water flow at the wall, hoses are fine, screens are clean, but the washer still will not fill.
- You hear a hum or click when it should fill, but no water enters.
- Error codes repeatedly indicate no water detected after multiple checks (again, codes vary by brand).
Basic DIY path
- Unplug washer and shut off water.
- Remove the rear access panel (varies by model).
- Take a photo of wire connectors and hose routing.
- Replace with the correct valve for your model number.
If you own a multimeter and are comfortable using it, you can check the inlet valve coil resistance and compare it to the spec in the service manual for your model. If that sentence makes your shoulders tense up, skip the meter and replace the valve only after you have done the five fixes above.
Top-load vs front-load: What is different?
- Top-loaders commonly fail to fill due to a lid switch or a pressure switch hose issue.
- Front-loaders more commonly refuse to fill when the door does not lock or the control detects a fill time problem.
- Both styles are equally prone to clogged inlet screens and failed inlet valves.
When to stop and call for service
I am all for DIY, but there are a few cases where I personally step back:
- You find burned wires, a melted connector, or a strong electrical smell.
- The washer is under warranty and opening panels could affect coverage.
- You have repeated fill errors plus other strange behavior (random resets, flickering display), which can point to a control board issue.
Quick checklist (print-friendly)
- Open both wall valves fully
- Unkink and inspect inlet hoses (including flood-safe hose issues)
- Clean inlet screens at washer connections and check hose-end screen washers
- Confirm lid switch (top-load) or door lock assembly (front-load) is working
- Check pressure switch hose and connections (do not blow into the switch)
- Check for siphoning if it fills then immediately drains
- Replace inlet valve if all else checks out
If you tell me your washer brand, model number, and whether it is top-load or front-load, I can help you narrow down which of these fixes is most likely and what panel to remove first.
About Marcus Vance
Content Creator @ Grit & Home
Marcus Vance is a lifelong DIY enthusiast and self-taught home renovator who has spent the last decade transforming a dilapidated 1970s ranch into his family's dream home. He specializes in budget-friendly carpentry, room-by-room renovations, and demystifying power tools for beginners. Through his writing, Marcus shares practical tutorials and hard-learned lessons to help homeowners tackle their own projects with confidence.