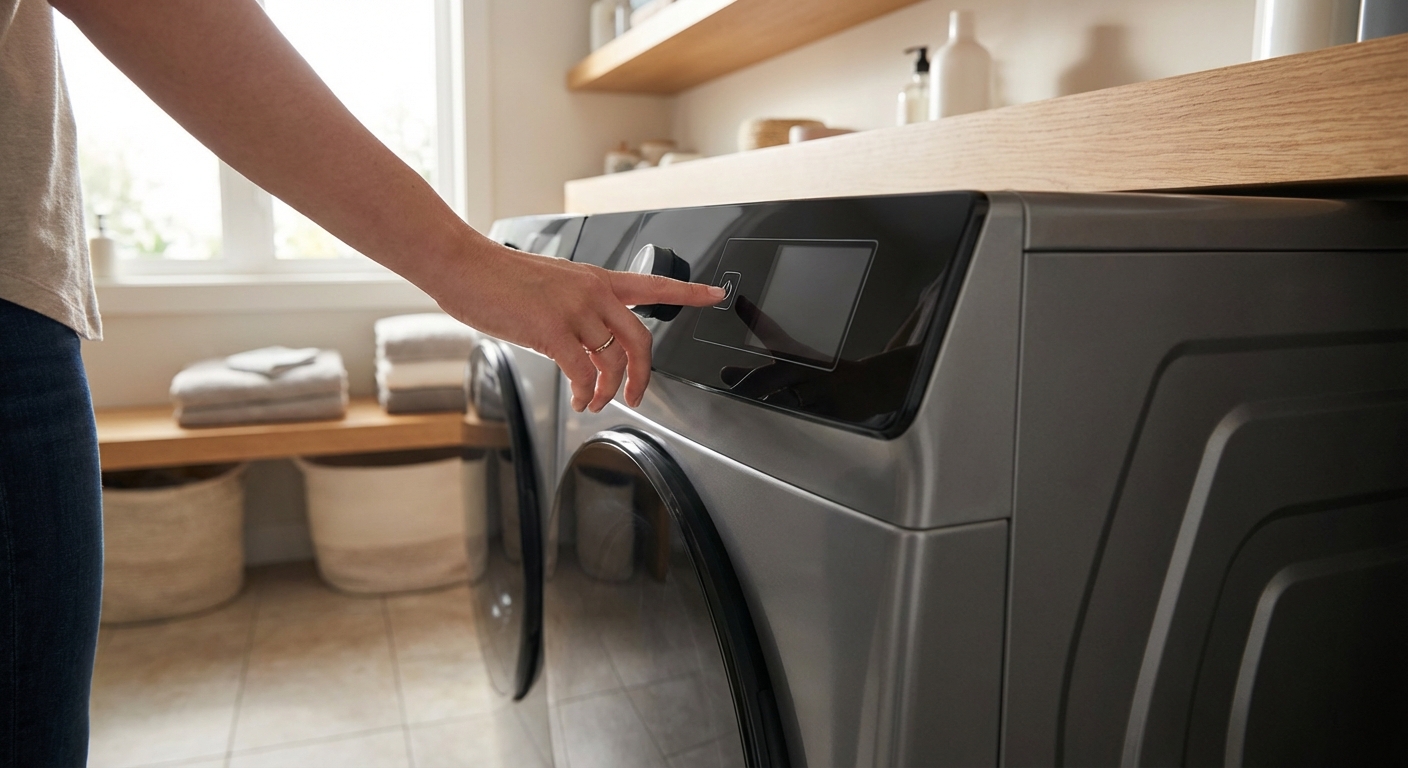
When a washing machine won’t turn on, it feels extra frustrating because you can’t even get to cycle, drain, or spin troubleshooting. The good news is that a totally dead washer usually comes down to a short list of power issues and safety interlocks.
I like to troubleshoot these in order, starting with the stuff that costs $0 and takes five minutes. We will move from simple power checks to the more involved parts like switches, fuses, and the control board.
Safety first
- Unplug the washer before removing any panels or touching wiring.
- If you smell burning plastic, see scorch marks, or the outlet is hot, stop and call an electrician.
- If your washer is hardwired or on a dedicated circuit you are not comfortable with, it is okay to tap out and bring in a pro.
- Do not bypass lid or door switches by jumping wires. They are safety devices, and bypassing them can cause injury or make the machine behave unpredictably.
Define “won’t turn on”
Different symptoms point to different causes. Choose the closest match:
- Completely dead: no display, no beeps, no lights.
- Has some lights but Start does nothing.
- Powers on but instantly shuts off.
This guide focuses on the first one, a washer that appears to have zero power. A couple steps also help with the other two because door and lid safety switches can sometimes make a washer look “dead” (or at least totally unresponsive) depending on the model.
Fix #1: Check breaker, GFCI, and outlet
This is one of the most common causes, especially after a storm, a power flicker, or running multiple appliances on the same circuit.
What to do
- Reset the breaker: Find your laundry circuit and flip it fully OFF, then back ON. A breaker can look “on” even when it is tripped.
- Check for a tripped GFCI: Some laundry rooms, garages, and basements have GFCI outlets or GFCI breakers. Press RESET.
- Test the outlet: Plug in something simple like a lamp (better than some phone chargers, which can be finicky). An outlet tester works too.

What the result tells you
- If the outlet is dead, the washer is probably fine. Address the circuit, the GFCI, or call an electrician.
- If the outlet works but the washer is still dead, move to Fix #2.
Fix #2: Remove smart plugs and adapters
If your washer is plugged into a smart plug, energy monitor, surge strip, extension cord, or any adapter, take it out of the equation. These add-on devices can fail or limit power in a way that makes a washer look totally dead.
What to do
- Plug the washer directly into the wall outlet for testing.
- If it powers up now, replace the smart plug or adapter and keep the washer direct-to-wall (recommended by many manufacturers).
Fix #3: Do a hard reset
After a power surge or glitch, some washers need a real reset before they will wake back up.
What to do
- Unplug the washer for 1 to 5 minutes.
- Plug it back in and try Power again.
If your model has a specific reset procedure (some do), look it up using your model number. But the unplug-and-wait reset is the best low-effort first move.
Fix #4: Check the plug and power cord
It sounds basic, but I have personally chased “mystery failures” that were just a plug that wiggled loose when the washer walked forward a bit.
What to check
- Push the plug in firmly. If it feels loose, try another known-good outlet temporarily (one that is properly grounded).
- Inspect the cord from the plug to where it enters the washer: look for cuts, flattened spots, bite marks (pets), or melted areas.
- Sniff test: a sharp electrical smell near the plug or cord is a red flag.
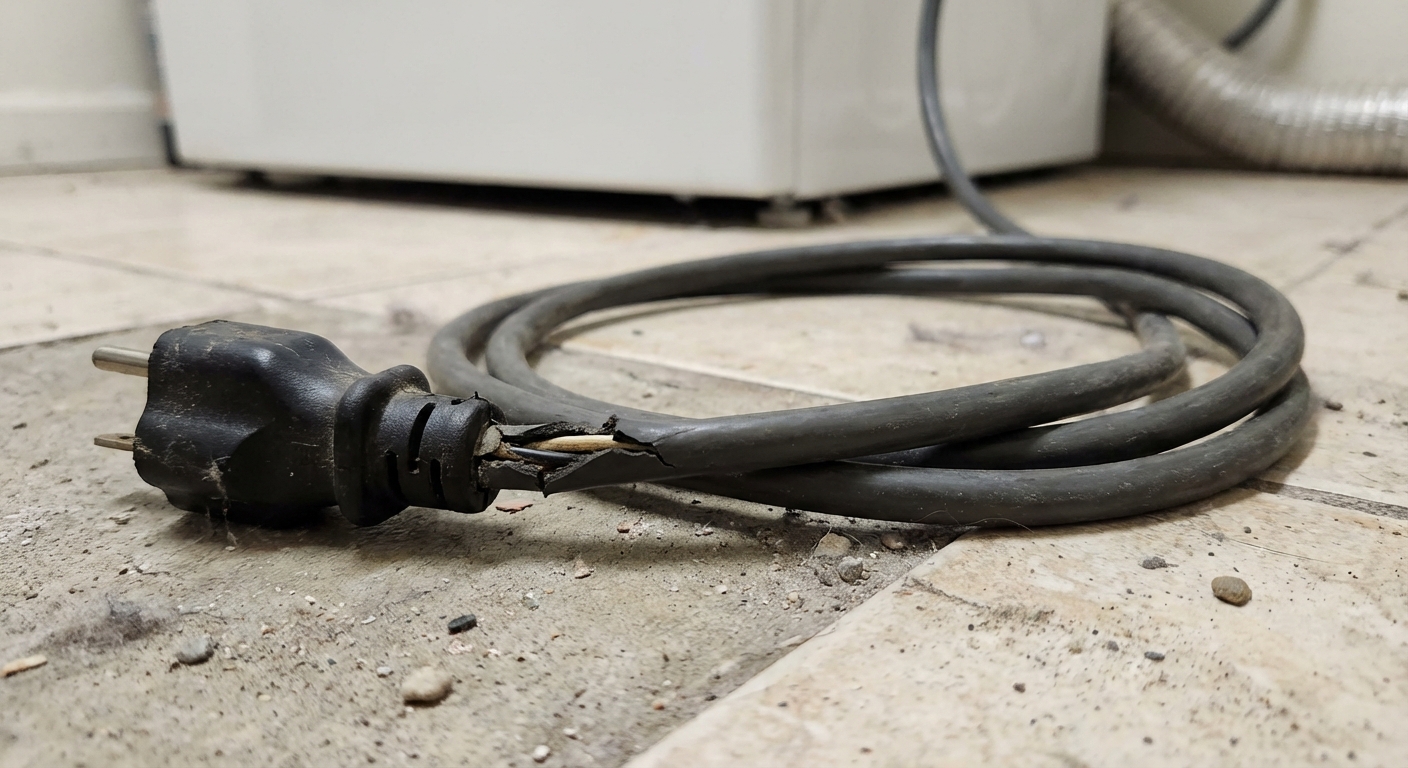
If you find damage
Do not tape it and keep going. Replace the cord or have it replaced. Some washers have a removable cord, while others are fixed internally and require opening the cabinet and swapping the cord set. If you are not comfortable working around internal wiring, this is a good stopping point for a service call.
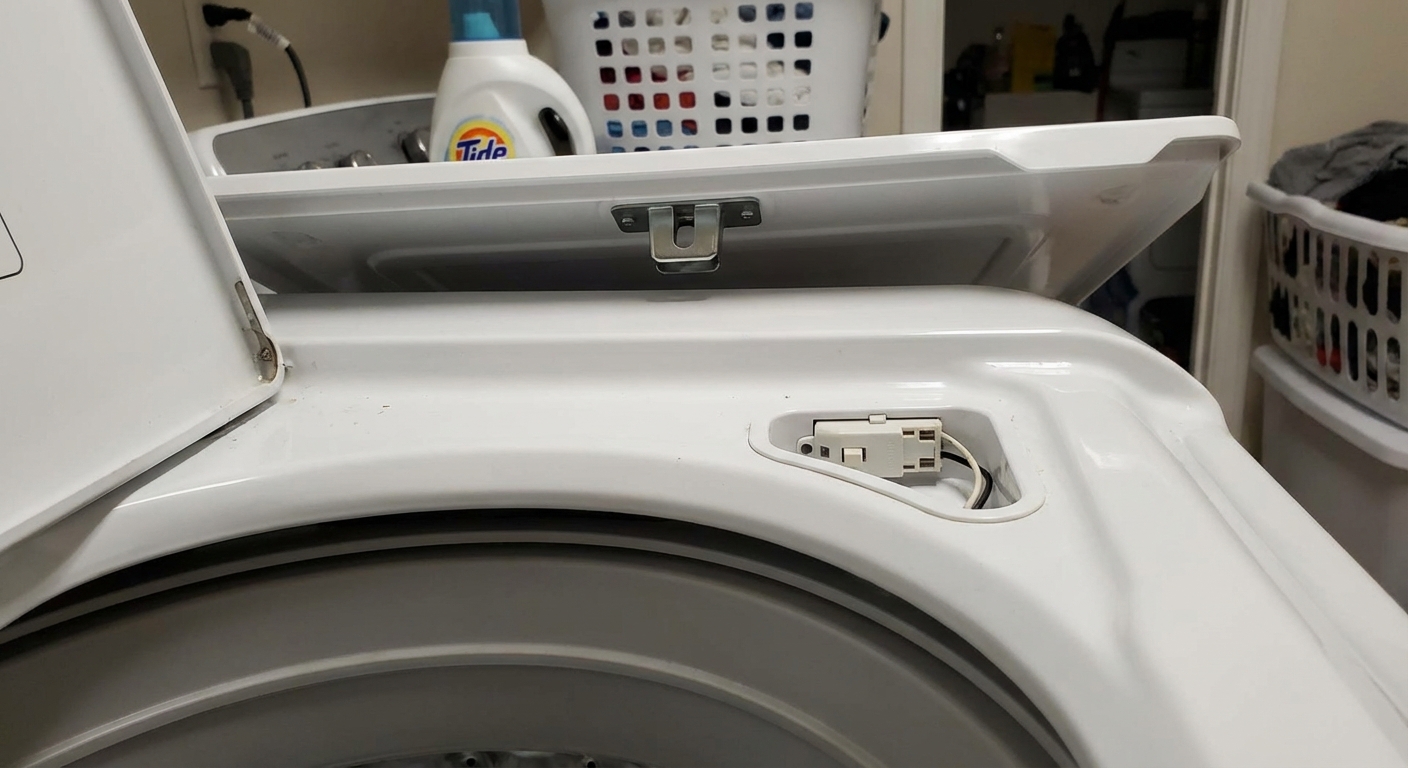
Fix #5: Check the line fuse or noise filter
If the outlet is good and the cord looks fine, a very common “hidden” failure is a line fuse or noise filter (also called an EMI filter). Many modern washers have one right where the power cord enters the cabinet. If there is a surge, that fuse can blow and the washer will look completely dead because power never makes it to the controls.
What to know first
- Not every washer has a serviceable fuse or filter, but many do (especially front-loaders).
- Filters can hold charge briefly. If you are not comfortable working around electrical components, stop here and call a technician.
Basic check (if equipped)
- Unplug the washer.
- Access the area where the cord enters the machine (often a rear panel).
- Look for a small box or module in line with the cord (the filter), or an inline fuse holder.
- Inspect for obvious damage: melted plastic, scorch marks, or a burned smell.
- Multimeter test: If you know how, check continuity through the fuse. No continuity usually means it is blown.
Thrifty tip: If you find a blown fuse, treat it as a clue, not just a part to swap. Fuses usually blow for a reason (surge, short, moisture). If it blows again quickly, stop and get a diagnosis.
Fix #6: Top-load lid switch or lock
Most top-load washers have a lid switch (or lid lock) that prevents the machine from running with the lid open. If that switch fails, many models will not start, and a few can appear completely unresponsive.
Common signs
- The washer will not start even though the outlet is good.
- You do not hear a click when closing the lid (on models that click).
- The lid feels “closed” physically, but the machine does not recognize it.
What to do
- Open and close the lid firmly 2 to 3 times. Listen for a clear click near the lid hinge area or where the lid meets the cabinet.
- Look for a broken lid strike: Many washers use a small plastic tab on the lid that presses the switch. If that tab is snapped, the switch never gets engaged.
- Check for misalignment: If the lid is sitting crooked, the strike might not hit the switch squarely.
Next level test (multimeter): If you are comfortable, you can unplug the washer, access the lid switch connector, and check continuity with a multimeter while pressing the switch. No continuity when pressed usually means the switch is bad.
My thrifty tip: Before ordering parts, look up your model number and confirm whether it uses a simple lid switch or a lid lock assembly. They are different parts and the lid lock costs more.
Fix #7: Front-load door latch
Front-load washers rely on a door lock mechanism. If the machine cannot confirm the door is closed and locked, it often will not start. On some models, you may still see lights. On others, it can feel like the machine is not powering on because nothing happens when you press Start.
Quick checks
- Close the door firmly until you feel it catch. Clothes caught in the gasket can prevent a full close.
- Inspect the strike (the plastic or metal hook on the door). If it is cracked or loose, the latch cannot engage.
- Check the hinge: a sagging door can miss the latch just enough to cause failure.
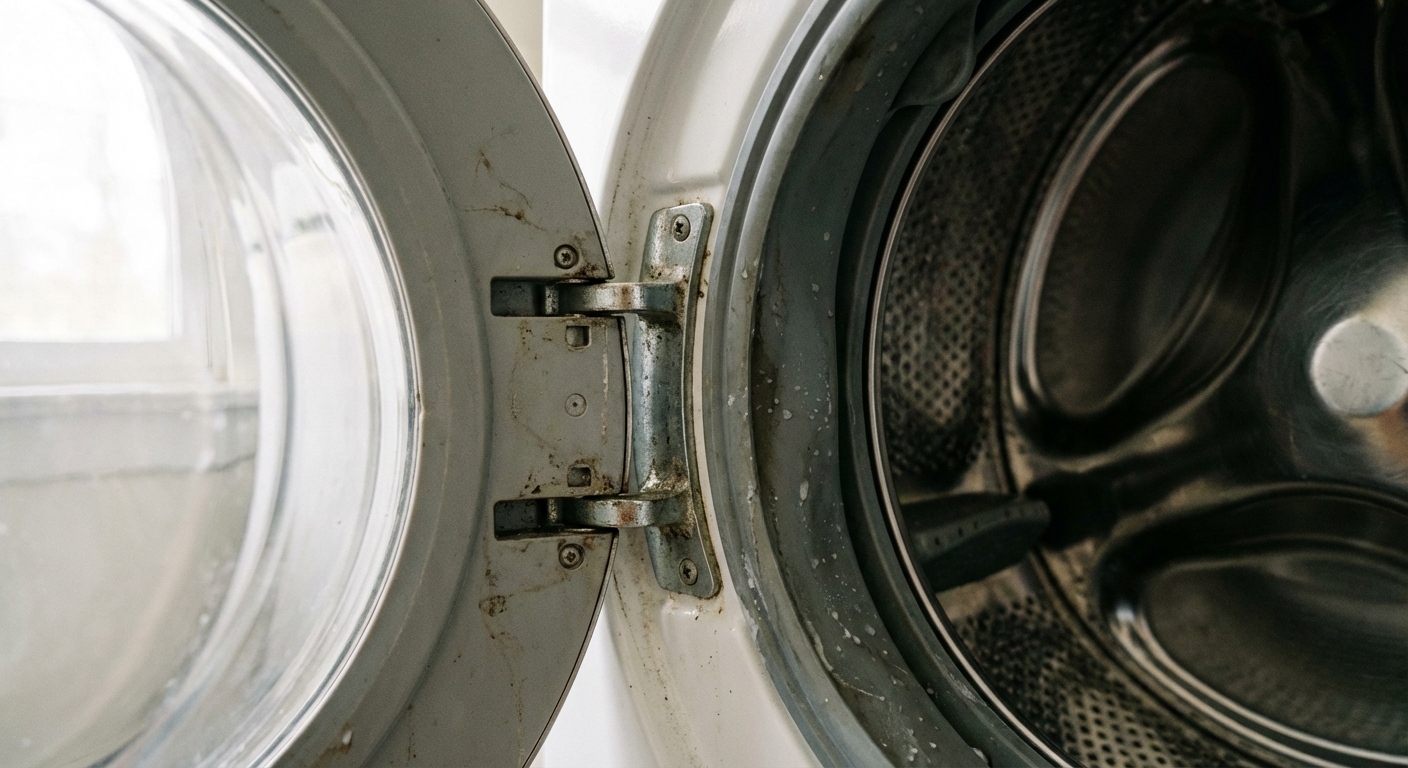
If it seems like a latch issue
If the door strike is broken, that is usually a simple replacement with a screwdriver. If the latch assembly inside the cabinet is faulty, replacement is still doable for many homeowners, but it requires removing the spring clamp around the door boot and peeling the gasket back to access the latch screws and wiring.
If you have a model that displays an error code (often related to “door” or “lock”), search your model number plus the code. It can confirm you are on the right track.
Fix #8: Suspect the control board
If your outlet has power, you have removed any adapters, the cord is intact, and the safety locks check out, the next likely culprit is the main control board or user interface board (depending on the washer design).
This is the step where I slow down and take photos before unplugging anything. Control boards are expensive and misdiagnosing them gets pricey fast.
Quick reality check: Intermittent power and random shutoffs can also come from a loose plug, a failing outlet, a failing noise filter, or a wiring harness or connector issue. If symptoms are on-and-off, do a careful connector check before buying a board.
Signs a board may have failed
- No lights or response even with confirmed outlet power.
- Intermittent power, random shutoffs, or the washer comes on only sometimes.
- Visible damage on the board: dark burn spots, swollen capacitors, or a burned smell.
Basic inspection steps
- Unplug the washer.
- Remove the access panel for your model (often the rear top panel or console area).
- Look for loose connectors going to the control board and the UI board. Reseat them one at a time, firmly, without forcing.
- Check for moisture trails or corrosion. Laundry rooms are humid, and a slow leak can drip into places it should not.
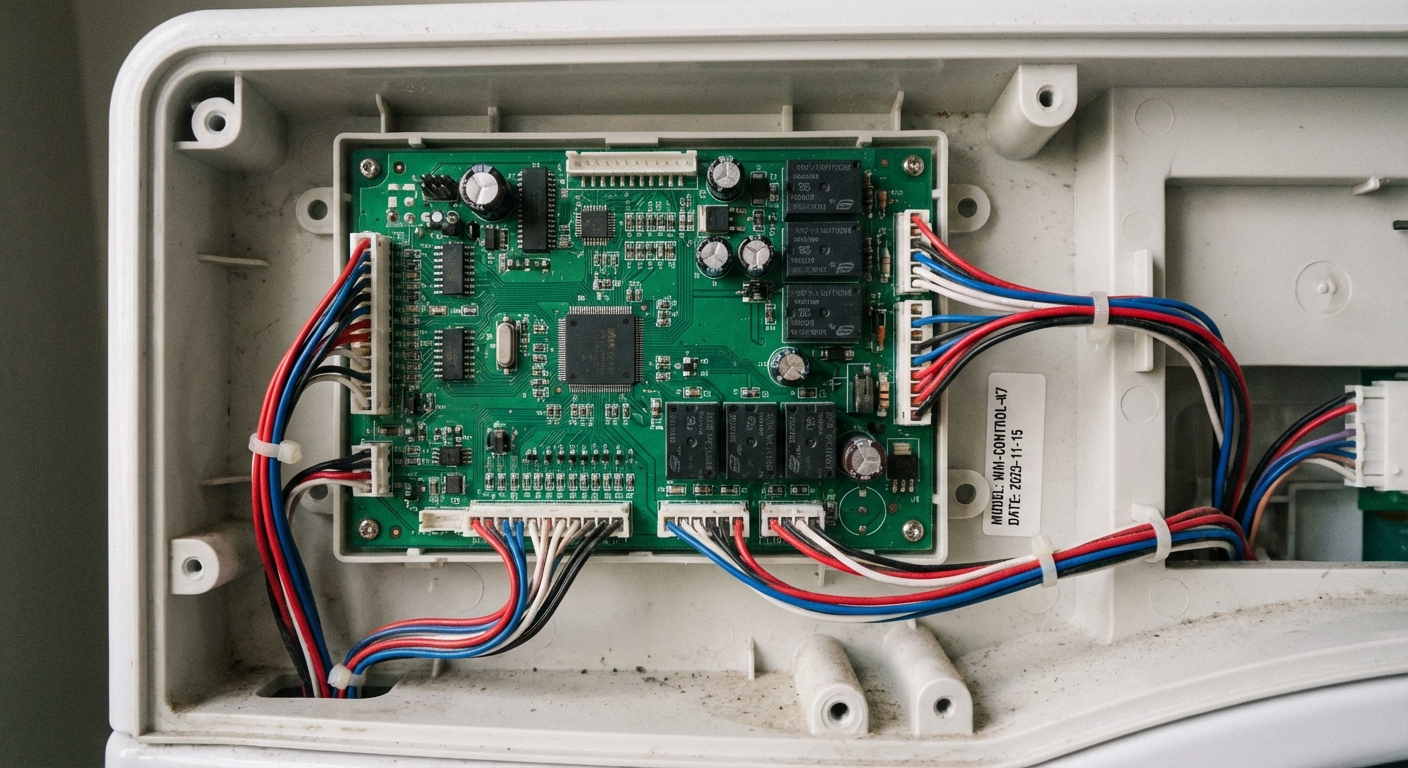
Replacement reality check: If the board is truly bad, replacing it can be straightforward, but the part cost can be significant. For older machines, compare the board price to the cost of a reliable replacement washer. Sometimes the thrifty win is not the repair, even though it hurts to admit.
Quick diagnostic order
- Breaker, GFCI, outlet test
- Remove smart plugs, adapters, and power strips
- Hard reset (unplug 1 to 5 minutes)
- Plug and power cord inspection
- Line fuse or noise filter (if equipped)
- Top-load: lid switch, lid lock, and lid strike
- Front-load: door strike, latch, hinge alignment
- Control board and UI connectors, then board failure
If it powers on then shuts off
If your washer lights up briefly and then dies, focus on:
- A loose plug or failing outlet
- A failing noise filter or internal fuse holder connection
- A loose wiring harness connector at the control board or UI
It can still be a control board, but quick power drops are often a connection or line-filter issue first.
When to call a pro
Call a technician or electrician if:
- The breaker trips immediately after reset.
- The outlet shows signs of heat damage or sparking.
- You find melted wiring inside the washer.
- You suspect the line filter or internal fuse but do not want to work around electrical components.
- The control board replacement cost is high and you want a confident diagnosis before buying parts.
My last tip
Write down your brand and full model number before you do anything else. It is usually on a sticker under the lid (top-load) or around the door opening (front-load). That one detail makes every next step faster, from finding the right panel removal method to ordering the correct latch, switch, or filter.
About Marcus Vance
Content Creator @ Grit & Home
Marcus Vance is a lifelong DIY enthusiast and self-taught home renovator who has spent the last decade transforming a dilapidated 1970s ranch into his family's dream home. He specializes in budget-friendly carpentry, room-by-room renovations, and demystifying power tools for beginners. Through his writing, Marcus shares practical tutorials and hard-learned lessons to help homeowners tackle their own projects with confidence.