If your gas water heater pilot light won’t stay lit, you’re not alone. On most tanks, the pilot is the little flame that proves the burner is safe to run. When it goes out, the water heater shuts down on purpose. That safety behavior is annoying, but it’s also the reason you do not want to “force” a fix or bypass anything.
I’ve dealt with this more than once on my own 1970s-era setup. The good news is that most pilot problems come down to a short list of culprits you can check in a calm, organized way: lighting procedure, airflow and drafts, lint and dust buildup, a weak or misdirected pilot flame, a failing thermocouple (or thermopile on some models), connector issues, gas supply hiccups, or a failing gas control valve.
Gas safety first
Before we touch anything, let’s keep you and your home safe. Gas appliances are not the place for guesswork.
- If you smell gas (rotten egg odor), do not light anything or operate anything that could spark. Leave the area, ventilate if you can do it safely, shut off the gas supply if it is accessible, and call your gas utility or a licensed plumber.
- If the burner chamber is sooty, melted, or heavily rusted, stop and call a pro. Soot can indicate improper combustion or venting problems.
- If you have a sealed combustion or FVIR-style unit (common on many post-2003 heaters), follow your manufacturer manual closely. Some “simple” cleaning steps are different on these designs.
- Keep a fire extinguisher nearby and make sure the area is clear of paint cans, cardboard, and rags.
Tip: If you have a carbon monoxide detector in or near the utility area, confirm it has fresh batteries and is functioning before troubleshooting.
Quick check: what ignition do you have?
This article is mainly for standing pilot gas water heaters, where a pilot flame stays on all the time. If your unit uses electronic ignition (no constant flame), the troubleshooting is different.
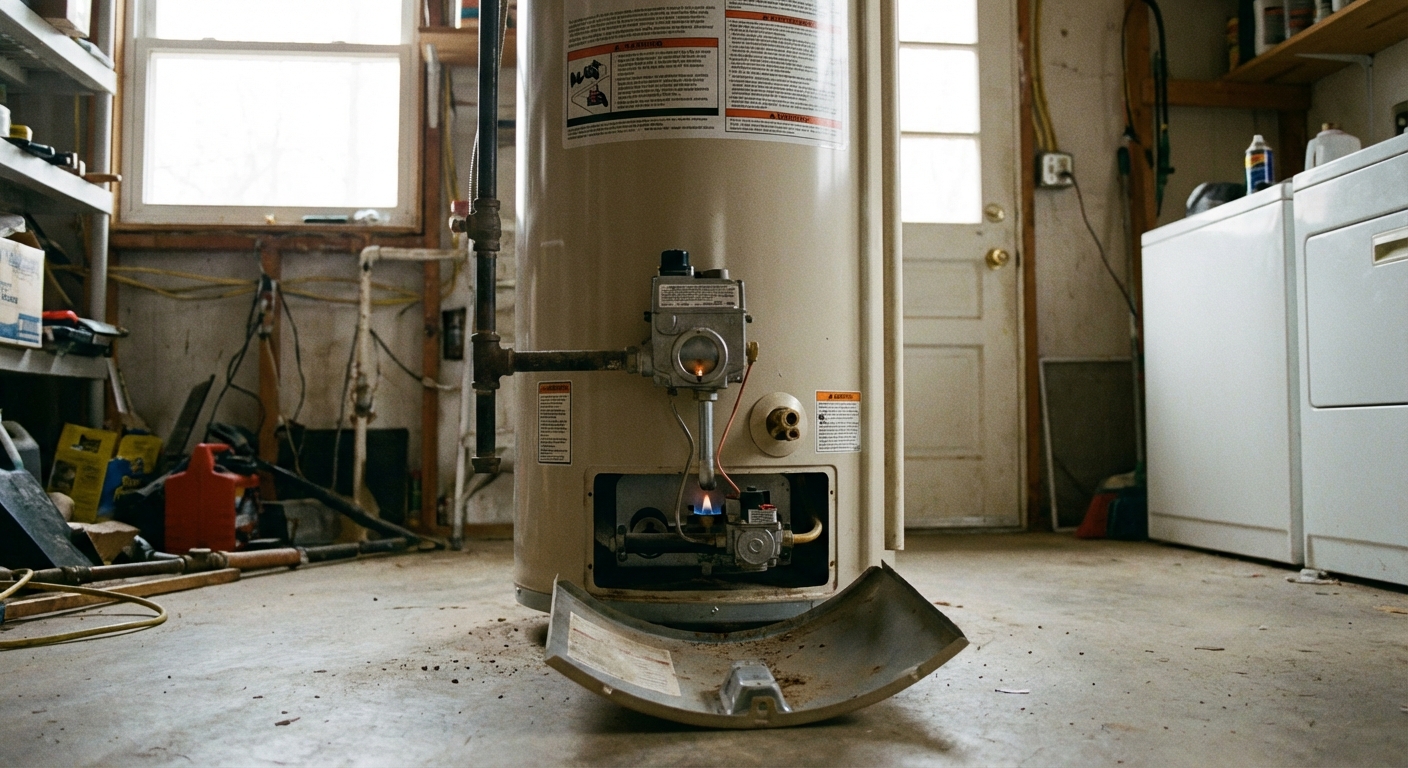
- Standing pilot: You can usually see the flame through a small sight glass, and the lighting instructions mention holding the control knob down for 30 to 60 seconds.
- Electronic ignition: Often has a status light and a start-up sequence. Many do not require holding a knob down, but some do. Always follow the label and manual for your exact model.
If you are unsure, look for a model label on the tank and pull up the manual. It is worth the two minutes.
Tools and supplies
- Flashlight or headlamp
- Small screwdriver (for access panels)
- Adjustable wrench or open-end wrench (often 3/8 in and 7/16 in fittings)
- Fine steel wool or a green scrub pad (only if your manufacturer allows cleaning)
- Compressed air (optional) or a soft brush
- Soapy water in a spray bottle (dish soap and water)
- Replacement thermocouple (or thermopile, if your model uses one)
Note: Some manufacturers prefer replacement over cleaning a thermocouple. If your manual discourages abrasion, skip straight to replacement.
How the safety system works
Here is the “why” behind the most common failure. The pilot flame heats a sensor called a thermocouple (or on some units, a thermopile). When it gets hot, it generates a tiny electrical signal that tells the gas control valve, “Yes, we have flame, it is safe to keep gas flowing.”
If the pilot goes out, or if the sensor cannot prove it is hot enough, the gas valve shuts off gas to the pilot and burner. So when your pilot will light but will not stay lit, you are usually chasing one of two issues:
- The pilot flame is not heating the sensor properly.
- The sensor signal is not reliably reaching the gas control valve, or the valve cannot hold the safety open.
Quick note: A thermocouple or thermopile is a sensor lead. It does not carry gas. Problems are usually heat, positioning, damage, or connection quality.
Troubleshooting checklist
I like to work from easiest to most likely, while keeping safety at the front of the line.
- Confirm you are lighting it correctly and holding the knob down long enough.
- Look for drafts and airflow changes.
- Inspect the pilot flame shape and color.
- On FVIR units, check the air intake screen and safety switch first.
- Clean the pilot area and (if allowed) the thermocouple tip.
- Check for damaged sensor lead, poor positioning, or loose connections.
- Inspect flex connector issues and gas supply problems.
- Consider a faulty gas control valve.
Fix 1: Light it right
This sounds too simple, but it gets people all the time, especially if the heater has been off for a while.
- Turn the gas control to OFF and wait at least 5 minutes. This lets any lingering gas clear.
- Turn to PILOT.
- Press and hold the control knob down while lighting the pilot (button igniter or match, depending on your model).
- Keep holding the knob down for 30 to 60 seconds, sometimes longer on an older unit.
- Release slowly. If it stays lit, turn to ON.
If the pilot goes out the moment you release the knob, that is a classic “sensor is not proving flame” symptom. Keep going.
Fix 2: Drafts and airflow
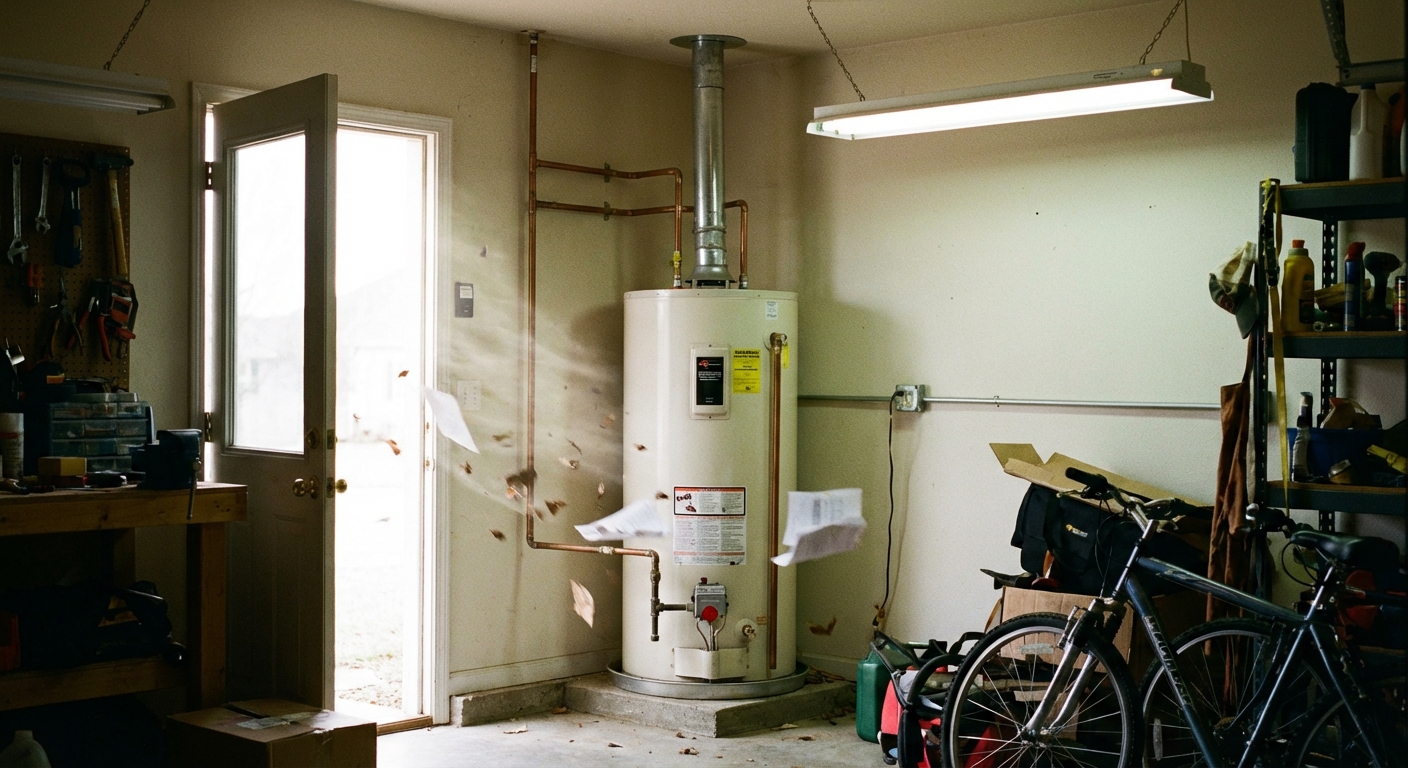
A steady pilot flame can still be blown off the sensor by moving air. Garages, utility closets, and basements with negative pressure are common offenders.
What to look for
- Open windows or doors nearby
- A dryer, bathroom fan, range hood, or whole-house fan running
- A return air vent that pulls air past the water heater
- A loose or missing burner access cover
What to try
- Make sure the inner and outer access panels are installed correctly after lighting.
- Temporarily turn off nearby exhaust fans and the dryer, then test the pilot.
- If the water heater is in a small closet, confirm it has the proper combustion air openings required by code. If you are not sure, get a plumber involved.
Do not “solve” airflow issues by blocking required vents. That can create carbon monoxide hazards.
Fix 3: FVIR air intake and safety switch
This is the modern design detail that trips people up. Many post-2003 tanks are FVIR (Flammable Vapor Ignition Resistant). They often have a more sealed burner area and an air intake flame arrestor screen underneath that can clog with lint and dust.
What to check
- Clogged FVIR screen: If the unit is starving for air, the pilot can get weak, unstable, or go out.
- Resettable thermal switch: Some models have a small reset button for a thermal cutoff (often triggered by overheating, flame rollout, or poor airflow). If it has tripped, your manual will show the location and reset procedure.
What to do
- Vacuum and gently brush lint from the intake screen area (often at the base). Do not damage the screen.
- If your model has a resettable thermal switch, follow the manufacturer steps exactly. If it trips again, stop and call a pro. Repeated trips mean something is wrong.
Important: On FVIR and sealed burner designs, avoid casually opening the burner door or pulling the burner assembly unless your manual explicitly allows it and you have the correct replacement parts on hand.
Fix 4: Clean the sensor and pilot area

Dust, lint, and combustion residue can build up around the pilot assembly. On some heaters, the sensor tip can also get coated. This is one of the most common DIY fixes, but the right approach depends on your heater design.
Steps
- Turn the gas control to OFF and shut off the gas supply valve on the line if you have one.
- Let things cool for a few minutes.
- Remove the lower access panel(s).
- If your manual allows burner removal: carefully remove the burner assembly per the manual. Take a quick photo first so you can put everything back exactly.
- If your manual discourages cleaning the sensor tip: skip abrasion and plan on replacing the thermocouple or thermopile instead.
- If allowed, gently clean the thermocouple tip with fine steel wool or a scrub pad. You are aiming for clean metal, not reshaping it.
- Blow out dust from the burner area with compressed air, or use a soft brush. Keep your face back. Old lint goes everywhere.
FVIR gasket note
If you have an FVIR unit with a burner door or manifold door, it often uses a gasket to seal the combustion area. If you open that door, inspect the gasket carefully. If it is damaged, compressed, or wonky, replace it with the correct part before running the heater. A poor seal can affect combustion and can be a carbon monoxide risk.
Reinstall everything snugly, then relight the pilot.
Transition: If cleaning does not change anything, the next question is whether the pilot flame itself is strong and correctly aimed.
Fix 5: Pilot flame issues
A healthy pilot flame is usually steady and mostly blue, and it should wrap the sensor tip. If the flame is small, lazy, yellow, or not hitting the sensor, the sensor never gets the heat it needs.
Common causes
- Dirty pilot orifice or pilot tube
- Dust and lint clogging the air intake (including FVIR screens)
- Pilot assembly bumped out of position
What to try
- With the unit off and cool, clean the burner compartment and air intake area.
- If you can remove the burner assembly per the manual, inspect the pilot tube for obvious damage or blockage.
- Do not enlarge any orifice with a wire or drill bit. If the pilot orifice is clogged and cleaning does not help, replacement is usually the safer move.
If your pilot flame is consistently weak even after cleaning, that can point to gas supply restrictions, regulator issues, or a gas control problem.
Fix 6: Sensor lead and connection
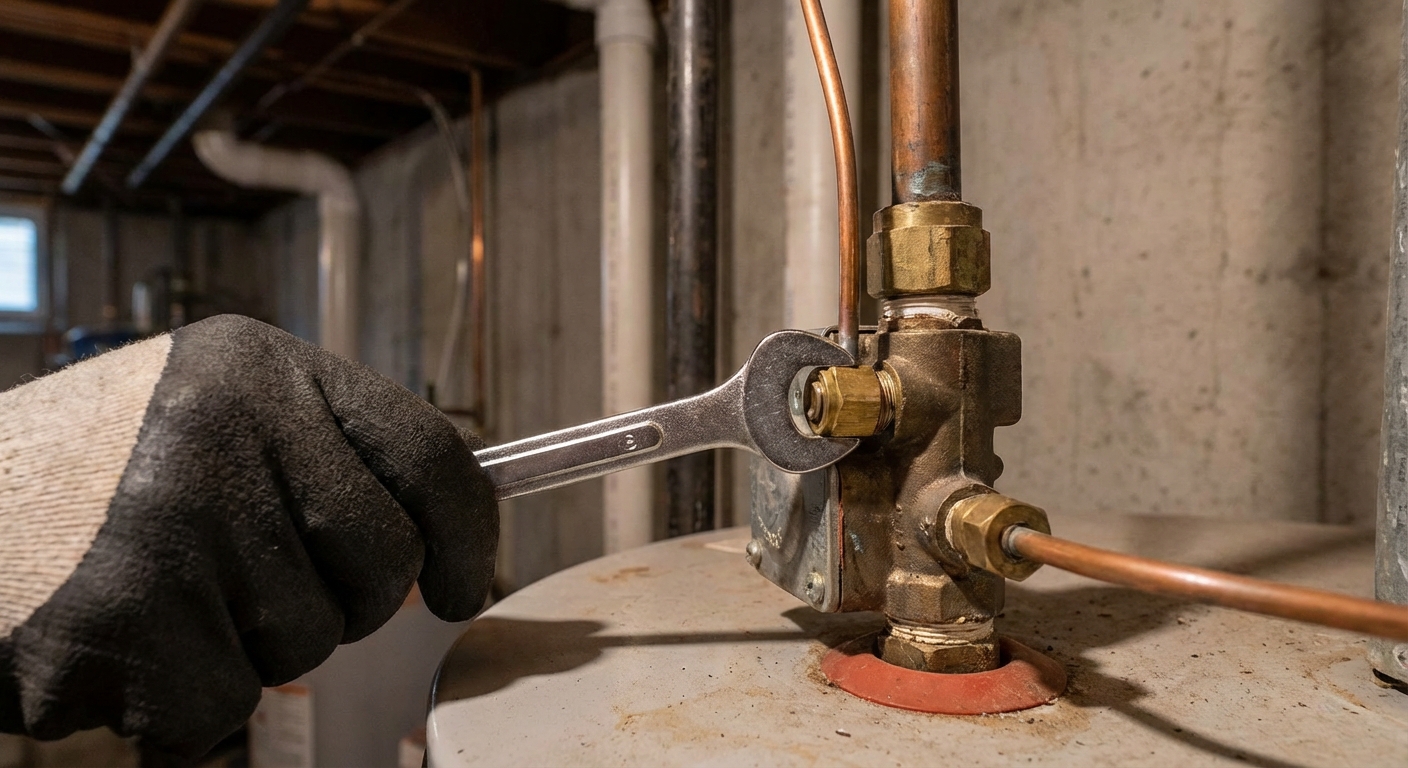
Many thermocouples are a flexible copper lead with a threaded nut at the gas control valve. If that lead is damaged, kinked, strained, or the tip is not positioned correctly in the flame, you can get intermittent shutdowns. Loose or over-tight connections at the valve can also cause trouble.
What to check
- The sensor lead should have smooth bends, not sharp creases.
- The sensor tip should sit where the pilot flame can properly wrap it.
- The thermocouple nut at the control valve should be snug. Over-tightening can damage threads or the connection.
How tight is “snug”?
Hand-tight, then about a quarter turn with a wrench is a common rule of thumb, but always defer to your manufacturer instructions. If you are unsure, stop and call a plumber. A damaged fitting in the control valve is not a fun mistake to learn from.
Fix 7: Flex connector and gas supply
If your water heater is connected with a flexible gas connector, problems with that connector or the gas supply upstream can lead to pilot dropouts.
What this usually means
- The flexible connector is kinked, crushed, or under tension because the heater shifted.
- There is corrosion on fittings (especially in damp basements).
- A shutoff valve is partially closed.
- Rare: Debris restricting gas flow, more likely after recent gas work, regulator issues, or (for propane) tank contamination.
What to do safely
- Visually inspect the flex connector for kinks or damage. If you see damage, do not operate the heater. Replace the connector or call a pro.
- Confirm the manual shutoff valve handle is fully parallel with the pipe (typically the “on” position).
- After any work involving gas fittings, use a soapy water spray on connections and watch for bubbles. If bubbles form, shut gas off and fix the leak before proceeding.
Important: If you are not comfortable leak-checking gas fittings, this is the handoff point to a licensed plumber.
Fix 8: Gas control valve
If you have:
- a clean pilot area,
- a strong pilot flame that clearly heats the sensor,
- no drafts blowing the flame around,
- and a good-looking, properly positioned sensor lead with snug connections,
then the problem may be the gas control valve itself (sometimes called the gas valve or control). Internally, it may not be holding the pilot safety open even when the sensor is hot.
What this looks like
- The pilot lights, but drops out randomly after minutes or hours.
- You can keep it lit only while holding the knob down.
- You replace the thermocouple and nothing changes.
My honest advice
Replacing a gas control valve is doable for a skilled DIYer, but it is a higher-risk repair involving gas piping and correct part selection. On an older tank, it can also be a “good money after bad” moment.
- If your water heater is 10 to 12+ years old, price out replacement before investing heavily in parts.
- If you are unsure about gas work, hire it out.
- Use OEM or verified compatible parts for your exact model. Some heaters use integrated pilot assemblies and model-specific sensors.
When to replace the sensor
If cleaning and repositioning do not help, thermocouples are relatively inexpensive and often the next best step. If your heater uses a thermopile, replacement is also common, but part type and testing are different, so match the manual.
Replace it if
- The tip is pitted, heavily corroded, or warped.
- The lead is kinked, cracked, or heat-damaged.
- The pilot stays lit only while you hold the knob, even with a good flame.
Match the length and the fitting style. Bring the old one to the store if you can. That little habit has saved me multiple return trips.
When to call a pro
- Gas smell at any time
- Visible soot, scorch marks, or signs of flame rollout
- Melted wiring, brittle insulation, or damaged burner components
- Vent pipe issues, backdrafting, or persistent condensation around the draft hood
- An FVIR manifold door gasket that looks damaged or does not reseal cleanly
- A thermal switch that trips more than once
- You cannot keep the pilot lit and do not have clear manufacturer instructions for your model
Quick FAQs
Why does my pilot light stay lit for a while, then go out?
Intermittent dropouts often point to a sensor that is failing as it heats up, a pilot flame that is barely touching the sensor, lint clogging an FVIR intake screen, or a draft that comes and goes (like a dryer turning on). A weakening gas control valve can also behave this way.
Can I just keep relighting it?
You can relight it to restore hot water temporarily, but repeated outages mean something is not right. Treat it as a diagnostic clue, not a lifestyle.
Is a yellow pilot flame normal?
A little yellow tip can be normal on some units, but a mostly yellow, lazy flame is a sign to clean the pilot area, check the FVIR air intake screen (if you have one), and pay attention to airflow and venting.
Do this in order
- Relight using correct timing and wait 5 minutes between attempts.
- Eliminate drafts and make sure access panels are properly installed.
- If you have an FVIR unit, clean the intake screen and check for a tripped thermal switch.
- Inspect the pilot flame and confirm it heats the sensor tip.
- Clean the pilot area and replace the sensor if cleaning is not recommended for your model.
- Check the sensor lead for damage and confirm snug connections.
- Inspect the gas flex connector and verify the shutoff is fully open, then leak-check with soapy water.
- If all of that checks out, suspect the gas control valve and consider pro help or replacement depending on heater age.
If you want, tell me your water heater brand and model number and what the pilot flame looks like through the sight glass. I can help you narrow it down without throwing random parts at it.
About Marcus Vance
Content Creator @ Grit & Home
Marcus Vance is a lifelong DIY enthusiast and self-taught home renovator who has spent the last decade transforming a dilapidated 1970s ranch into his family's dream home. He specializes in budget-friendly carpentry, room-by-room renovations, and demystifying power tools for beginners. Through his writing, Marcus shares practical tutorials and hard-learned lessons to help homeowners tackle their own projects with confidence.