When great pressure is a problem
Most of us only worry about low water pressure. Then one day you notice a toilet valve hissing, a faucet that spits and bangs when it shuts off, or a small leak that seems to come and go. High water pressure can be hard on plumbing and appliances, and it tends to turn tiny weak spots into expensive failures.
In most homes, safe, typical water pressure is roughly 40 to 60 PSI. Many plumbers and many local codes and utilities commonly recommend 80 PSI as a residential upper limit. If your pressure is consistently over that, it is time to take it seriously and get control of it. (A few situations can differ, like some high-rise or booster-pumped systems, but 80 PSI is a solid red-flag number for most single-family homes.)
Quick checklist: signs of high pressure
If you are seeing one or more of these, high pressure is a strong suspect.
- Banging pipes when a valve closes quickly (water hammer)
- Faucets that kick or jerk when you shut them off
- Dripping or leaking from faucets, showerheads, toilet fill valves, or under-sink supply lines
- Toilet running or hissing even after the tank refills
- Shorter life for dishwashers, washing machines, ice makers, and water heaters
- Pressure spikes that feel worse at night or early morning
- PRV hunting, meaning pressure seems to surge then sag while you are using water, often from a worn or poorly sized valve reacting to changing flow
One honest note from my own house: I chased a mystery toilet that kept wearing out fill valves. The fix was not another fill valve. It was bringing the pressure down so the plumbing was not getting beat up all day.
How to measure PSI with a gauge
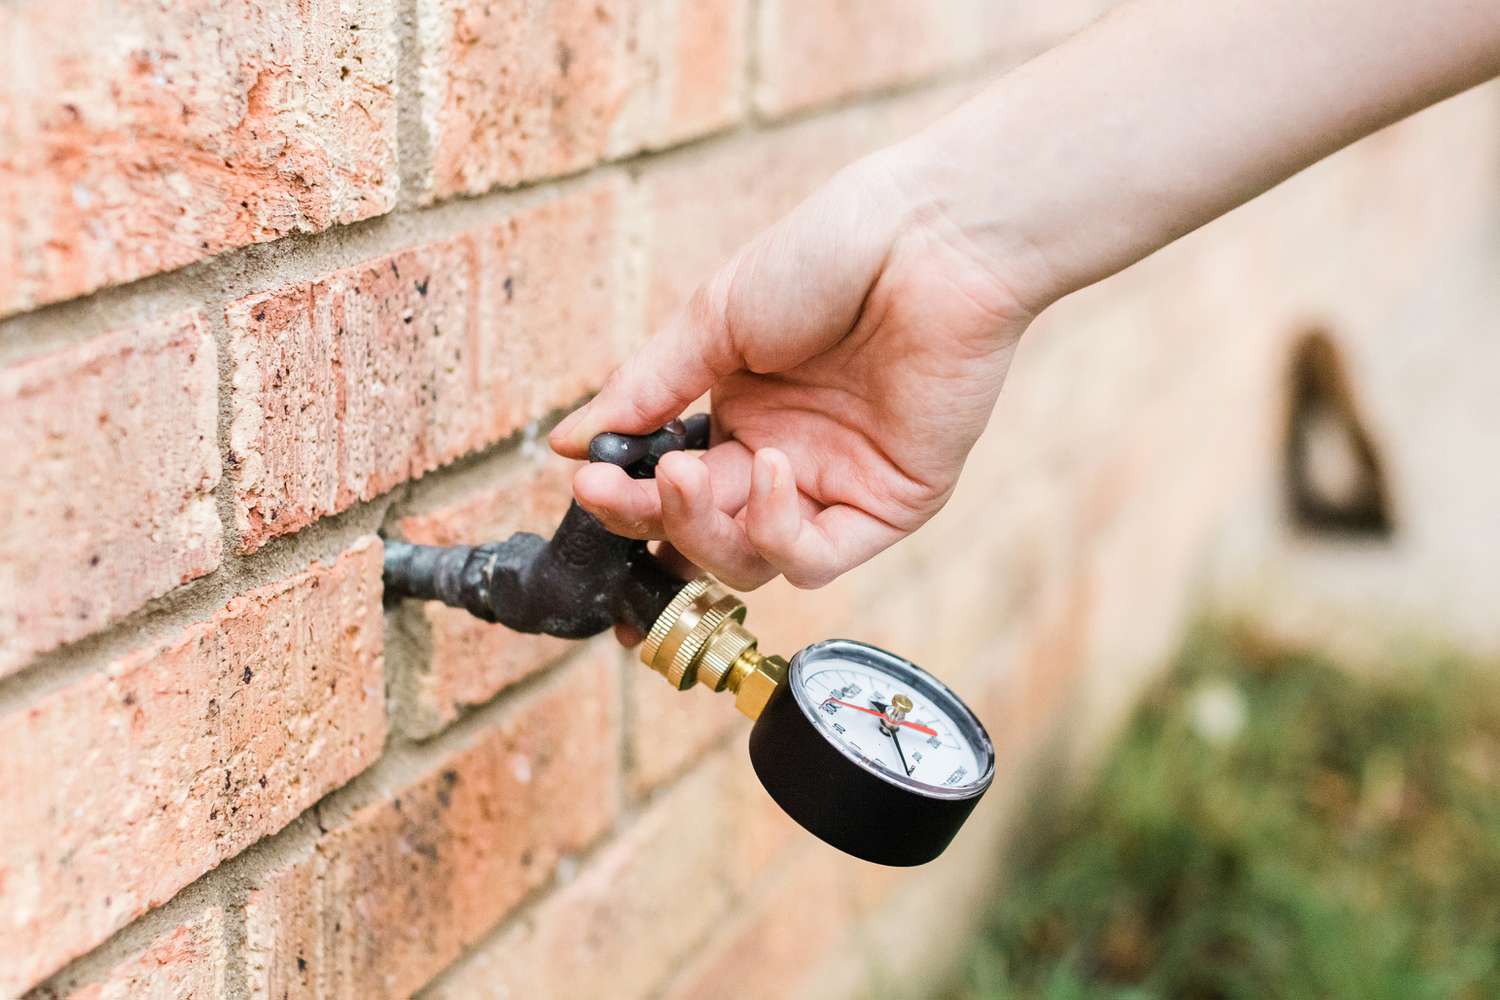
You do not have to guess. A basic water pressure gauge is inexpensive and screws onto a standard hose thread, like your outdoor spigot or a laundry sink faucet with hose threads.
What you need
- Water pressure gauge (0 to 200 PSI is common)
- Access to a hose bib (outdoor spigot is ideal)
- Optional: gauge with a max needle to capture spikes
Step by step
- Stop all water use inside the house. Make sure no toilets are filling and no faucets, sprinklers, humidifiers, or appliances are running.
- Screw the gauge onto a hose bib. Hand-tighten snugly. Do not overtighten.
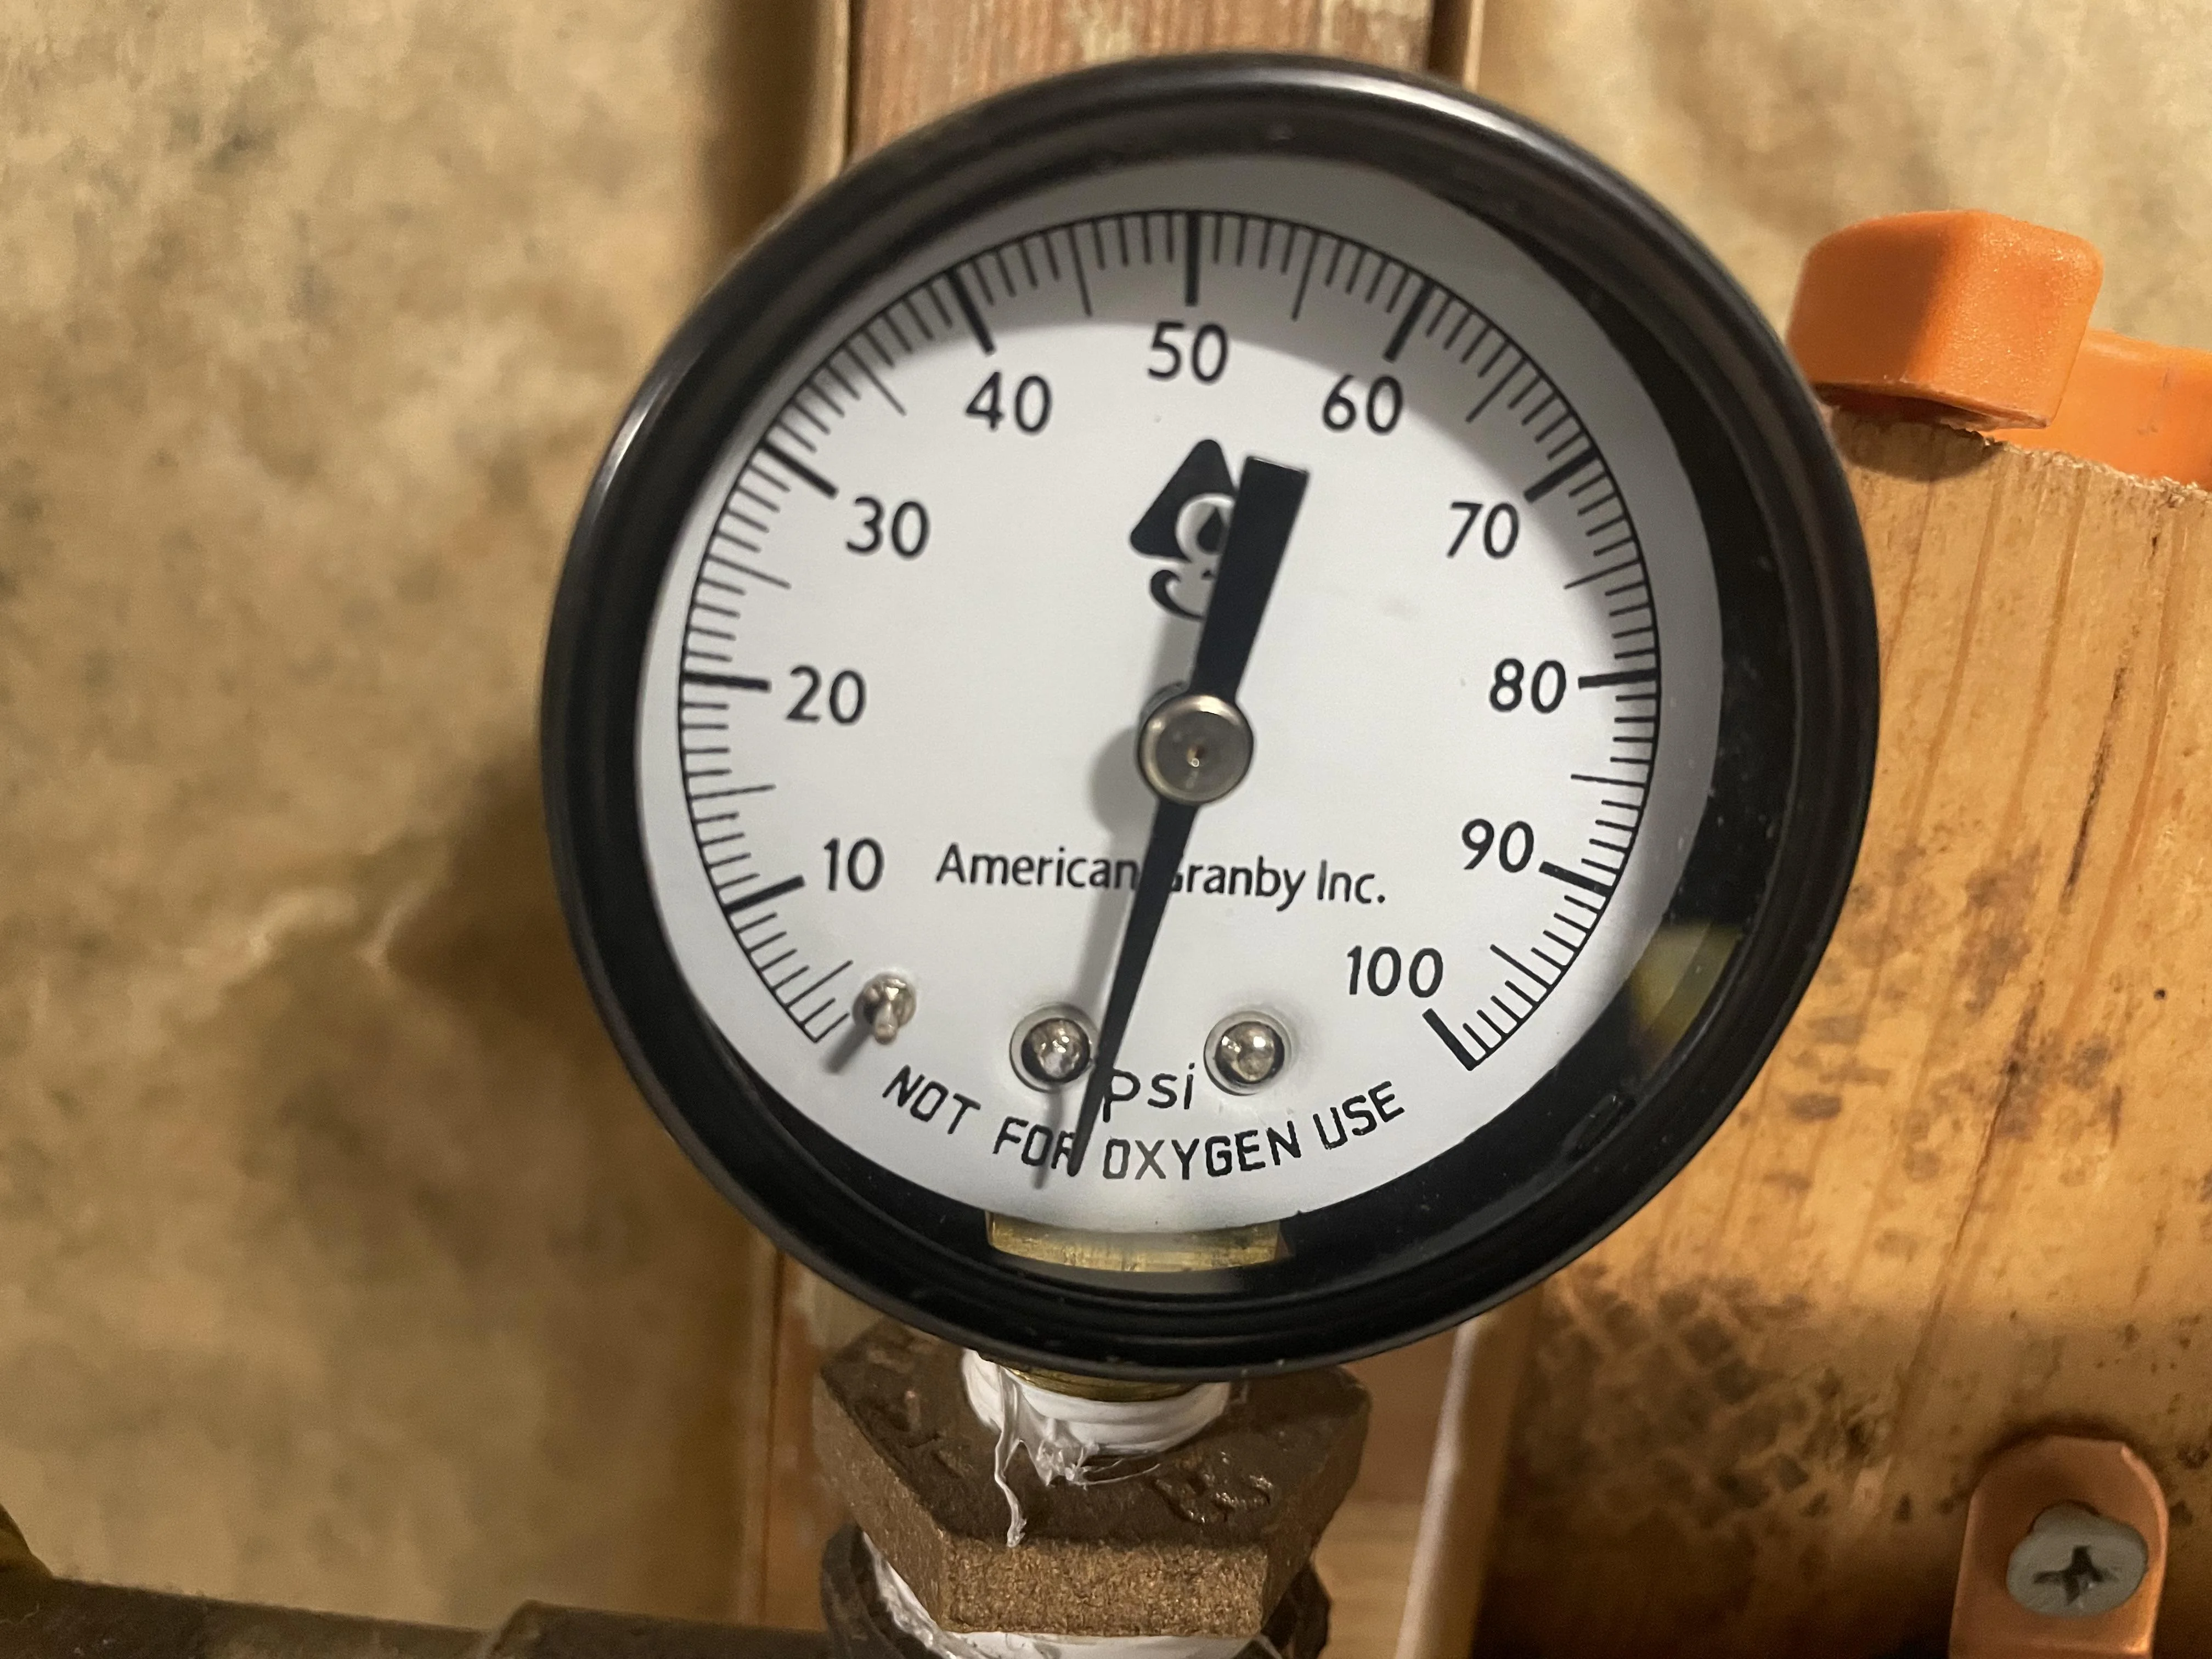
- Open the spigot fully. Read the gauge once it stabilizes. That number is your static pressure (pressure with no water flowing).
- Check pressure at different times. Municipal pressure can vary, so take a quick morning reading and a late-night reading if you can.
- Check for spikes. If your gauge has a max needle, leave it on for a few hours or overnight, then see how high it climbed.
Static vs dynamic
Static pressure is measured when nothing is running. Dynamic pressure is what you experience while water is flowing. Dynamic pressure is usually lower because of pipe size, distance, and other restrictions. Most damage concerns start with high static pressure and high spikes.
How to read the numbers
- 40 to 60 PSI: Usually ideal for comfort and plumbing longevity
- 60 to 80 PSI: Often acceptable, but watch for banging and leaks
- Over 80 PSI: Common point where nuisance problems and damage risk rise (and often above what codes and utilities recommend)
- Spikes well above 80 PSI: Often points to a PRV issue or thermal expansion in a closed system, but municipal fluctuations, loose piping, or water hammer can contribute too
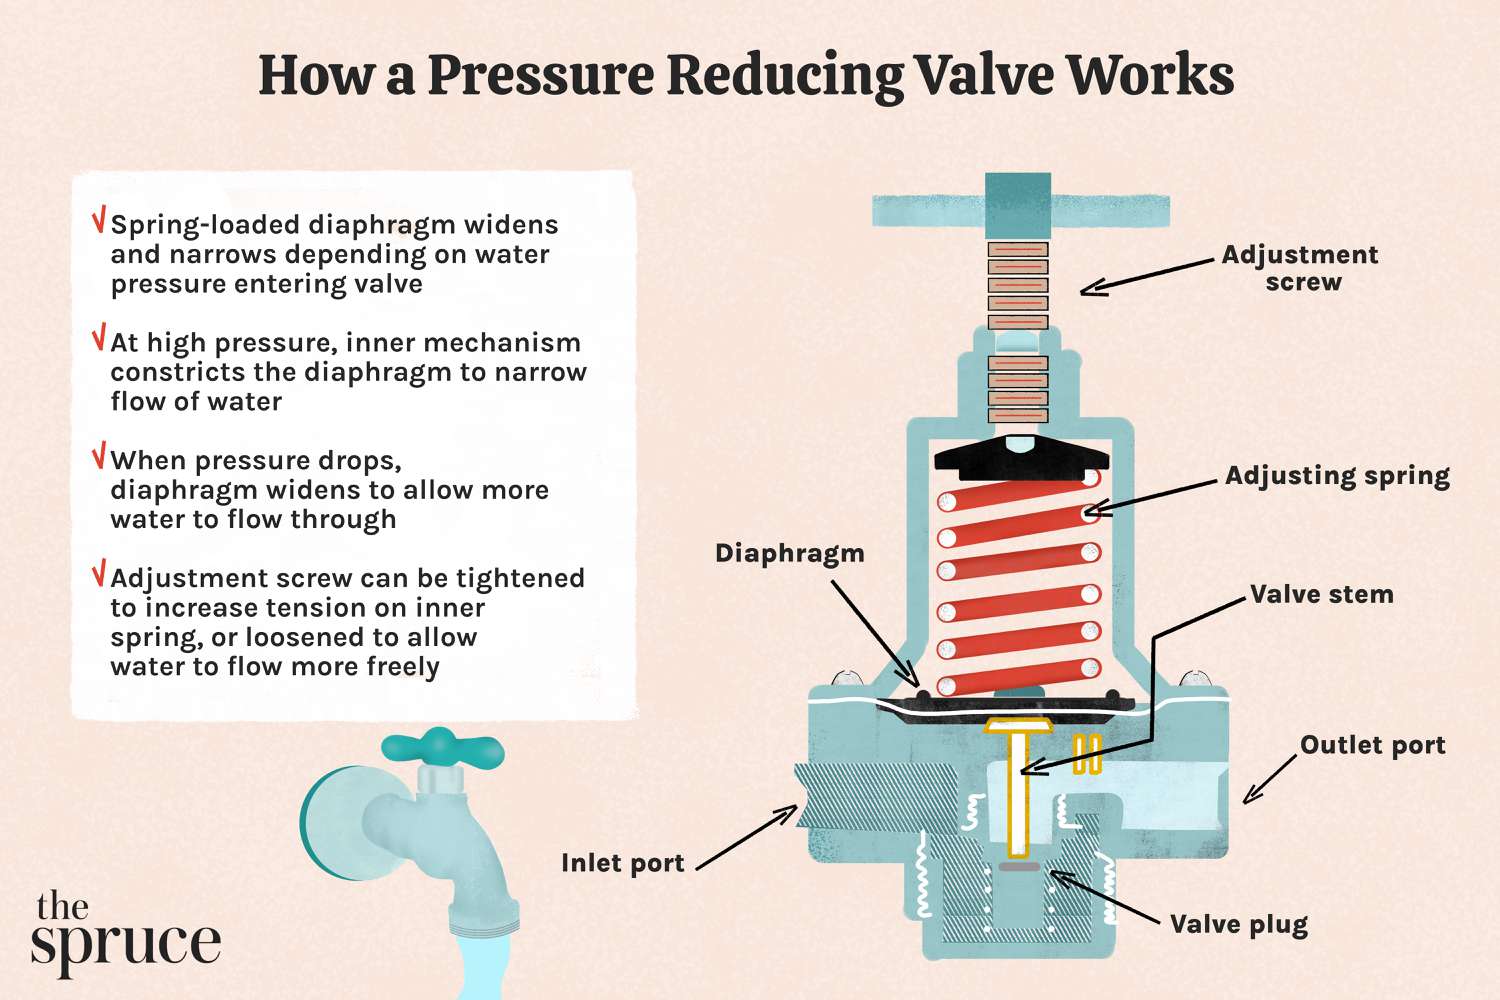
What a PRV does
A pressure-reducing valve (PRV) is typically installed on the main water line where the supply enters the house. City water pressure can be high, and it can fluctuate. The PRV’s job is to take that incoming pressure and reduce it to a steady, house-friendly level.
You will often find the PRV:
- Near the main shutoff valve
- Near the water meter (sometimes in a basement or crawlspace, sometimes outside in a box)
- On the line before branches head to fixtures
PRV symptoms
PRVs wear out. Sediment, mineral buildup, and normal spring fatigue all take their toll. Here are the classic clues.
- High static pressure (your gauge reads high even when no one is using water)
- Pressure creep (pressure starts okay, then climbs higher while water is not being used)
- Inconsistent pressure (showers surge and sag)
- New leaks after years of fine plumbing (high pressure finds the weak link)
If you have no PRV at all, your home may simply be seeing full municipal pressure. In some neighborhoods, that can be 90 to 120 PSI or more.
Adjusting a PRV safely
Many PRVs are adjustable. If yours is adjustable and not failed, a simple adjustment can bring your PSI into a safer range.
Before you touch anything
- Confirm the PRV exists and locate the adjustment screw (often under a cap on top).
- Start with a gauge installed so you can see real-time changes.
- Pick a target. I usually aim for 50 to 60 PSI in a typical home.
Adjustment steps
- Open a faucet slightly (like a laundry sink) so water is flowing while you adjust. This helps the valve respond and gives you a stable reading.
- Loosen the lock nut if your PRV has one.
- Turn the adjustment screw in small increments.
- Typically, clockwise increases pressure.
- Typically, counterclockwise decreases pressure.
- Pause and re-check the gauge after each small turn.
- Tighten the lock nut and re-check once more.
Tip: If you turn the screw and the pressure does not change, or it changes briefly then creeps right back up, the PRV may be failing internally.
When to replace the PRV
Adjusting is great when the valve is healthy. Replacement is smarter when it is not.
- Pressure will not come down even after adjustment
- Pressure creep continues and climbs over time
- Water leaking from the PRV body or fittings
- Severe corrosion or the valve is very old and sticky
PRV replacement can be DIY-friendly if you are comfortable shutting off the main water, cutting pipe, and making solid connections. If your main shutoff is unreliable, the pipe is cramped, or you have galvanized lines, this is a good moment to call a plumber. Also, in some areas a PRV install or replacement can require a permit or inspection, so it is worth checking local rules.
Thermal expansion and pressure spikes
Here is the part many homeowners miss: even if your PRV is adjusted correctly, you can still see big pressure spikes.
When water heats up in a water heater, it expands. In an older, open system, that expanded water could push back into the city main. In many modern setups, a PRV or backflow device creates a closed system. Now the expanded water has nowhere to go, so pressure rises inside your house.
Signs expansion is involved
- Pressure is normal most of the day, but spikes after the water heater runs
- The gauge’s max needle shows intermittent jumps well above your PRV setting
- Drips from the water heater T&P relief valve or occasional discharge from a drain tube
Expansion tank basics
A thermal expansion tank is designed to absorb that extra volume so your pressure stays steady. It is commonly recommended or required when:
- You have a PRV on the main
- You have a backflow preventer or check valve on the supply
- Your water heater manual or local code calls for one
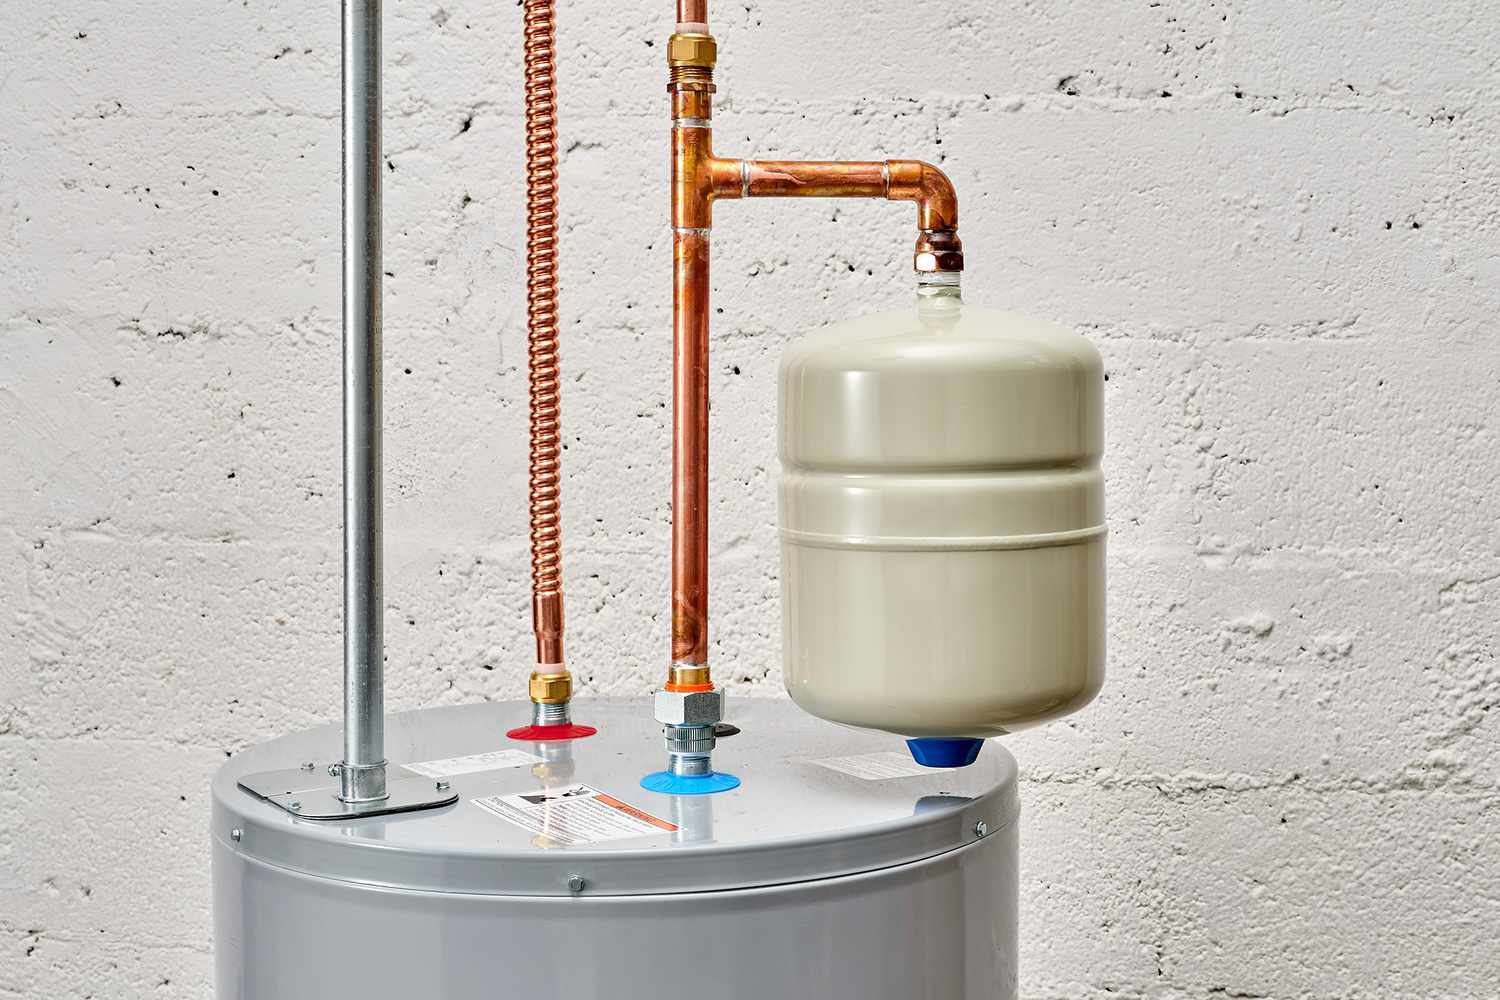
Important: An expansion tank should be installed on the cold-water supply to the water heater, and it must be precharged to match your home’s measured static pressure (for example, 55 PSI). To check or set that air charge accurately, you want the water pressure relieved on the house side (open a faucet after shutting off the supply) so you are not fighting live water pressure while you measure and adjust. A tank with the wrong air charge can act like it is not there at all.
If banging continues
Lowering pressure helps a lot, but it is not the only factor. If you are sitting at a sane 50 to 60 PSI and pipes still bang when valves snap shut, look at:
- Water hammer arrestors for quick-closing valves (washing machine, dishwasher, some faucet types)
- Loose pipe supports that let lines jump inside walls or ceilings
- Fast-closing fixtures that may need a gentler shutoff or an arrestor nearby
Safety notes
- Do not cap or plug a leaking T&P relief valve line. That valve is a safety device for the water heater.
- Know where your main shutoff is and confirm it actually works before you plan a PRV swap.
- If you see pressure over 100 PSI or repeated flooding, move fast and consider calling a pro.
- If you have a pressure gauge, keep it. It is one of those tools you will use again.
What PSI should you aim for?
If you want a simple goal, I like 50 to 60 PSI for most homes. You might choose a little higher if you have a large house, long pipe runs, multiple stories, or irrigation that struggles, but I would still avoid living near 80 PSI if you can help it. The best setting is the lowest pressure that still gives you comfortable showers and reliable fixture performance.
Troubleshooting flow
1) Test pressure
Install a gauge and record static PSI and any spikes. Check at more than one time of day if possible.
2) If PSI is over 80, find the PRV
If there is no PRV, adding one is the long-term fix. If there is a PRV, try adjusting it with the gauge installed.
3) If pressure creeps up, think PRV or expansion
If pressure climbs when no fixtures are running, the PRV may not be holding. If spikes seem tied to water heating cycles in a closed system, size and charge an expansion tank correctly.
4) If banging persists, address water hammer
Add arrestors where needed and secure loose piping, especially near fast-closing valves.
5) Re-test
After adjustments or repairs, re-check your PSI and leave the gauge on overnight to confirm you solved the spike, not just the average.
When to call a plumber
I am all for DIY, but I also like dry floors and predictable weekends. Consider bringing in a licensed plumber if:
- Your main shutoff does not fully stop the water
- Your piping is galvanized, badly corroded, or difficult to access
- You need soldering in a tight space and you are not comfortable with a torch
- You suspect multiple issues, like a failing PRV plus a leaking water heater relief valve
- Your area requires a permit or inspection for PRV or backflow-related work
Bottom line
High water pressure is one of those invisible house problems that quietly costs you money. The good news is the fix usually starts with a simple gauge, then either a PRV adjustment, a PRV replacement, or addressing thermal expansion with a properly charged expansion tank.
If you want a simple goal to shoot for, set your house up to live around 50 to 60 PSI. Your fixtures, appliances, and future self will thank you.
About Marcus Vance
Content Creator @ Grit & Home
Marcus Vance is a lifelong DIY enthusiast and self-taught home renovator who has spent the last decade transforming a dilapidated 1970s ranch into his family's dream home. He specializes in budget-friendly carpentry, room-by-room renovations, and demystifying power tools for beginners. Through his writing, Marcus shares practical tutorials and hard-learned lessons to help homeowners tackle their own projects with confidence.