🚨 In a DIY emergency or rush?
Skip the details and jump straight to our 30-second cheat sheet for the most crucial info.
If your water softener used to make your shower feel like a hotel and now it feels like you are rinsing with gravel, the resin bed is a prime suspect. But it is not the only suspect. A softener can stop producing soft water because of simple salt problems, a clogged injector, or a worn valve long before the resin is truly “dead.”
In this guide I will walk you through resin life expectancy, the telltale signs of chlorine damage, how to diagnose resin failure versus other common issues, and a realistic overview of the DIY “dump and refill” resin replacement. I will also cover resin types and when replacing the whole softener is the smarter move.
What softener resin does and why it wears out
Inside the tall mineral tank is a bed of plastic beads called ion exchange resin. Hard water minerals like calcium and magnesium stick to those beads as water passes through. During regeneration, the brine from your salt tank flushes the minerals off the beads so the resin can keep working.
Resin fails in a few main ways:
- Physical breakdown: beads crack and turn into fines that clog flow paths.
- Oxidation damage (often chlorine or chloramine): resin becomes brittle, loses capacity, and can start leaking hardness sooner.
- Fouling: iron, manganese, sediment, or organics coat the beads and block exchange sites.
- Channeling: water creates “paths” through the bed so not enough resin contacts the water.
How long resin typically lasts
Most standard 8% crosslink cation resin in a typical city-water softener lasts 7 to 12 years in decent conditions, but real-world life can range roughly 5 to 15+ years. Chloramine-heavy water, high chlorine levels, iron fouling, or an undersized softener that regenerates constantly can shorten that dramatically.
What shortens resin life
- Chlorine or chloramine exposure from municipal water supplies.
- High water usage or undersized equipment that regenerates constantly.
- Iron and manganese in well water without proper treatment.
- Sediment if there is no prefilter where one is needed.
- Improper settings (too little salt, incorrect hardness, wrong day override) that let the resin get overloaded.
On chlorinated city water, upgrading to 10% crosslink resin usually buys you more durability and better oxidant tolerance, but it is not bulletproof. If you want to protect resin directly, a carbon prefilter ahead of the softener is often the bigger win because it reduces the disinfectant exposure in the first place.
Symptoms of resin failure
When resin is worn out, homeowners usually notice a slow slide, not a sudden failure. Here are the most common signs.
Signs the resin bed is exhausted or damaged
- Hardness “leaks” back quickly after regeneration. You get a day or two of decent water and then it turns hard again.
- Soap will not lather and you see spots on dishes even though the softener appears to be cycling normally.
- Reduced softening capacity even with correct salt settings and plenty of salt.
- Higher salt use as you try to “chase” softness with more frequent regenerations.
Chlorine or chloramine damage clues
- Resin beads become brittle and break down into tiny particles (fines). These can migrate and contribute to restrictions.
- Pressure drop or weak flow at fixtures. This is not always resin, but resin fines can contribute.
- Resin in the house plumbing: small amber or tan beads show up in faucet aerators or toilet tanks.
If you see beads in the house, the first thing I suspect is a failed lower distributor or screen. Old brittle resin can make the situation worse, but a mechanical failure down at the bottom of the tank is often the main reason beads escape.
My rule of thumb: if the softener is more than 10 years old on city water and you are seeing fast hardness return after a regeneration, resin is near the top of the list.
Quick troubleshooting first
Before you plan a resin swap, eliminate the “cheap and common” problems. I have personally spent an afternoon convinced a component had failed, only to find a basic salt issue staring back at me.
Step 1: Confirm it is not bypassed
Check the bypass valve. Half-bypassed systems can create confusing “sometimes soft, sometimes hard” behavior.
Step 2: Check for a salt bridge
A salt bridge is a crust that forms above the water level, leaving an empty cavern under the salt. The tank looks full, but it is not making brine.
- Push a broom handle straight down. If it suddenly drops into a hollow, you found it.
- Break up the bridge and remove chunky salt.
Also look for salt mush at the bottom: slushy salt that will not dissolve cleanly. This can choke brine production too.
Step 3: Confirm brine draw during regen
Start a manual regeneration and watch the brine tank during the brine draw portion. You should see the liquid level drop. If the level does not move, you likely have a problem upstream of the resin:
- Clogged injector or venturi
- Leaking or stuck brine valve
- Cracked brine line
- Control valve seal or piston issues
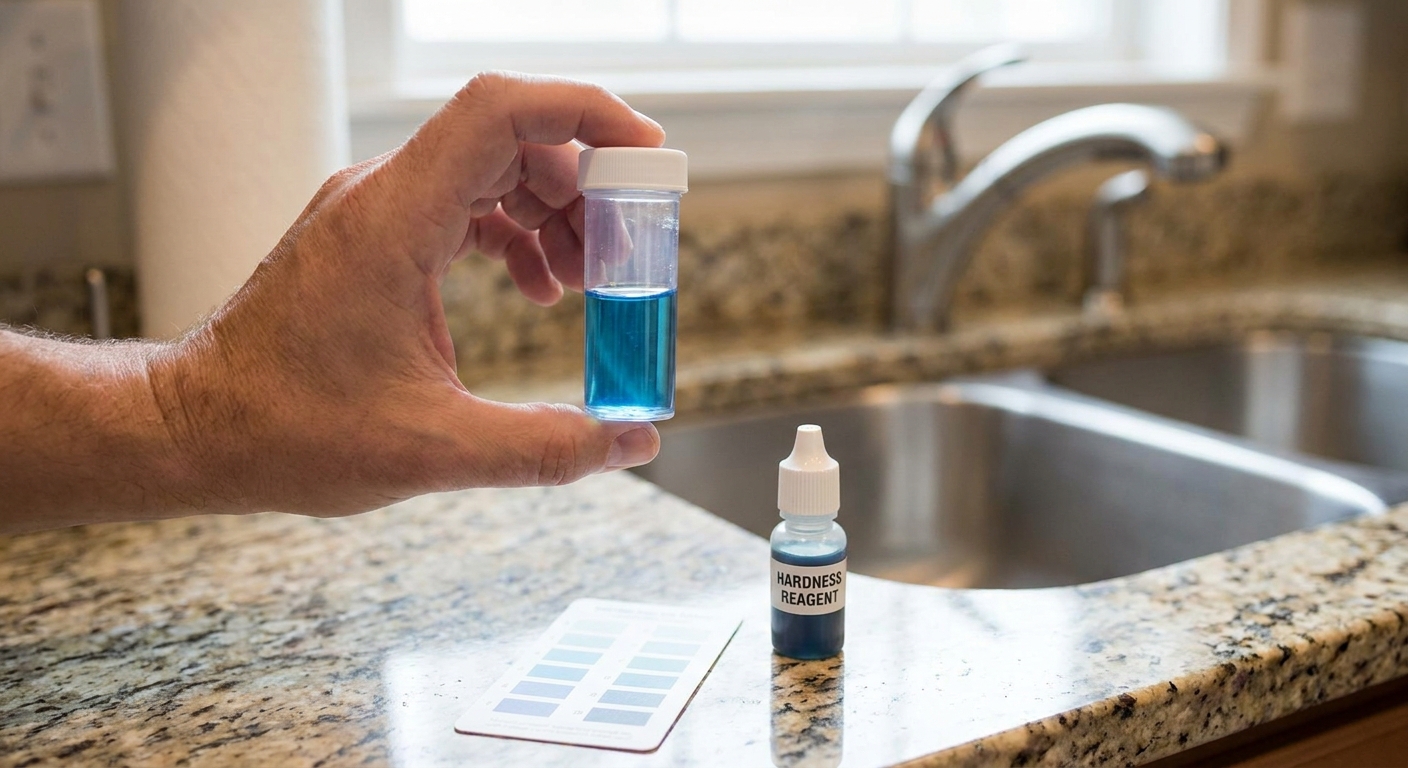
Step 4: Do a simple hardness test
Use a basic drop test kit. For best results, run the water for 30 to 60 seconds first so you are not testing water that was sitting in the pipes.
Test water at:
- A hose bib or faucet before the softener if you have one available
- A cold faucet after the softener
If hardness is unchanged after the softener and you confirmed brine draw is working, resin becomes a much stronger suspect.
Resin or valve problem?
Here is a practical way to separate the big three: resin, brine system, and control valve.
When it is probably not resin
- No brine draw during regeneration. Resin cannot recharge if it never sees brine.
- Softener does not advance cycles, stalls mid-regeneration, or never regenerates on schedule.
- Brine tank overfills or keeps too much water. Often a brine valve or float issue.
- Sudden hardness overnight after years of good performance. Often a bypass accidentally moved, a valve failure, or a brine problem.
When it probably is resin or the distributor
- Normal-looking regenerations (brine draw and refill happen) but soft water does not last.
- Resin beads appearing in faucet aerators or toilet tanks. This often points to a failed lower distributor or screen, but severe resin breakdown can contribute too.
- Soft water right after regen, hard soon after even after settings have been verified.
If resin beads are making it into the house, stop and investigate soon. Those beads can clog aerators and appliance screens, and it is a sign something has physically failed in the tank.
DIY resin replacement overview
Resin replacement is often DIY-friendly if you are comfortable with shutting off water, disconnecting plumbing, and lifting awkward equipment. It is messy, but it is usually straightforward. That said, the details vary by valve model (clamp-style versus threaded, proprietary heads, tight clearances), so treat this as an overview and follow your manual where it differs. Also note that DIY disassembly can affect warranties on some systems.
Reality check: the mineral tank can weigh 80 to 150 pounds when moved around with wet media, depending on tank size and whether gravel is present. Plan to do this with a helper if possible.
Before you start
- Unplug power to the softener and keep it dry.
- Relieve pressure before opening anything by cracking a nearby cold faucet.
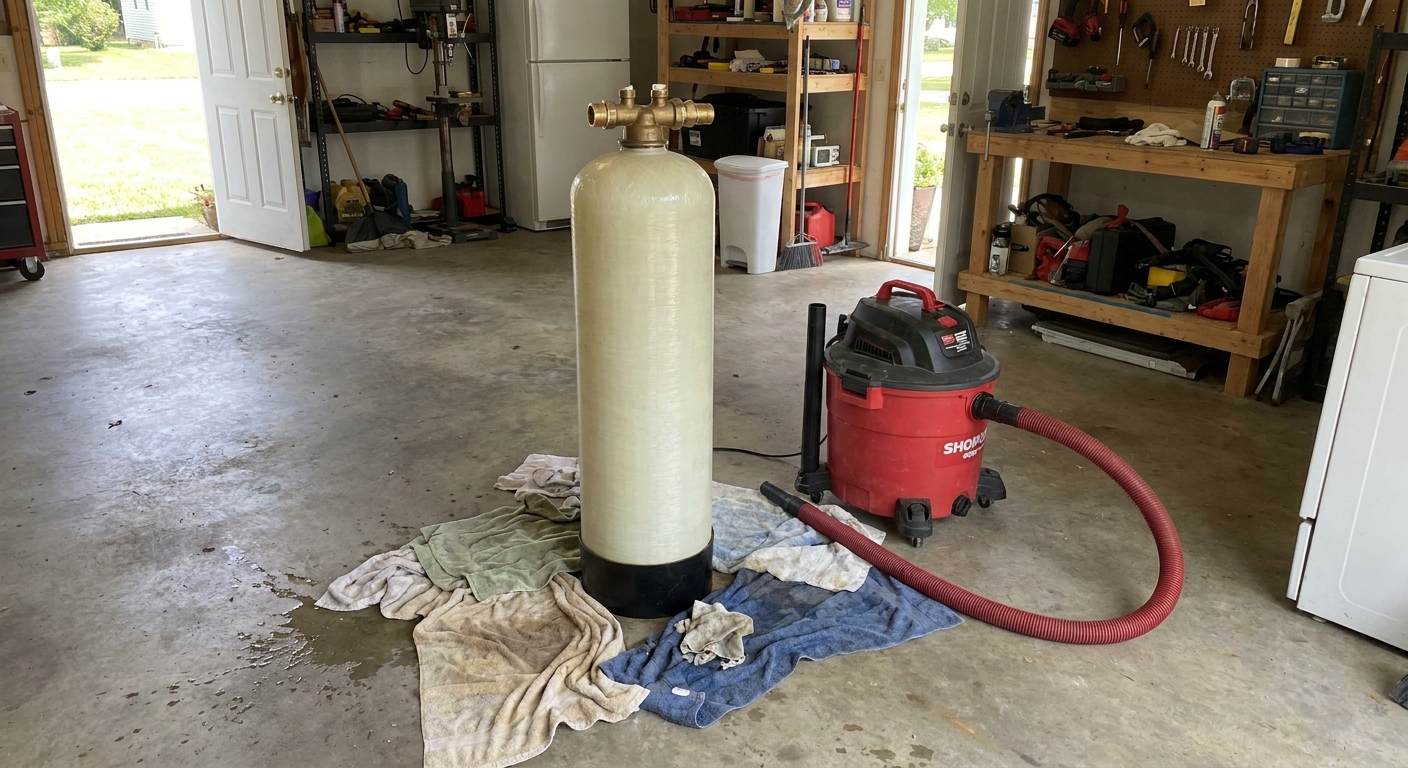
- Protect the floor with plastic and towels.
- Watch your footing: spilled resin beads act like tiny ball bearings. They make concrete floors incredibly slippery. Sweep and vacuum as you go.
Tools and supplies you will likely need
- Shop vacuum (helps a lot)
- Large adjustable wrench or channel locks
- Bucket, towels, plastic sheeting
- NSF-certified food-grade silicone grease for O-rings
- Funnel made for resin tanks or a cut plastic bottle
- New resin (and optionally new gravel underbedding if your system uses it)
- Optional but recommended: new upper and lower screens or distributor tube assembly if yours is worn
High-level steps
- 1) Put the softener in bypass and shut off the water supply if needed for your plumbing layout.
- 2) Depressurize by opening a nearby cold faucet.
- 3) Unplug the softener and disconnect the drain line and brine line.
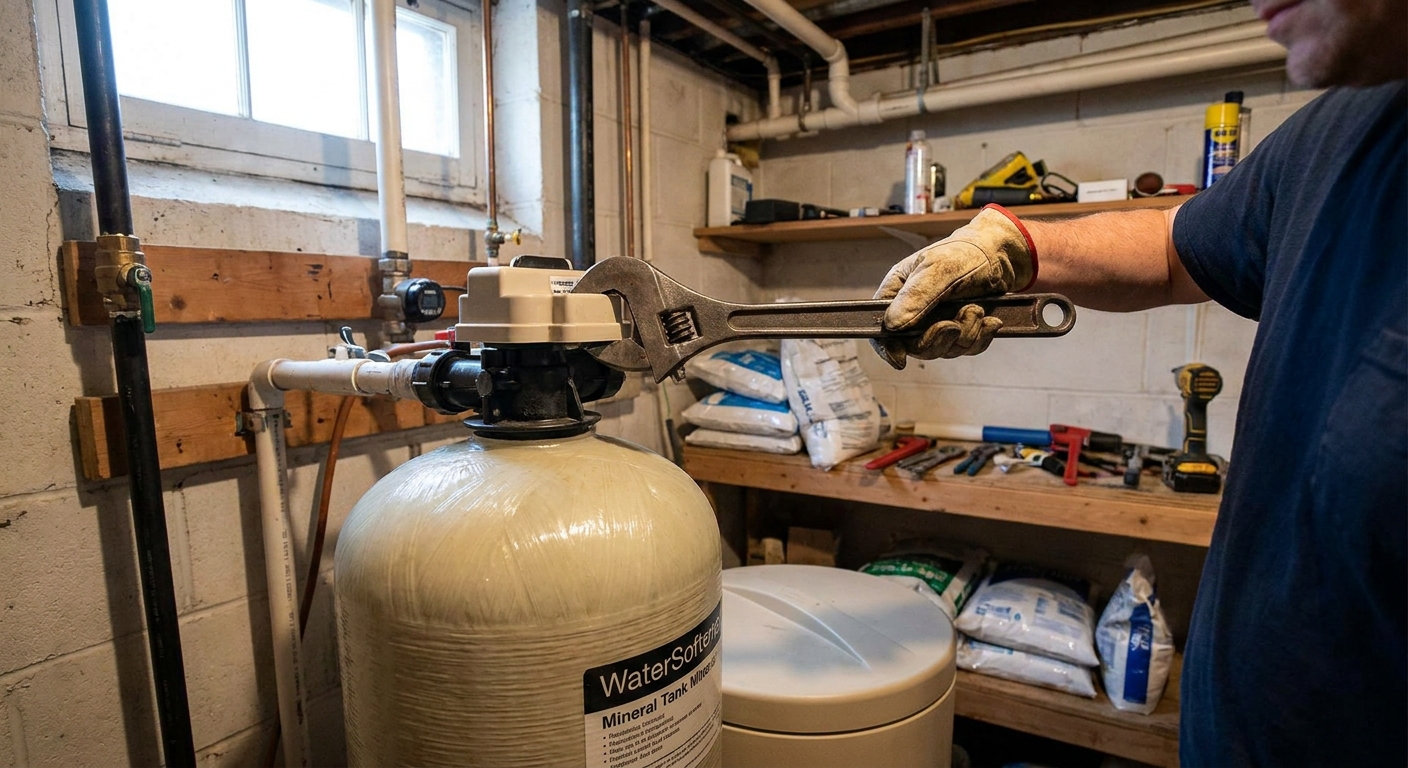
- 4) Remove the control valve from the top of the mineral tank. Be gentle with the distributor tube.
- 5) Protect the distributor tube by taping over the top so resin does not fall into it.
- 6) Remove old resin. Tip-and-dump works, but a shop vac is cleaner and easier.
- 7) Inspect and clean the tank, distributor tube, and screens. Replace cracked parts.
- 8) Add new resin using a funnel, keeping the distributor tube centered.
- 9) Reinstall the valve with lubricated O-rings, reconnect lines, and slowly return to service.
- 10) Run the startup cycles per your valve manual (usually backwash and rinse), then do a manual regeneration.
Two mistakes I see a lot
- Letting resin fall into the distributor tube. That can cause immediate problems or block flow. Tape it off.
- Turning water on too fast. A sudden rush can churn the bed and push fines into plumbing. Bring it back online slowly and follow your valve’s backwash and rinse steps.
How much resin do you need?
Most residential softeners use 0.75 to 2.0 cubic feet of resin. The exact amount depends on your tank size and your valve specifications. Your softener’s label, manual, or a tank sizing chart can help.
If you are unsure, start with the tank diameter (often printed on the tank or listed in the manual as something like 10x54, 12x52, etc.) and use a chart for that tank size. Do not guess based on height alone.
Do not overfill. Resin needs headspace for backwash expansion.
Sanitize after a resin swap
Any time you open the mineral tank and handle the distributor, you can introduce bacteria. Many manufacturers recommend sanitizing the softener after service. A common DIY method is to add a small amount of unscented household bleach to the brine well (or brine tank) and then run a manual regeneration.
Important: follow your softener manufacturer’s guidance for the amount and where to add it. Do not mix cleaners, and do not use scented or splashless products.
Choosing the right resin type
Resin is not one-size-fits-all. Picking the right type can extend life and improve performance in your specific water.
Standard cation resin (8% crosslink)
- Best for: many homes with mild water conditions
- Pros: usually the cheapest
- Cons: less tolerant of chlorine and other oxidants
10% crosslink resin (my default for city water)
- Best for: municipal water with chlorine, higher usage, or you just want longer life
- Pros: better durability and improved chlorine tolerance
- Cons: costs a bit more and still benefits from carbon pretreatment
Fine mesh resin
- Best for: certain iron scenarios and specialized applications
- Pros: can improve kinetics
- Cons: more sensitive to sediment and flow issues, not always a simple swap
Resin for chloramine or high chlorine
Some specialty resins are marketed for improved chloramine resistance. If your city uses chloramines and your resin is failing early, it can be worth considering. Another approach is to install a carbon prefilter ahead of the softener to reduce oxidant exposure and protect the resin.
What about “iron reducing” resin?
If you have well water with iron, you can sometimes use resin designed to tolerate iron better, but it is not magic. Heavy iron usually needs treatment ahead of the softener, along with proper cleaning and regeneration settings.
If you routinely see orange staining, address the iron first or you will be back in the same spot. In mild cases, a resin cleaner can help with iron fouling. But if the resin is physically oxidized or breaking down, cleaning will not restore it like new. Replacement is the real fix.
When to replace the softener
I love repairing things, but there is a point where you are throwing good money after a tired machine. Re-bedding resin is most cost-effective when the softener’s valve and tank are in good shape and the unit is not ancient.
Replace the resin when
- The softener is under about 10 to 12 years old and otherwise functioning well
- The control valve cycles correctly and parts are available
- The mineral tank is in good condition (no cracks, no leaks at the neck)
- You can do the labor yourself and keep costs down
Replace the whole softener when
- The unit is 15 to 20 years old and multiple components are acting up
- The control valve is leaking, sticking, or expensive to rebuild
- You have had repeated issues with brine draw, injector clogs, or electronics
- You want a more efficient modern unit with better controls and lower salt use
- You are paying a pro for labor. Sometimes the installed price difference is smaller than you expect
If you are on the fence, get pricing for a resin re-bed kit versus a new softener head and tank package. When the valve is questionable, a resin job can turn into a “while we are in here” project fast.
After the swap
Fresh resin will not fix incorrect programming. Once the resin is replaced:
- Verify hardness setting (and add iron compensation if you are on a well).
- Check salt dose and capacity settings for your resin volume.
- Run the recommended rinse and regeneration for your valve, then flush cold water at a tub or utility sink for several minutes.
- Clean faucet aerators over the next day or two if any fines or old beads were disturbed.
If your water still tests hard after a proper regeneration with confirmed brine draw, step back and re-check bypass, valve function, and plumbing cross-connections.
FAQ
Can I just add new resin on top of old resin?
I would not. Old resin can be fouled or physically broken down. Mixing new resin into a failing bed often gives disappointing results and can create channeling. Do it once, do it right.
Why did I find resin beads in my toilet tank?
That usually means resin escaped the mineral tank. The most common causes are a cracked bottom distributor or a failed screen, although severe resin breakdown can contribute. It is a “stop and inspect” moment.
Do I need gravel under the resin?
Some systems use underbedding gravel to support flow distribution, others do not. Match what your softener was designed for. When in doubt, check the manual or the manufacturer’s media specification for your valve and tank size.
The 30-Second Cheat Sheet
Essential takeaways for: Water Softener Resin Replacement: When You Need It and How
- Typical resin life: commonly 7 to 12 years for standard 8% resin, but it can range 5 to 15+ years depending on chlorine or chloramine levels, iron, sizing, and maintenance. City water disinfectants often shorten life unless you use 10% crosslink resin and or protect with a carbon prefilter.
- Most common “resin is failing” symptom: water feels soft right after regeneration, then turns hard again within a day or two.
- Chlorine damage clues: brittle resin that breaks into fines, reduced capacity, possible flow restriction. Sometimes you find small amber beads in faucet aerators or toilet tanks, although a failed lower distributor or screen is often the first thing to suspect when beads appear.
- Rule out easy issues first:
- Make sure the unit is not bypassed.
- Check for a salt bridge or salt mush.
- Start a manual regeneration and confirm the brine tank liquid level drops during brine draw. If it does not, fix the brine, injector, or valve problem before blaming resin.
- Do a hardness drop test before and after the softener.
- DIY resin replacement (overview): bypass water, depressurize, disconnect lines, remove control valve, tape off distributor tube, vacuum or dump old resin, inspect and replace screens, refill with correct resin volume, reassemble, slowly return to service, run a manual regeneration and rinse. Consider sanitizing after an open tank swap.
- Resin choice: for most city-water homes, 10% crosslink cation resin is a solid upgrade over 8% for better chlorine tolerance, but it is not immunity. A carbon prefilter is more direct protection.
- Replace the whole softener when: the unit is 15 to 20 years old, the control valve is unreliable or leaking, parts are pricey, or you are paying for labor and the cost gap to new equipment is small.
💡 Tip: Scroll up to read the full article for detailed, step-by-step instructions.
⬆️ Back to topAbout Marcus Vance
Content Creator @ Grit & Home
Marcus Vance is a lifelong DIY enthusiast and self-taught home renovator who has spent the last decade transforming a dilapidated 1970s ranch into his family's dream home. He specializes in budget-friendly carpentry, room-by-room renovations, and demystifying power tools for beginners. Through his writing, Marcus shares practical tutorials and hard-learned lessons to help homeowners tackle their own projects with confidence.