🚨 In a DIY emergency or rush?
Skip the details and jump straight to our 30-second cheat sheet for the most crucial info.
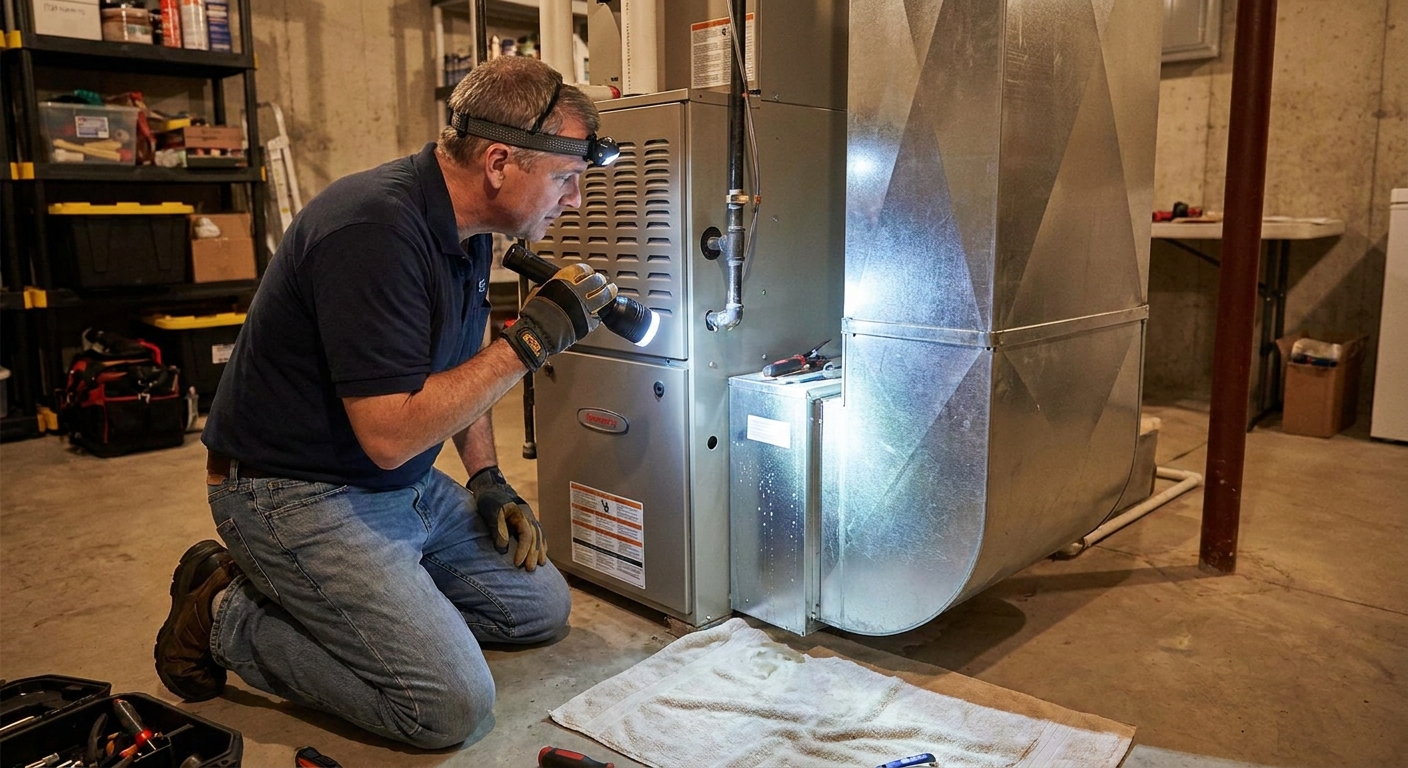
If you find a puddle near your furnace and you have a whole-house humidifier, don't assume the furnace is “leaking.” In a lot of homes, the humidifier is often the culprit, and the good news is most causes are straightforward: a saturated evaporator pad, a clogged drain, a solenoid valve that won't fully close, a float issue on a reservoir-style unit, or a cabinet that's rusting through.
I've chased this exact kind of mystery drip more than once in my own 1970s ranch. The trick is to slow down, shut the right things off, and isolate where the water starts. This guide will walk you through that in a clean, beginner-friendly order.

First: make it safe and stop the water
Quick shutoff checklist
- Turn the humidifier off at the humidistat (set it to OFF or the lowest setting).
- Shut off the water feeding the humidifier. Look for a small saddle valve or ball valve on a nearby copper line. If it's a saddle valve, keep in mind many plumbers discourage them because they can clog, seep, and fail. Upgrading to a proper shutoff is a nice long-term fix.
- Cut power to the furnace at the service switch or breaker if water is near any wiring, control boards, a condensate pump, or the burner area.
- Dry the area so you can tell if the leak returns and exactly where it starts.
If your furnace also makes water (common with high-efficiency condensing furnaces), keep that in mind while troubleshooting. A clogged furnace condensate line can mimic a humidifier leak. If you want a refresher on basic furnace upkeep without going down a rabbit hole, see our furnace maintenance guide: Furnace Maintenance Checklist.
Grab these tools first
- Flashlight or headlamp
- Old towels or rags
- A small cup or bowl (to catch drips while you test)
- Wet-dry vac (optional, but great for drain clogs)
- Replacement pad (if yours is due anyway)
- New vinyl drain tubing (optional, if yours is brittle or kinked)
How to pinpoint the leak in 10 minutes
Here's the simple isolation routine I use. You're trying to answer one question: Does it leak only when the furnace runs, only when the humidifier calls for water, or all the time?
Step-by-step
- With humidifier water OFF, run the furnace for 10 minutes. If water appears, it's likely furnace condensate or a separate plumbing issue, not the humidifier feed water. Two quick caveats: if there was already water sitting in the humidifier cabinet or duct, it may keep dripping for a bit even with the water off, and some steam humidifiers can still drain or flush depending on how they're plumbed and controlled.
- With the furnace OFF (or not calling for heat), turn the humidifier water ON but keep the humidistat OFF. If water appears now, suspect a weeping solenoid or a leaking feed fitting.
- Turn the humidistat ON and force a call (raise the humidity setting temporarily). Watch the humidifier for 5 to 10 minutes with a flashlight. Most leaks show up at a seam, drain outlet, or under the solenoid. One more “gotcha” that trips people up: many bypass and fan-powered humidifiers only open the solenoid when the furnace is actively heating or the blower is running. If nothing happens, set the thermostat to call for heat, or set the fan to ON (if your setup allows humidification with fan only).
Condensation or a real leak?
Not every “puddle near the furnace” is a failed part. Sometimes it's plain condensation, especially in cold basements.
- Cold water line sweating: you’ll see beads of water on the outside of the copper tubing feeding the humidifier. It may drip and run along the pipe before hitting the floor.
- Bypass duct sweating: the round bypass duct can sweat if it's pulling cold air across a warm, humid airstream, or if the basement is chilly and damp.
- True leak signs: an active drip from a fitting, the solenoid body, the drain outlet, or water collecting inside the humidifier cabinet.
If it's sweat, improving insulation on cold lines, tightening duct connections, and controlling basement humidity can help. If it's a drip from a fitting or drain, keep going with the checks below.
Most common causes (and how each one leaks)
Different humidifier designs fail in different ways. The sections below match the real-world leak patterns I see most often.
1) Evaporator pad drips and overflow
What it looks like: Water drips from the bottom of the humidifier cabinet while it's running, or you see water streaks inside the housing. Sometimes you also get a musty odor.
Why it happens: The pad (also called a water panel) is the honeycomb filter-like insert inside the humidifier cabinet that water flows over. When it clogs with mineral scale, water can't wick evenly, so it channels and spills. Another common issue is the distribution tray above the pad being plugged or not seated, so water dumps in one spot.
- Fix: Replace the pad. Clean the distribution tray and check it sits flat.
- Check: Make sure the pad is installed in the correct orientation and fully seated. Many pads have an “up” arrow or frame channel that must align.
- Pro tip: If you've got hard water, replacing the pad every season is often cheaper than dealing with cabinet rust and water damage later.
2) Drain line blockage (the silent overflow)
What it looks like: The humidifier runs, but water backs up and leaks from the bottom. You may also notice the drain hose feels heavy or full, or the drain pan area looks slimy.
Why it happens: The drain tube is kinked, clogged with scale, or the floor drain or condensate pump inlet is blocked. In flow-through humidifiers, water is supposed to trickle through the pad and out the drain continuously. If it can't leave, it'll find another way out.
- Fix: Remove the drain line and flush it at a sink. If it's brittle vinyl, replace it.
- Clear clogs: A wet-dry vac on the end of the tube can pull out gunk. For stubborn scale, soaking the tube in warm water and vinegar can help. Don't pour vinegar into pumps or internal components unless the manufacturer allows it, and when in doubt, check your manual.
- Prevent: Keep the drain run sloped downward with no sags. Those low spots become small traps that collect sludge.
Note: If your humidifier drains into the same pump as your high-efficiency furnace, verify the pump is working and the discharge line isn't frozen or clogged. A failing condensate pump can cause “mystery” water in the same area.
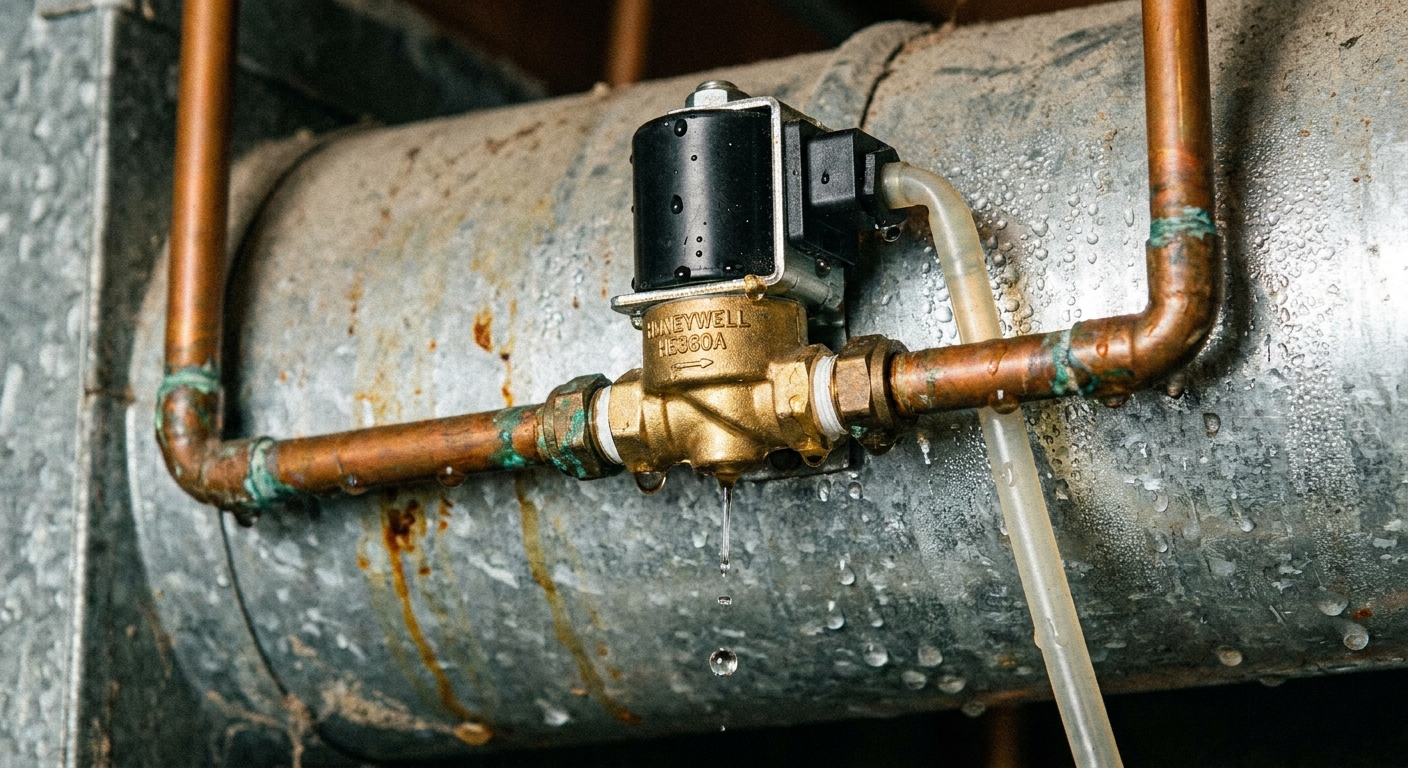
3) Solenoid valve weeping (leaks even when “off”)
What it looks like: A slow drip from the water feed area or through the humidifier even when the humidistat is off. You may find a puddle hours after the system last ran.
Why it happens: The solenoid valve that controls water to the humidifier isn't fully sealing. Mineral grit, a worn internal diaphragm, or debris can let water seep through under household water pressure.
- Confirm it: With the humidifier set to OFF, turn the water supply ON. Watch the outlet side of the solenoid. Any drip is a red flag.
- Fix: Shut water off, disconnect power, and replace the solenoid valve. Many are commonly two-wire and 24V, but not all, so confirm your model and voltage before ordering parts.
- Also check: The small inlet screen on some solenoids. If it's packed with grit, cleaning it may reduce issues, but a weeping valve often comes back.
4) Float orifice clogging (reservoir-style humidifiers)
What it looks like: Water keeps filling past the normal level, or you see water spilling from an overflow port. Some units have a small tank and a float assembly like a mini toilet tank.
Why it happens: Scale builds up on the float mechanism, the float sticks, or a tiny fill orifice clogs and causes erratic filling. Either scenario can lead to overflow and cabinet leaks.
- Fix: Shut off water, open the reservoir, and clean the float arm and valve seat. Vinegar works well for mineral scale.
- Clean the orifice: If there's a small metering port, clear it gently. Don't enlarge it.
- Replace parts: If the float is waterlogged or the valve seat is worn, replacement is usually the long-term cure.
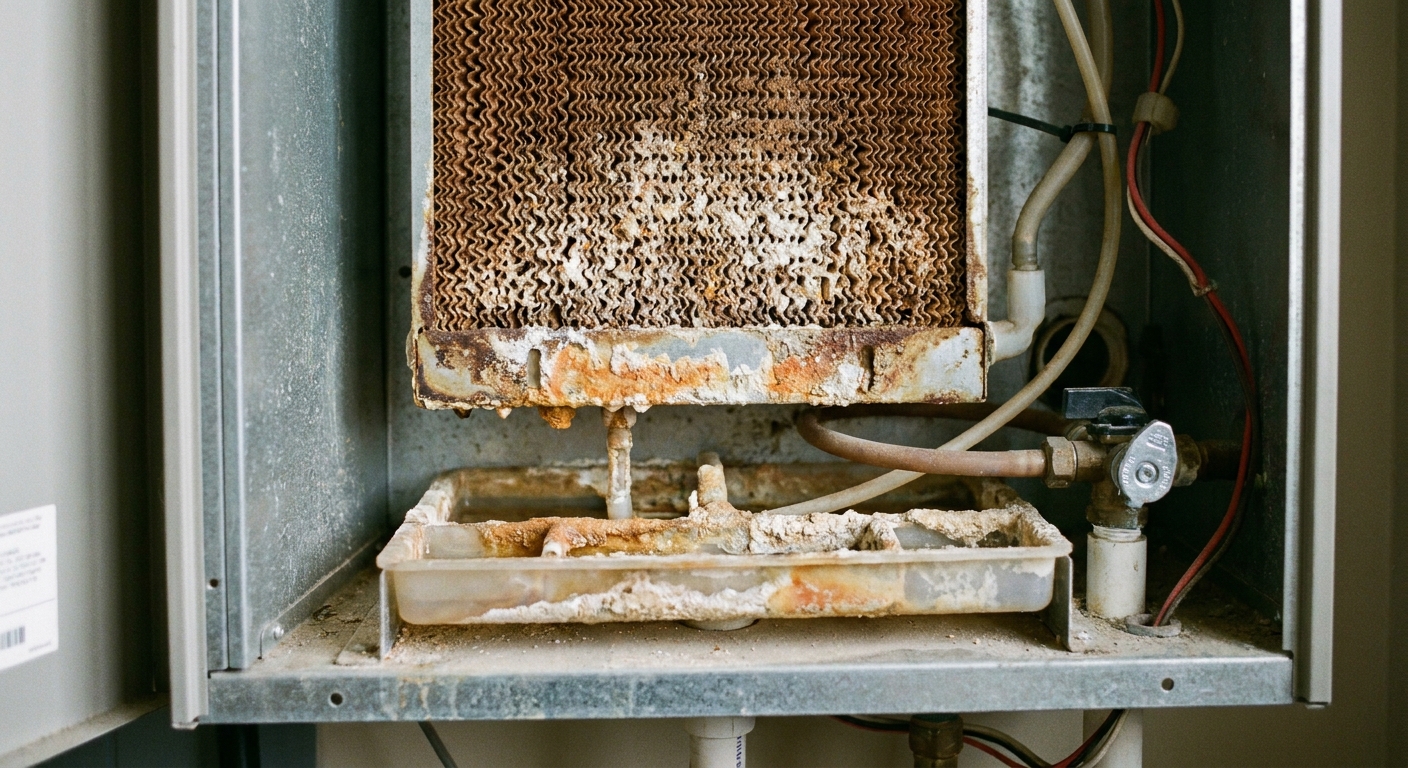
5) Cabinet rust and seam pinholes (the “it leaks from everywhere” problem)
What it looks like: Rust streaks, flaky metal at the bottom edge, or water that seems to appear from a cabinet corner rather than a hose.
Why it happens: Years of minor drips plus mineral-laden water will rot out thin sheet metal. Once you've got pinholes, the cabinet itself becomes the leak path.
- Fix: If you catch it early, address the original cause and replace the pad and drain tube. Clean, dry, and monitor.
- When to replace: If the cabinet bottom is perforated, replacement is usually smarter than patching. Patches rarely hold up long in a wet, warm airflow environment.
Common leak points by type
Bypass humidifier
- Drain tube kinked or clogged
- Water distribution tray not seated
- Bypass duct connection sweating or loose (less common for puddles, more for dampness)
Fan-powered humidifier
- Pad scale causing channeling and drips
- Drain restriction causing overflow
- Cabinet seams corroding from constant moisture
Steam humidifier
- Drain and flush line issues during blowdown cycles
- Loose drain connections
- Cracked drain hose or pump issues (model dependent)
If you've got a steam unit and you don't recognize the drain and flush setup, that's a good place to pause and pull the manual. Steam humidifiers can involve high voltage and very hot water during drain and blowdown, so if the leak is anywhere near electrical parts or you suspect a pump or internal plumbing problem, it's often a pro call.
DIY fixes you can do today
1) Replace the pad and clean the tray
- Turn off humidifier water and power.
- Open the cabinet, remove the old pad, and inspect for heavy scale.
- Rinse and clean the distribution tray and any channels.
- Install the new pad in the correct orientation.
2) Clear or replace the drain line
- Pull the drain hose off and check for sludge at the fitting.
- Flush with warm water. Vacuum from the end if needed.
- Reinstall with a steady downhill slope and no sharp bends.
3) Inspect and tighten fittings
- Check compression nuts, push-to-connect fittings, and the saddle valve area for dampness.
- Snug compression fittings gently. Over-tightening can crack ferrules or distort tubing.
4) Test for a weeping solenoid
- Humidistat OFF, water supply ON.
- Watch for any drip at the solenoid outlet or inside the humidifier.
- If it weeps, plan a solenoid replacement, and confirm voltage and part number by model.
When to call a pro
- You see water near the furnace control board, blower wiring, or burner compartment.
- Your high-efficiency furnace also has condensate issues and you can't tell which system is leaking.
- The humidifier is a steam model and the leak appears tied to electrical components, hot drain water, internal plumbing, or a drain pump.
- You've got recurring leaks after replacing the pad and clearing the drain, which can point to install issues, incorrect water pressure, or a failing valve.
In my experience, the “money leak” is often the one you can't see: a slow solenoid seep that rots out the cabinet over a season. If you fix the obvious stuff but the floor keeps getting damp, that's where I'd look next.
Prevent it next season
- Replace the pad on a schedule: yearly for most homes, more often with hard water.
- Check the drain every fall: pull the hose and flush it before heating season.
- Look for rust early: wipe the cabinet bottom and seams during filter changes.
- Check for sweating: look for beads on the cold feed line or bypass duct, and consider insulation if your basement runs cold and damp.
- Do a quick furnace area check: while you're down there, confirm the furnace filter is seated and the condensate setup is draining properly. (If you need a structured routine, our furnace maintenance checklist pairs well with humidifier upkeep.)
Quick troubleshooting map
- Puddle appears only when humidifier runs: pad channeling, tray mis-seat, drain restriction.
- Puddle appears even when humidifier is “off”: solenoid weeping, supply fitting leak.
- Water inside cabinet but drain is dry: clogged drain outlet or kinked drain hose.
- Rust flakes and pinholes: cabinet deterioration, often from long-term small leaks.
- Beads of water on the outside of pipes or duct: condensation (sweating), not a failed part.
The 30-Second Cheat Sheet
Essential takeaways for: Whole-House Humidifier Leaking Near the Furnace: Causes and Fixes
Stop the leak first
- Turn the humidistat to OFF.
- Shut off the humidifier water valve (often a saddle valve on a copper line). If you have a saddle valve, consider upgrading to a proper shutoff since saddle valves can clog and seep over time.
- If water is near wiring or electronics, shut off furnace power at the service switch or breaker.
Fast diagnosis
- Leaks only when humidifier runs: clogged pad, mis-seated distribution tray, blocked drain line.
- Leaks even when humidifier is OFF: solenoid valve is weeping or a feed fitting is leaking.
- Reservoir-style overflow: stuck float or clogged fill orifice.
- Rusty cabinet bottom: pinholes from long-term drips, often means replacement soon.
- Looks like “leaking,” but it’s sweat: beads on cold water lines or the bypass duct in a cold basement can drip and mimic a leak.
Top fixes (most common)
- Replace the evaporator pad and clean the distribution tray.
- Clear or replace the drain hose and make sure it slopes downhill with no sags.
- Test the solenoid: humidistat OFF + water ON = any drip means the solenoid likely needs replacement.
Call a pro if
- Water is near the furnace control board or burner area.
- You have a steam humidifier and the leak seems tied to electrical parts, hot drain water, a drain pump, or blowdown plumbing.
- The same leak returns after pad and drain fixes (possible valve or install issue).
💡 Tip: Scroll up to read the full article for detailed, step-by-step instructions.
⬆️ Back to topAbout Marcus Vance
Content Creator @ Grit & Home
Marcus Vance is a lifelong DIY enthusiast and self-taught home renovator who has spent the last decade transforming a dilapidated 1970s ranch into his family's dream home. He specializes in budget-friendly carpentry, room-by-room renovations, and demystifying power tools for beginners. Through his writing, Marcus shares practical tutorials and hard-learned lessons to help homeowners tackle their own projects with confidence.