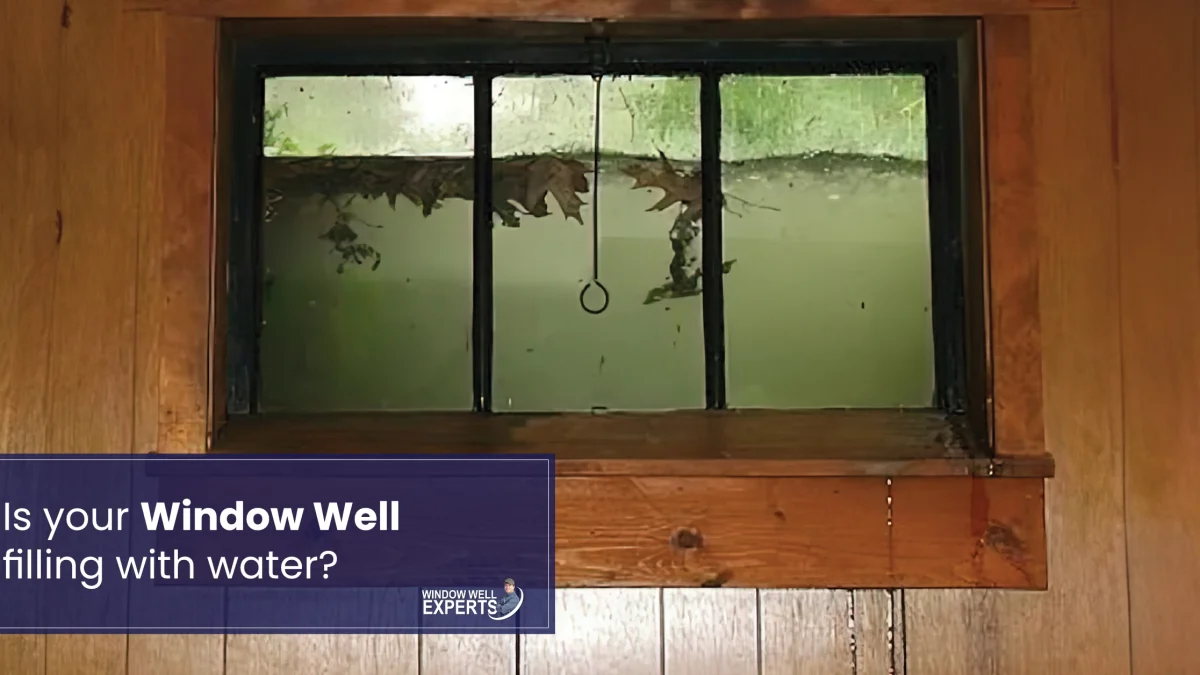
Why window wells flood (and why it becomes a basement problem fast)
A window well is basically a little bowl next to your foundation. When everything is working, rainwater lands near it and drains down into gravel and a drain line. When something is off, that bowl fills up and the water looks for the next easiest path, which is usually your window frame, a tiny gap in caulk, or the joint where the foundation meets the window opening.
Most window well floods come from one (or a combo) of these:
- Roof water dumping too close (short downspouts, clogged gutters, or a downspout aimed right at the well).
- Bad grading where soil slopes toward the house, feeding the well like a funnel.
- Clogged window well drain or a drain that was never connected to anything useful.
- Gravel packed with silt, turning the bottom into muddy concrete.
- No cover, so the well collects rain plus leaves, mulch, and snow melt.
The good news is you can knock out a lot of this in a weekend without jumping straight to full basement waterproofing. Start with the simplest water-diversion fixes first, then move to drainage checks.
Safety and quick triage
Before you dig or drain
- If the well is full and still rising, do not yank the window open. Relieving pressure the wrong way can send water inside fast.
- Kill power to nearby outlets if water got into the basement. Use a flashlight, not a corded work light.
- If the window is leaking now, set towels and a shallow pan inside, then address the outside water source first.
Fast triage checklist
Grab a notepad and answer these in five minutes:
- Is a downspout discharging within 6 feet of the well?
- Do you see a “valley” in the soil that channels water toward the well?
- Is the well full of leaves, mulch, or soil?
- Do you see a drain opening at the bottom? If yes, is it buried?
- Does the well flood only during heavy rain, or even days later (which can hint at a slow drain line)?
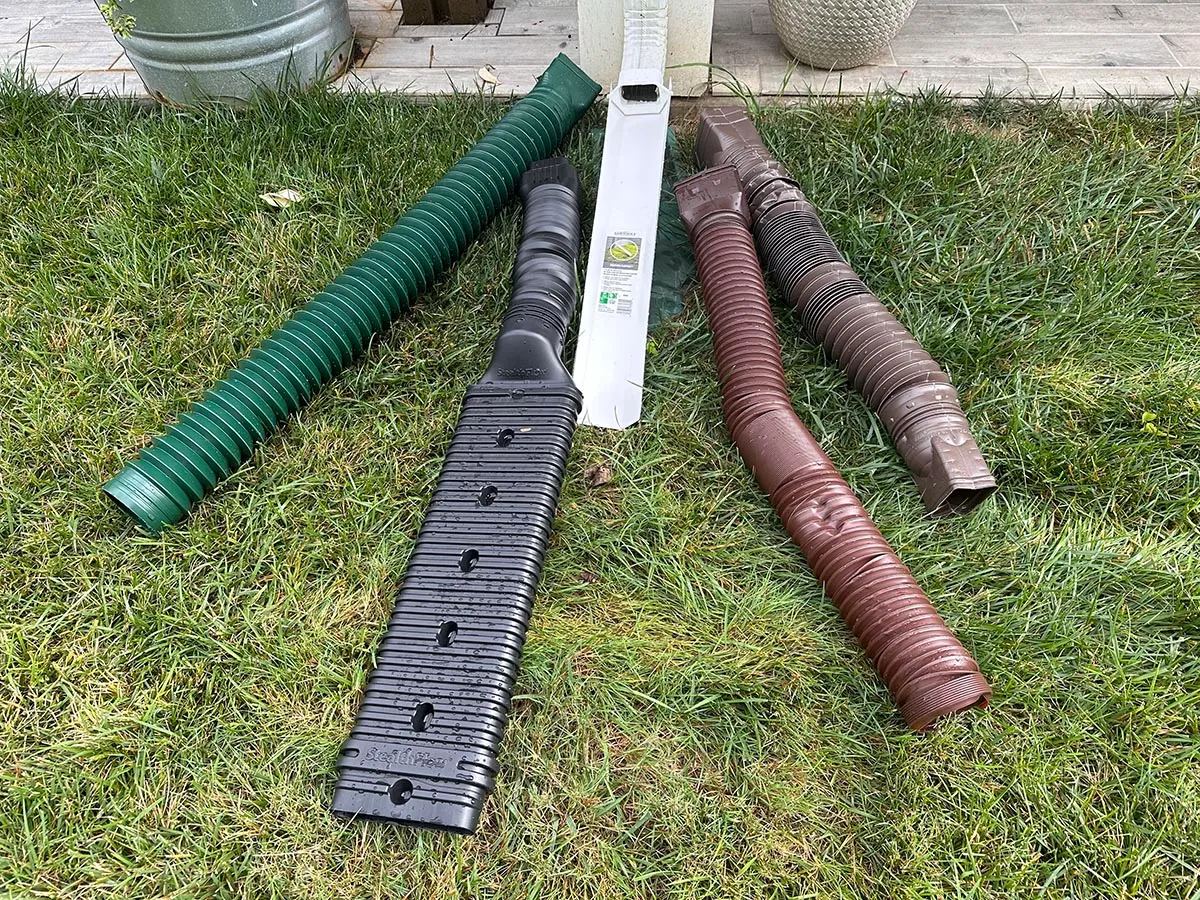
Weekend fix #1: Extend downspouts and control roof runoff
If I could only do one thing at most homes, it would be this. Roof water is a huge volume, and it hits hard during storms. If a downspout dumps near a window well, you are asking that well to handle a firehose.
Downspout extension basics
- Get water at least 6 to 10 feet away from the foundation where possible.
- Make sure the extension discharges downhill, not into a low spot that sends water right back.
- If you use a buried line, use a solid drain pipe for the run and a pop-up emitter at the end. Perforated pipe is for distributing water, not carrying it away.
Digging safety note
If you’re trenching for a buried downspout line, call 811 (or your local utility locating service) before you dig. It’s quick, and it can keep a “simple weekend project” from turning into a dangerous, expensive mess.
Also check your gutters
- Clean them. Overflowing gutters can dump sheets of water right into the window well.
- Fix negative pitch or sagging sections so water actually reaches the downspouts.
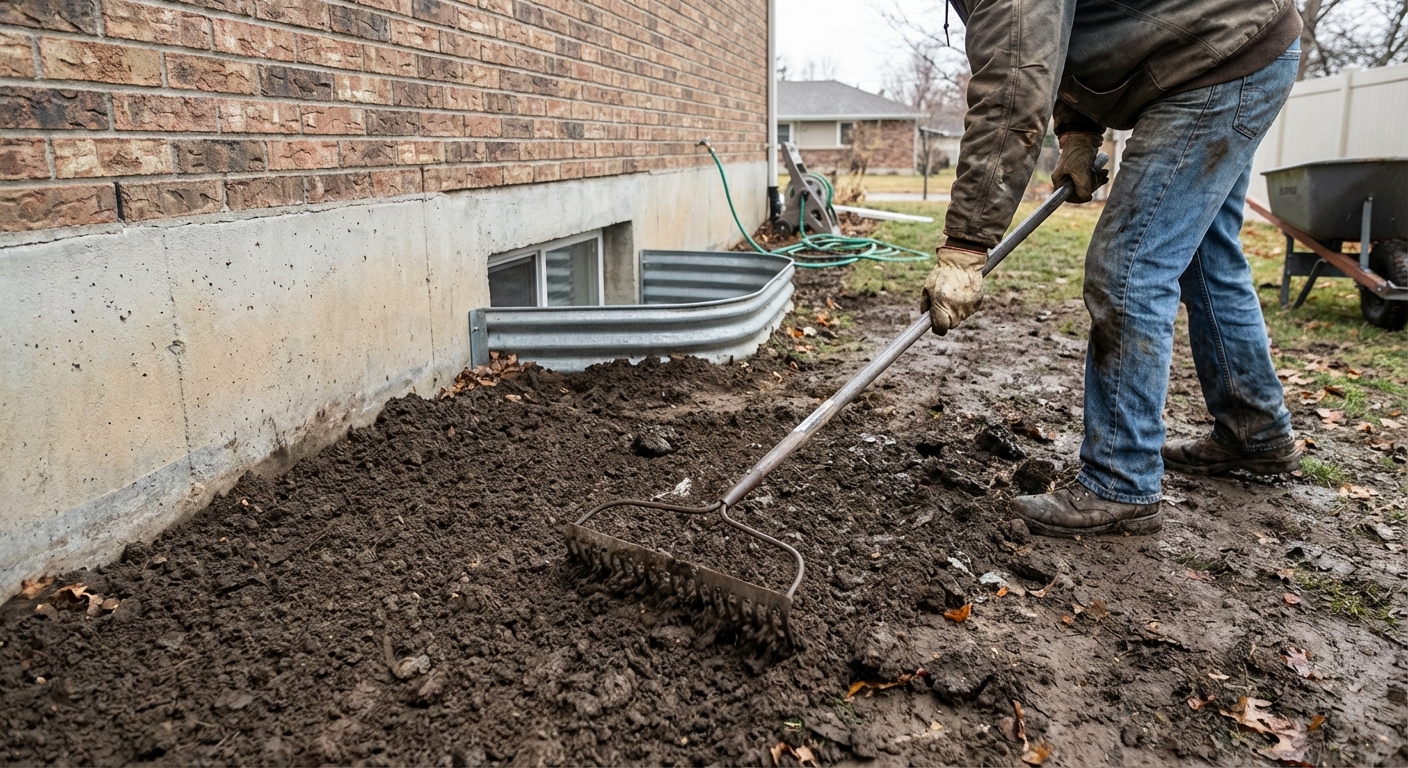
Weekend fix #2: Correct grading around the well
If the ground slopes toward your house, your window well will always feel like it’s “in the line of fire.” Your goal is simple: make surface water flow away from the foundation.
What good grading looks like
- Slope away from the house for at least 6 feet if you can.
- A common target is about 1 inch of drop per foot (roughly a 5 percent slope). You do not need perfection. You need “not toward the house.”
Steps
- Pull mulch back and inspect soil height around the well rim.
- Build up low spots with compactable fill soil, then cap with topsoil if needed.
- Compact in thin layers with a hand tamper. Loose soil settles and recreates the dip.
- Keep soil below siding and weep screed clearances. Do not bury wood or cover brick weep holes.
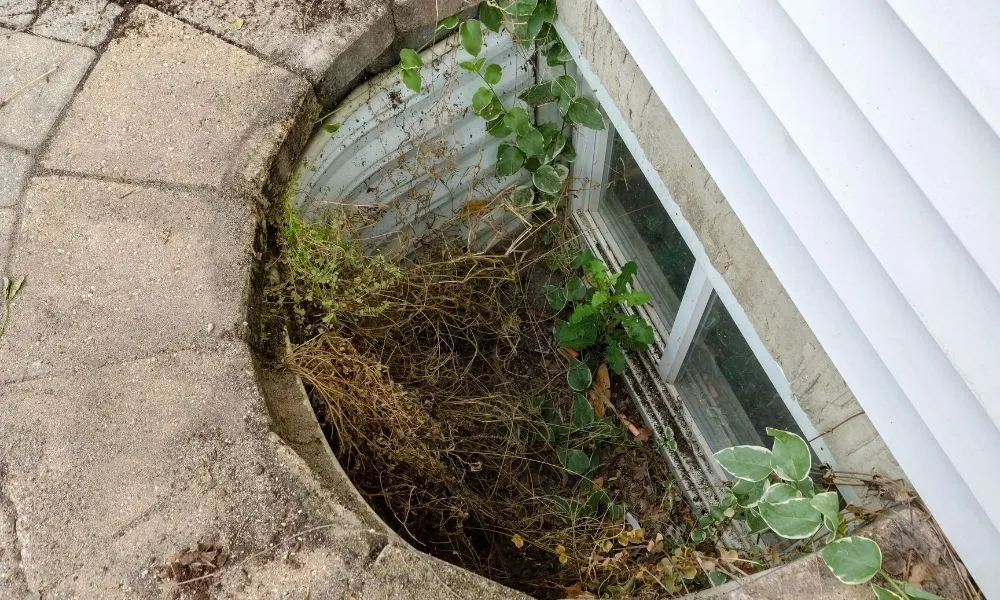
Weekend fix #3: Clean the well and expose the drain
This step is boring, but it’s the foundation for everything else. If the drain is buried under muck, no cover or extension will feel like it “works.”
What you need
- Gloves and a small shovel or garden trowel
- Bucket
- Shop vac (optional but helpful for sludge)
- Garden hose
Steps
- Scoop out debris: leaves, mulch, toys, old landscape fabric, anything that can block water flow.
- Expose the bottom: you should see gravel. If it’s mostly soil, you’re due for a gravel refresh.
- Find the drain (if you have one): often a 3 to 4 inch pipe opening or a small grate at the bottom.
- Test it: pour a gallon of water slowly. A healthy drain should accept water without the well filling up. If it backs up quickly, treat it like a clog until proven otherwise.
Weekend fix #4: Refresh the gravel so water can actually move
Gravel is not just “filler.” It’s your mini drainage field. Over time, fine soil washes in and packs tight. When that happens, water sits instead of filtering down.
How much gravel and what type?
- Use washed drainage rock, typically 3/4 inch clean gravel. Avoid pea gravel if you can. It locks together and clogs easier.
- Aim for 4 to 6 inches of clean gravel at the bottom minimum. Deeper is fine as long as the drain opening stays clear.
Steps
- Scoop out the top layer of dirty gravel and silt if it’s packed.
- If there’s landscape fabric in the well and it’s clogged like a coffee filter, remove it. In a window well, fabric often causes more problems than it solves.
- Pour in washed gravel and rake it level.
- Re-test with a slow hose flow for several minutes.
My mistake, so you do not have to repeat it: I once “topped off” a well with fresh gravel without removing the sludge underneath. It looked great for a month and then flooded again because the bottom was still basically clay.
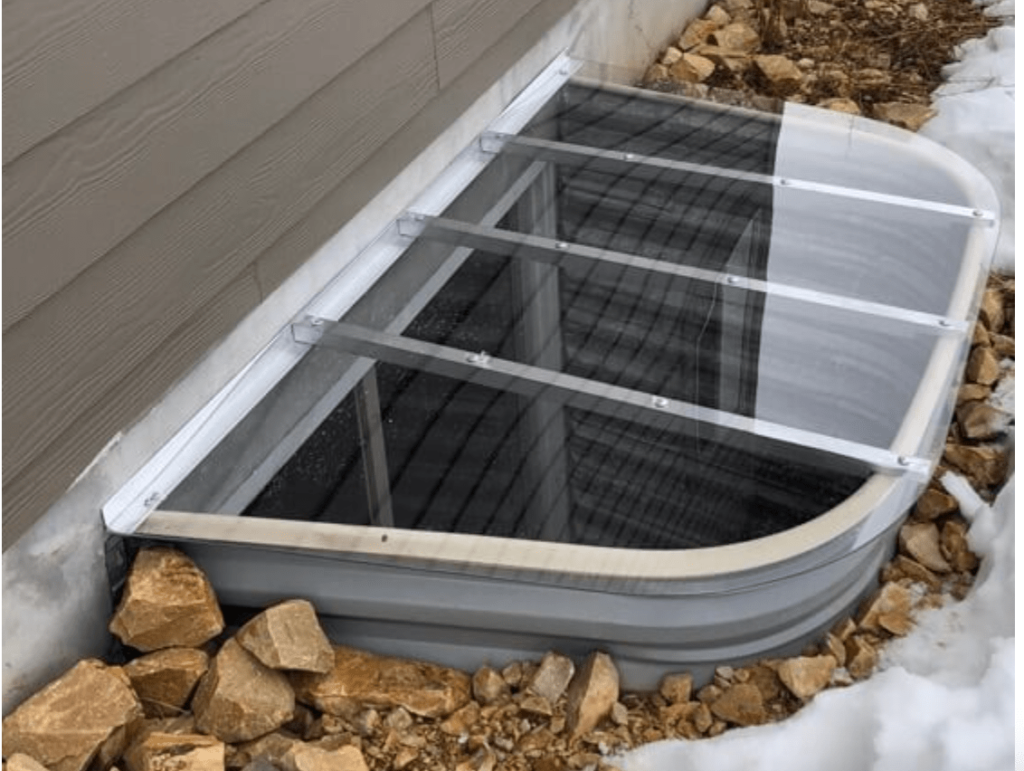
Weekend fix #5: Add a window well cover (the right kind)
A cover does two big things: it blocks direct rainfall and it keeps leaves from building a compost pile in your well. It’s not magic, but it’s one of the best bang-for-your-buck upgrades if your drain works.
Common cover options
- Bubble style polycarbonate cover: sheds rain and snow well. Great for wells that collect a lot of roof runoff splash.
- Flat polycarbonate cover: cleaner look, but can sag if not supported.
- Metal grate cover: good for keeping kids and pets safe, but it still lets rain through. Best when you mainly need debris control and safety.
Cover tips that prevent headaches
- Anchor it well. Wind can turn a loose cover into a backyard kite.
- Leave ventilation if the window is an egress window or you get condensation issues. Many bubble covers naturally have gaps.
- Do not block the window if it’s a required egress escape route. Use an egress-rated cover that can be opened from inside without tools.
If your window well has a drain: where it should go
A proper window well drain usually ties into one of these:
- Foundation drain (footing drain) that leads to daylight on a slope or to a sump pit.
- Stormwater system in some neighborhoods, where allowed by code.
If the drain just ends in the dirt, it’ll work only until the surrounding soil is saturated. That is why some wells drain fine in light rain and fail during a long storm.
Quick test for a suspected clogged line
- After cleaning, run a hose into the well for 5 to 10 minutes.
- If water rises quickly or drains slowly, the line may be clogged, crushed, or disconnected.
- If you have a sump pump, listen for it cycling while you run water. No cycling does not prove anything, but cycling can hint that the line is connected.
DIY next step: a plumbing snake can sometimes clear a short clog if you can access the drain opening. If you hit hard resistance quickly, stop. You may be dealing with a collapsed pipe.
When window well flooding points to bigger drainage issues
Sometimes the window well is not the whole problem. It’s just the lowest, most obvious place water shows up.
Signs you may need a pro evaluation
- Water comes up from below the well (you see bubbling or the well fills even when rain is light).
- Multiple wells flood during the same storm.
- Basement seepage at the cove joint (where the wall meets the slab), not just at the window.
- Efflorescence (white mineral residue) on foundation walls near the well.
- Sump pump runs constantly during rain or you do not have a sump where one seems necessary.
- Cracked or bowing foundation walls, or doors and windows inside sticking suddenly.
That’s when you start talking about larger solutions like repairing or replacing footing drains, adding an exterior drainage system, or installing or upgrading a sump pump system. Window well fixes still matter, but you do not want to treat the symptom and ignore the water pressure building against the foundation.
A simple order of operations
- Redirect roof water: gutters cleaned, downspouts extended.
- Fix grading: eliminate dips that feed the well.
- Clean the well: remove debris and expose drain.
- Refresh gravel: restore drainage capacity.
- Add a cover: keep rain and debris out.
- Investigate drain line: snake, camera inspection, or pro help if it still backs up.
If you do it in this order, you’re working from the cheapest, highest-impact fixes to the more involved ones.
FAQ
Can I just pump the well out when it floods?
You can, but it’s a temporary bandage. If the well fills once, it’ll fill again until you address the source (roof runoff and grading) and the exit path (drain and gravel).
Should I seal around the window to stop leaks?
Sealing can help, but do not rely on caulk as your waterproofing plan. The goal is to keep water from standing against the window in the first place. Use sealant as a backup, not the main strategy.
Is a window well cover enough by itself?
It depends. If your well is filling mainly from direct rainfall and debris, a cover is a big win. If your downspout dumps nearby or the drain line is clogged, a cover alone usually will not solve flooding.
How do I know if my well drain connects to my sump pit?
After cleaning the well, run water from a hose into it and listen for sump pump activity. If you can safely access your sump, you may also see water entering the pit. If nothing happens and the well backs up, the connection may be missing or blocked.
My go-to weekend materials list
- Washed 3/4 inch gravel (1 to 3 bags depending on well size)
- Work gloves, trowel, and bucket
- Garden hose
- Downspout extension or solid drain pipe and fittings
- Window well cover sized to your well
- Hand tamper (optional but great for grading)
If you tackle the biggest wins first (roof runoff control, grading, and a clean, draining well), you’ll solve the majority of window well flooding cases I see in older homes.
About Marcus Vance
Content Creator @ Grit & Home
Marcus Vance is a lifelong DIY enthusiast and self-taught home renovator who has spent the last decade transforming a dilapidated 1970s ranch into his family's dream home. He specializes in budget-friendly carpentry, room-by-room renovations, and demystifying power tools for beginners. Through his writing, Marcus shares practical tutorials and hard-learned lessons to help homeowners tackle their own projects with confidence.