🚨 In a DIY emergency or rush?
Skip the details and jump straight to our 30-second cheat sheet for the most crucial info.
When a wine cooler or beverage fridge stops cooling, it feels extra personal because it is usually packed and tucked into a tight spot. The good news is most “not cooling” problems are either a simple settings or airflow issue, or a predictable part failure like a fan or start relay.
This guide walks you through the fastest checks first, then the deeper ones. You do not need to be an appliance tech, but you do need to be careful. Electricity and hot compressor parts can injure you.
Before you start
- Unplug first before removing panels or touching wiring.
- Expect a trend first: after a setting change, you should usually see some temperature movement within 1 to 3 hours if it is working. Full stabilization can take 12 to 24 hours after moving the unit, loading it up, or making a big setpoint change.
- Know normal temps: many wine coolers are designed for about 40/45 to 65°F depending on the model, not “near freezing.” A beverage fridge usually targets 34 to 40°F, but some models cannot hold the low end in a hot room.
- Ambient temperature matters: if the room is above 90°F, many compact units struggle. Check your unit’s ambient rating or climate class in the manual or on the label if you can.
Quick symptom map
- No power: outlet, GFCI, breaker, plug, control lock, failed power board.
- Runs but warm: airflow, dirty condenser, door leak, fan not running, heavy frost, or sealed-system issue.
- Clicks or hums then clicks: start relay/overload, failing compressor, or low voltage.
- Heavy frost or ice: door leak, blocked airflow, defrost issue (or it may simply be a manual-defrost model that needs a melt-out).
Step 1: confirm it has power
Do this before you assume you have a cooling failure.
- Test the outlet: plug in a lamp or phone charger.
- Check GFCI and breaker: built-ins under counters often share a GFCI circuit that trips quietly.
- Avoid extension cords: they can cause voltage drop that makes compressors struggle to start.
- Check the plug fit: a loose plug can cause intermittent power and weird behavior.
Step 2: confirm what type you own
Wine and beverage coolers come in two main flavors. The troubleshooting path depends on which one you have.
Thermoelectric (Peltier)
- Usually lighter, quieter, and common in smaller countertop or compact coolers.
- No compressor “humming” cycle like a normal fridge.
- They rely heavily on airflow and can lose performance fast when dusty or tightly installed.
- They often cool to about 20 to 30°F below room temperature, but the real limit depends on the design and the manufacturer’s spec.
Compressor
- Heavier, more powerful, better for built-ins and larger capacities.
- You will hear the compressor turn on and off.
- They have a condenser, fans, and often a start relay.
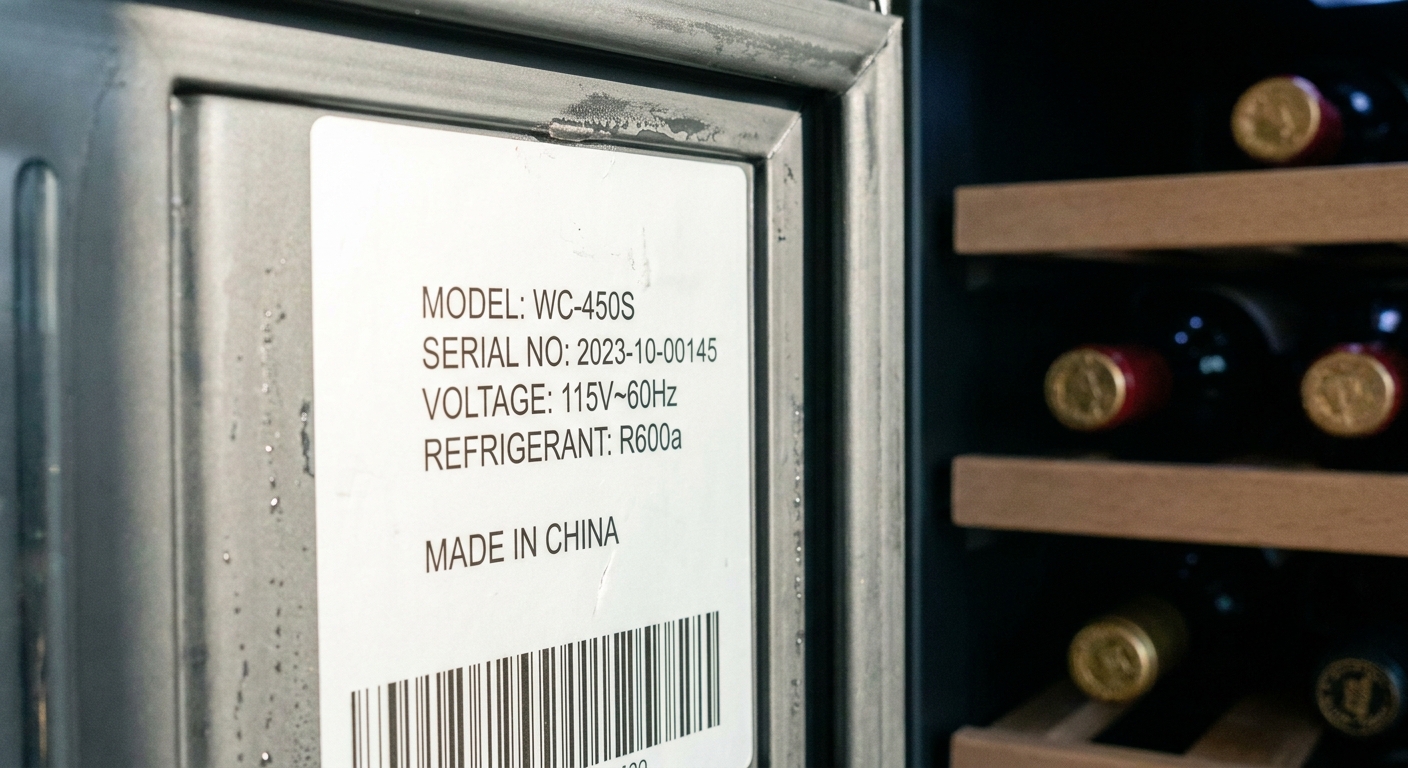
How to tell quickly: check the spec label inside the door or back panel. Look for the word “thermoelectric” or for refrigerant type like R600a or R134a which means compressor.
Step 3: settings and controls
I have personally chased my tail on an appliance problem that was just a bumped setting. Do these checks before you grab tools.
- Setpoint: set it colder than your target temp. Within 30 to 60 minutes, you should typically hear or feel signs of cooling (fans running, compressor on for compressor models) and you should see a temperature trend within a few hours.
- Mode settings: some dual-zone units have “demo,” “eco,” or “vacation” modes that reduce cooling.
- Temperature units: make sure you are not accidentally reading Celsius.
- Child lock: a locked panel can ignore input.
- Error codes: if you see a code, look it up in the manual or the manufacturer support page. Many codes point straight to a sensor, fan, or defrost issue.
- Reset: unplug for 5 minutes, plug back in.
Tip: use a cheap standalone fridge thermometer in a cup of water on the middle shelf. Give the water 15 to 30 minutes to settle before you trust the reading. Air swings fast when the door opens, water gives you a steadier number.
Step 4: airflow and installation
These coolers hate being smothered. Heat has to go somewhere. If it cannot dump heat, it cannot make cold.
Check clearances
- Freestanding units: typically need a few inches behind and on the sides. Consult your manual if you can find it.
- Built-in units: must match the cabinet design they were made for. If a freestanding cooler is stuffed into a tight cabinet, it will usually overheat.
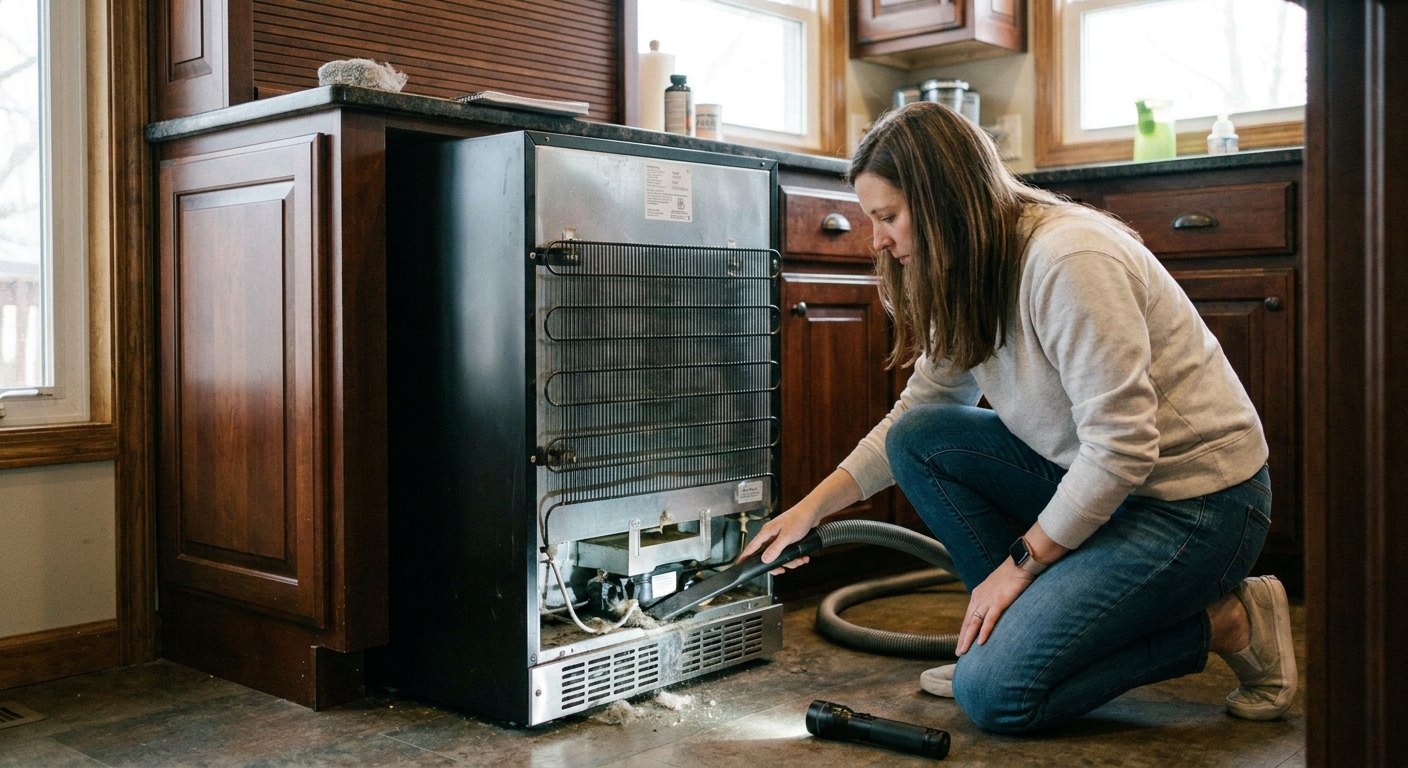
Clean dust and pet hair
Compressor models usually pull air through a front grille or rear area to cool the condenser. Thermoelectric units rely on clear vents and a working fan to dump heat.
- Vacuum the grille and any exposed coils with a soft brush attachment.
- Do not bend delicate fins if you can avoid it.
Do not choke interior airflow
- Do not pack cans or bottles tight against the back wall if it blocks vents.
- Leave a little breathing room around the interior circulation fan area (if your model has one).
Step 5: door seal and door habits
A weak seal is a silent killer. These units are small, so a small leak is a big percentage of the total cooling capacity.
Dollar-bill test
Close the door on a dollar bill and pull. You want steady resistance around the entire perimeter. If it slides out easily in one area, that spot is leaking.
Common seal problems
- Gasket is dirty: clean with warm soapy water, then dry.
- Gasket is warped: gently warm and reshape with a hair dryer on low, then close the door for a few minutes to help it set.
- Door is out of alignment: check hinge screws and whether the unit is level front to back and side to side.
Stop warm-air loading
Putting room-temperature cans into a packed cooler forces a long recovery. That is normal, but if you do it daily, it can look like “not cooling.” Spread the load out and avoid blocking vents inside.
Step 6: leveling and vibration
Some wine units have vibration dampers and specific shelf positions. If the unit is rocking, the door may not seal perfectly and compressor units can sound louder and cycle oddly.
- Make sure the cooler is level. Adjust the feet.
- Check shelves and bottles are not preventing the door from fully closing.
- Listen for a fan blade hitting a wire or panel, which can slow the fan and reduce cooling.
Step 7: thermoelectric checks
Thermoelectric coolers live or die by airflow. When they fail to cool, the top suspects are:
Exhaust fan not running
- With the unit on, place your hand near the rear vent. You should feel warm air being pushed out.
- If the fan is dead or intermittent, the unit will quickly lose cooling.
Vents blocked or dusty
- Clean vents thoroughly.
- Make sure there is breathing room around the unit.
Peltier module fading
If fans run, vents are clear, and it still cannot pull down temperature, the Peltier module may be weak. On many budget units, replacing the module and dealing with thermal paste, heat sinks, and wiring costs more time and money than a replacement cooler.
Step 8: compressor “hot side” checks
Compressor coolers behave more like a standard refrigerator. If it runs but does not cool, or it clicks and never really starts, these checks help you narrow it down.
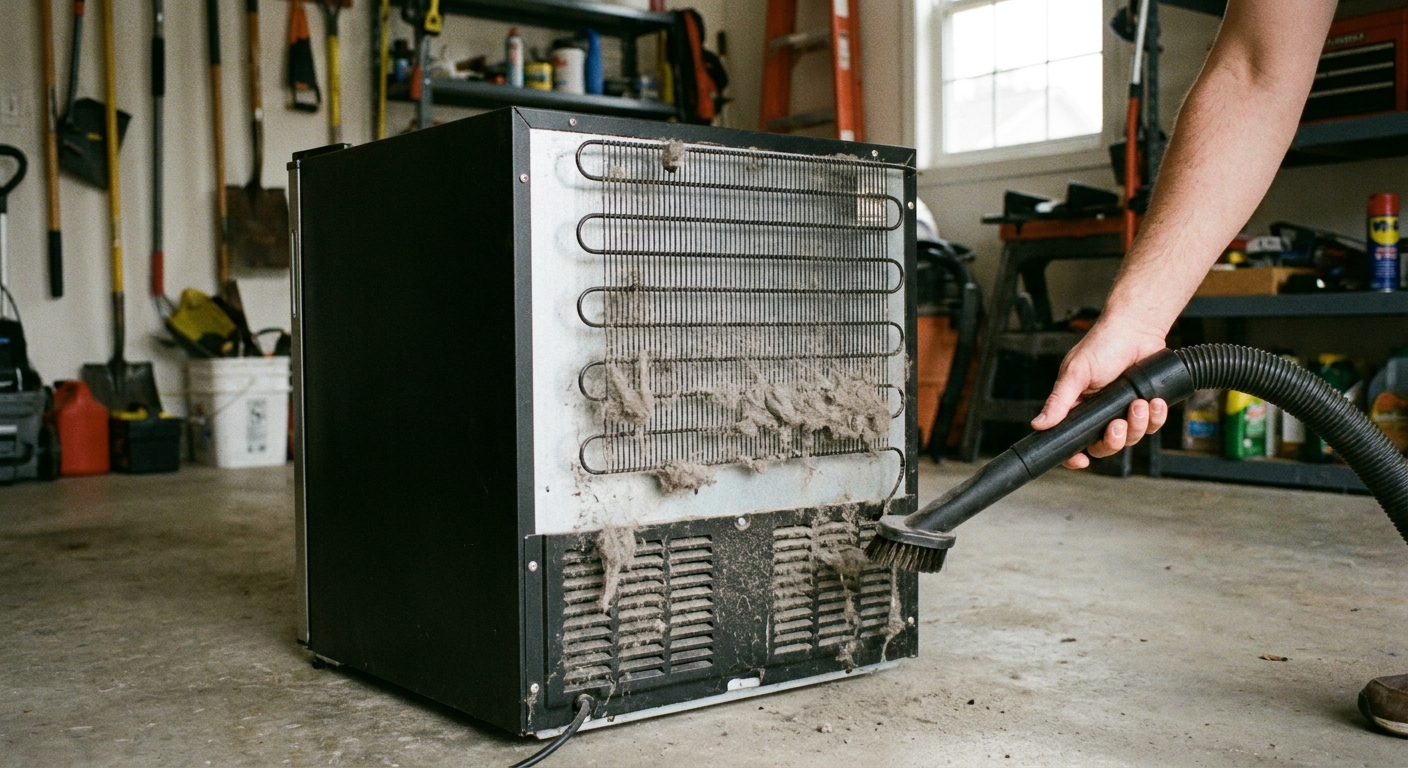
Condenser coil and condenser fan
- Coils: clean them. Dust acts like a blanket.
- Fan: many built-in beverage fridges have a fan pulling air across the condenser. If the compressor is hot but there is no airflow, suspect the fan or a blockage.
Evaporator fan (inside airflow)
If the compressor runs and the condenser side is warm, but inside is barely cool, the evaporator fan may not be moving air across the cold coil.
- Open the door and listen. Some fans stop when the door opens, so hold the door switch closed if it is safe and accessible.
- Door switch quick check: if the light does not change when you press the switch, or the fan never runs when it should, the switch can be stuck or failed.
- Look for ice buildup blocking the fan.
Step 9: clicking, humming, and start relay
Here is what the sounds usually mean:
- Repeated clicking every few minutes: often a failed start relay or overload, or a compressor that is struggling to start.
- Hums briefly then clicks off: start relay or compressor problem (and sometimes low voltage from a weak outlet or extension cord).
- Compressor runs continuously but never gets cold: could be airflow, dirty condenser, heavy frost blocking airflow, or a sealed-system issue like low refrigerant or a restriction.
Start relay basics
The start relay is a small device on the side of the compressor. When it fails, the compressor may not start even though the unit has power. On many models, this is one of the more affordable repairs, but access varies.
DIY reality check: if you are comfortable unplugging the unit, removing an access cover, and swapping a plug-in part with the exact match, a relay can be a reasonable DIY fix. If wiring is brittle, melted, or you see burned terminals, I would stop and call a pro.
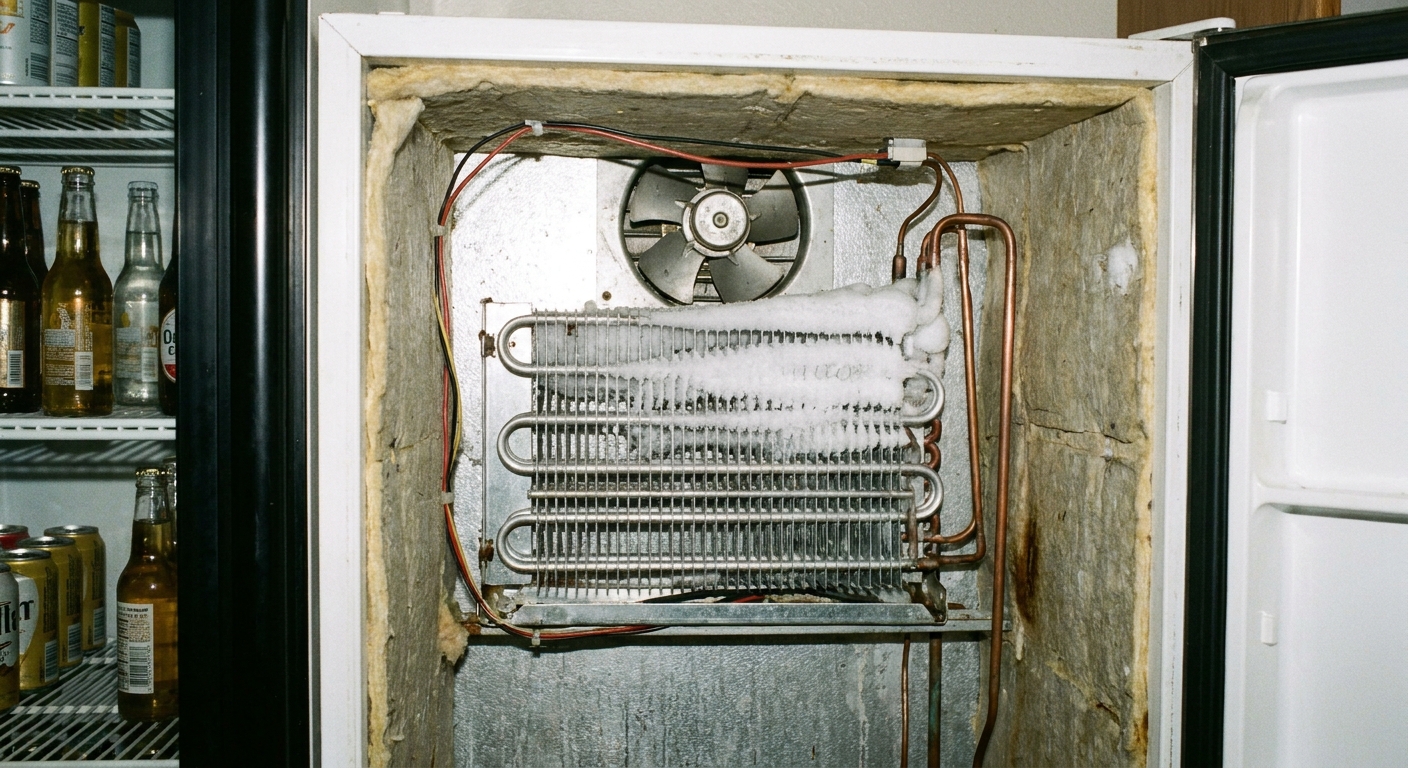
Step 10: frost, ice, and defrost
Some beverage fridges and many wine coolers are manual-defrost by design, so a light frost film on the back wall can be normal over time. What is not normal is frost that turns into a solid block of ice and chokes airflow.
- Normal: a thin, even frost layer that builds slowly and does not block vents or the fan.
- Problem: heavy frost, a thick ice sheet, or the fan hitting ice, especially if temps climb.
- If you see heavy frost: unplug and do a full manual defrost with the door open for several hours (towels on the floor).
- After defrost: if it cools normally for a day or two then repeats, you may have a door seal leak letting humid air in, or a defrost control issue on models that are supposed to defrost automatically.
Do not chip ice with a screwdriver. One poke in the wrong spot and you can puncture a refrigerant line and turn a “maybe repair” into “definitely replace.”
Step 11: sealed-system red flags
If you hit these symptoms, the issue may be in the sealed refrigeration system:
- Compressor runs but the condenser stays near room temperature after 10 to 15 minutes of steady run time.
- You hear the compressor running, but there is little to no frost pattern on the evaporator (behind the interior panel on many models).
- Only a tiny patch of the evaporator frosts and the rest stays warm.
- Oily residue near tubing joints (possible refrigerant leak).
Sealed-system repairs require specialized tools and certification for handling refrigerant. On many specialty beverage units, the repair cost can rival the price of a new cooler.
Repair vs replace
I love repairing things. It is basically my hobby. But wine and beverage coolers have a tipping point where replacement is the smarter play.
Usually worth repairing
- Dirty condenser or blocked vent
- Door gasket cleaning or replacement
- Loose hinges or leveling issues
- Fan replacement
- Start relay replacement (compressor units)
Usually cheaper to replace
- Thermoelectric unit with a weak Peltier module (especially budget brands)
- Sealed-system leak or restriction
- Compressor itself is failing
- Control board failures on older units where parts are discontinued
Rule of thumb: if the repair estimate is over 50% of the cost of a comparable new unit, I lean toward replacing unless it is a high-end built-in model.
Before you call for service
If you do bring in a technician, you will save time and money by collecting a few details:
- Model and serial number (photo it)
- Does it have power? Lights on?
- Is the compressor running, clicking, or silent?
- Any error codes on the display?
- Ambient room temperature and where the unit is installed
- What you already cleaned or tested
That short list can turn a “diagnostic visit” into “arrive with the right part.”
The 30-Second Cheat Sheet
Essential takeaways for: Wine Cooler Not Cooling: Troubleshooting Steps
Fast checks (5 minutes)
- Confirm power: outlet works, GFCI not tripped, breaker on, plug seated fully. Avoid extension cords.
- Confirm type: thermoelectric (needs lots of airflow, often cools about 20 to 30°F below room temp) vs compressor (uses refrigerant like R600a or R134a).
- Settings: set colder, check eco/demo mode, unlock controls, unplug 5 minutes to reset.
- Door seal: dollar-bill test, clean gasket, make sure bottles or shelves are not blocking closure.
- Airflow: pull it out of the cabinet, vacuum grille and vents, make sure it has clearance.
If thermoelectric
- Feel for warm air exhaust at the rear vent.
- If fans are not running or vents are dusty, fix airflow first.
- If fans run and vents are clear but it still will not cool, the Peltier module may be fading and replacement is often cheaper.
If compressor-based
- Clean condenser and verify the condenser fan runs.
- Check evaporator fan inside for airflow (ice can block it).
- Clicking or hum-then-click: often a bad start relay/overload.
- Runs nonstop but warm: airflow issue or possible sealed-system problem.
When to stop DIY
- Oily residue on lines, tiny frost patch, or suspected refrigerant leak
- Burned wiring or melted terminals
- Repair quote above 50% of replacement cost on a mid-range unit
💡 Tip: Scroll up to read the full article for detailed, step-by-step instructions.
⬆️ Back to topAbout Marcus Vance
Content Creator @ Grit & Home
Marcus Vance is a lifelong DIY enthusiast and self-taught home renovator who has spent the last decade transforming a dilapidated 1970s ranch into his family's dream home. He specializes in budget-friendly carpentry, room-by-room renovations, and demystifying power tools for beginners. Through his writing, Marcus shares practical tutorials and hard-learned lessons to help homeowners tackle their own projects with confidence.