🚨 In a DIY emergency or rush?
Skip the details and jump straight to our 30-second cheat sheet for the most crucial info.
If water is running toward your house, it is not just an annoying puddle problem. It is a foundation problem, a basement problem, and a “why is my mulch floating away again?” problem.
The good news: a lot of drainage issues start with simple grading, and grading is one of the most budget-friendly fixes you can do with a shovel, a wheelbarrow, and a little patience. The key is doing it measurably and strategically, not just tossing soil at the low spot and hoping for the best.
Why slope matters
Gravity is always working. If the ground tilts toward your house, rainwater follows that path and stacks up along the foundation. Over time, that can lead to:
- Basement or crawl space moisture and musty smells
- Efflorescence (that white, chalky residue) on foundation walls
- Soil erosion and exposed footing in bad spots
- Freeze-thaw damage in colder climates
- More hydrostatic pressure against foundation walls after heavy storms
For many homes, the standard target is a slope that falls about 6 inches over the first 10 feet away from the house. That is roughly a 5% grade (6 inches of drop over 120 inches of run). You may also see rules like “about 1 inch per foot.” Local codes and site conditions vary, so treat this as a solid baseline, not a universal law.
Do not get hung up on perfection. You are trying to create a consistent escape route for water so it has no reason to hang out at your foundation.
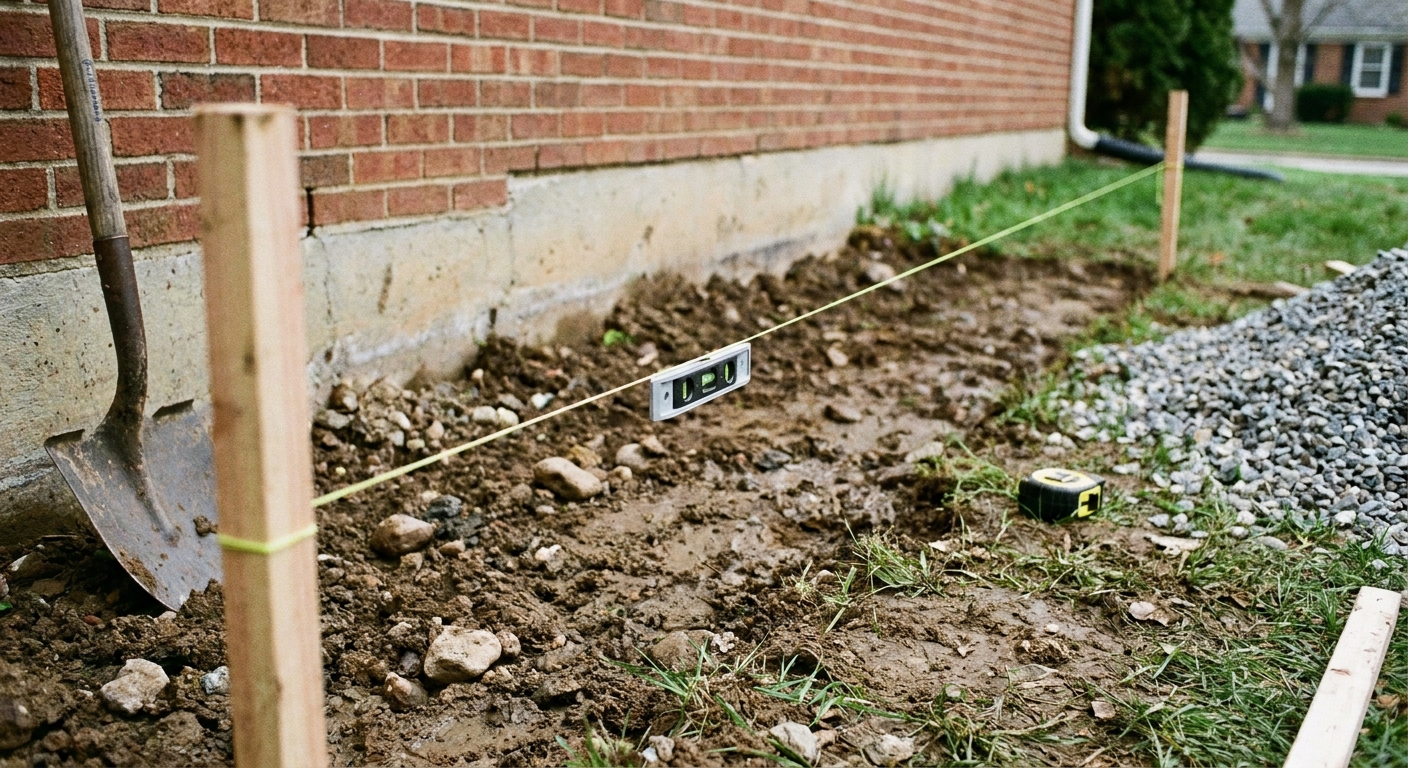
Measure slope
You can eyeball slope, but water does not care about your eyeballs. Measure it so you know how much you need to change.
Option A: String line (my go-to)
- Tools: two stakes or short pieces of rebar, mason line, line level, tape measure
- Drive one stake near the foundation and one stake 10 feet out.
- Tie a string between them at a convenient height.
- Use a line level to make the string level.
- Measure from the string down to the ground at the stake by the house, and again at the stake 10 feet away.
- The difference between those measurements is your slope over 10 feet.
How to read it: If the string-to-ground distance is larger at the 10-foot stake, the ground is lower there, meaning it slopes away (good). If it is smaller at 10 feet, the ground rises away (bad for drainage).
Example: If the string is 12 inches above the ground at the foundation stake and 18 inches above the ground at the 10-foot stake, the yard drops 6 inches over 10 feet. That is the goal.
Safety first
- Call before you dig: Even “just grading” can turn into digging deeper near downspouts, drain lines, or low spots. Get utility locates before you cut into the soil with any enthusiasm.
- Be gentle at the wall: If your foundation has parging, dampproofing, or waterproofing, do not gouge it with a shovel. Work with hand tools close to the wall and avoid scraping coatings off.
Check no-bury zones
This is where a lot of well-meaning DIY grading goes sideways. Adding soil is simple, but adding it in the wrong place can trap moisture against your house.
Keep these areas clear
- Siding clearance: Keep soil below siding and follow the manufacturer’s clearance requirements. As a common reference point, many wood-based sidings call for about 6 inches of clearance to grade, and fiber cement often calls for about 2 inches to hard surfaces and about 6 inches to grade. Vinyl and other systems can differ. If siding is already close to grade, you may be limited on how high you can build up.
- Weep holes (brick veneer): If you have brick, do not cover the little openings near the bottom courses. They are there for drainage and ventilation.
- Termite inspection gap: In termite-prone areas, leaving a visible band of foundation can matter for inspections and prevention.
- Window wells and vents: Do not bury them. If you need more height there, you may need a different strategy than “just add dirt.”
If you cannot add enough soil to hit the ideal slope without burying something you should not, that is a clue you may need a swale, a collection point, or a drain further out. More on that below.
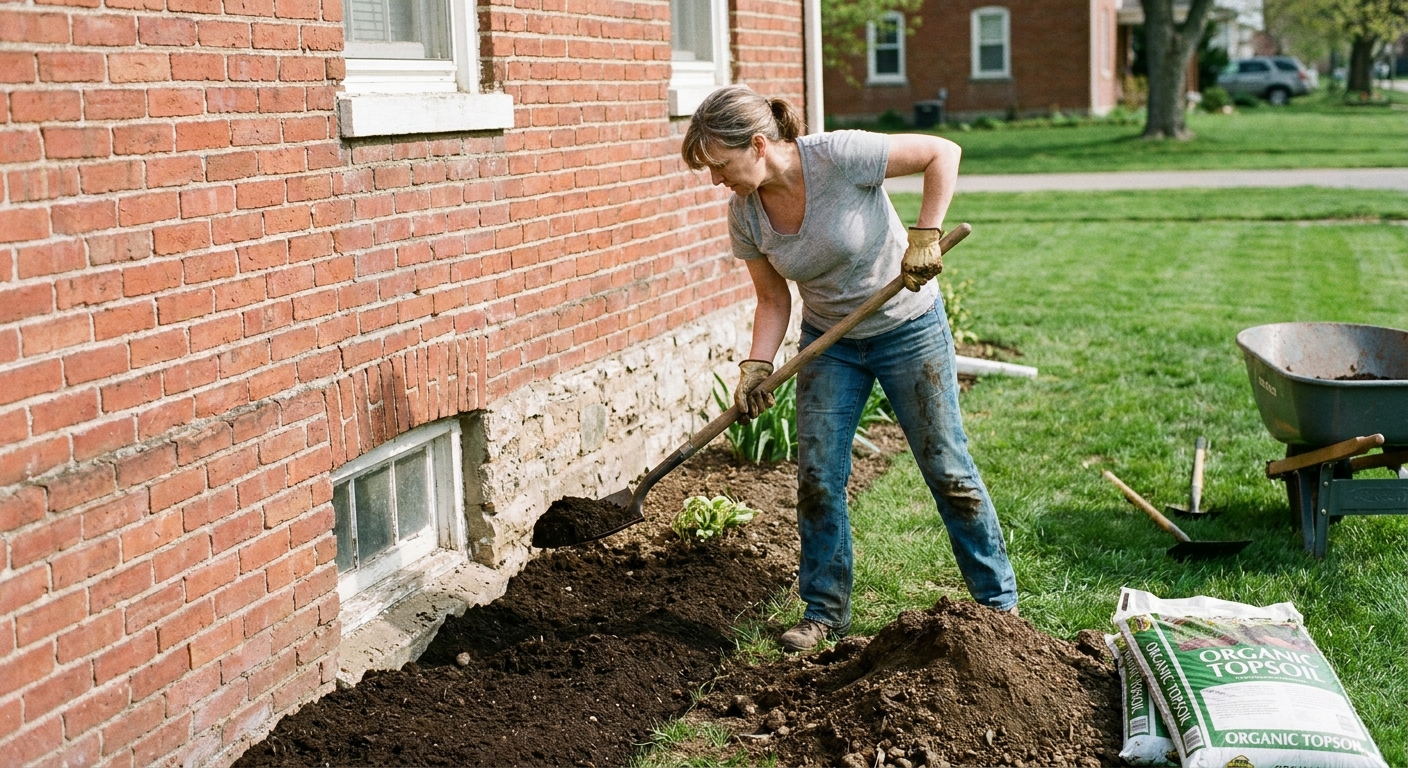
Regrade with soil
Think of this job as building a shallow ramp away from your foundation. It is not a mound. It is not a trench. It is a smooth, compacted slope that sends water onward.
Step 1: Strip mulch and debris
Rake mulch, landscape fabric, and loose organic material out of the way. You want soil-on-soil contact so your new grade does not act like a sliding blanket, and so water does not travel and linger along fabric layers.
Step 2: Pick the right material
- Best for building grade: clean fill dirt or a clayey loam that compacts well
- Finish layer: a few inches of topsoil for grass or planting
- Avoid as the main build: compost-heavy “garden soil.” It settles more, especially if it has lots of organic content, and it can hold water. It can be fine as a thin finish layer, just not the structural base.
If you are buying in bulk, ask for fill to build grade and topsoil to finish. That combo is usually cheaper and more stable than trying to do everything with fluffy “premium” soil.
Step 3: Build in lifts
This is the part beginners skip, and it is why the grade looks great for two weeks and then sinks back into a sad puddle.
- Spread soil in 2 to 3 inch layers.
- Compact each layer before adding more.
- Check slope as you go.
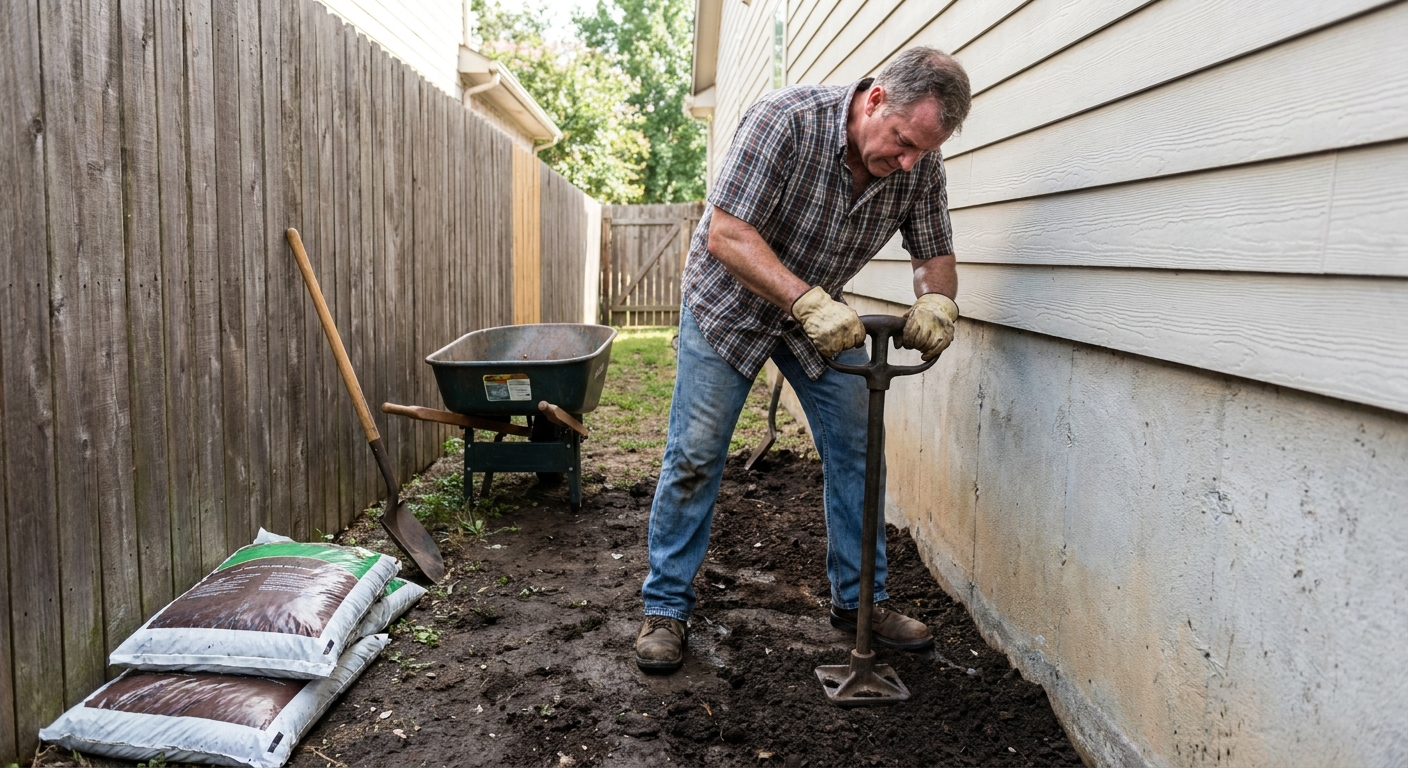
Step 4: Compact it
Compaction is what turns “pile of dirt” into “finished grade.” You can use:
- Hand tamper for small areas and tight spots
- Plate compactor for larger runs (often worth a one-day rental)
Lightly misting the soil can help it compact, but avoid working with overly wet soil. When soil is too wet, it tends to pump, smear, and later shrink and crack as it dries.
Plan for settling
Even with solid compaction, new soil almost always settles. Moisture cycles, gravity, and consolidation slowly reduce air pockets over time. If you used organics where you should not have, decomposition can add even more settling.
How high to finish
As a rule of thumb, I like to finish slightly high, usually around 1 inch higher than the final target for small touch-ups, and a bit more if I built up several inches total. It is easier to rake off a little later than to haul more soil back in mid-season.
Timing tips
- Plan a second pass: Check it after a few good rains and top off low spots.
- Protect bare soil: Bare soil washes away. Seed, straw, erosion mat, or mulch helps lock it in while it settles.
Give water a destination
Regrading is only half the job. The other half is giving that water a safe destination.
Ideally, runoff should:
- Move away from the house
- Stay on your property without causing problems
- Flow toward a lower area, street, ditch, or other approved drainage path
Also, be intentional about what you do not aim water at: septic system areas, retaining walls, and property lines where it will just become your neighbor’s problem. If your yard is boxed in by fences or sits lower than surrounding lots, grading can still help near the foundation, but standing water may not fully resolve without a swale or drain system.
Hardscape slopes
If you have a walkway, patio, or driveway meeting the house, the same concept applies. Hard surfaces should generally slope away from the foundation too. The exact number varies by material and situation, but the goal is the same: no flat spots that hold water against the house, and no back-pitch that funnels runoff to the wall.
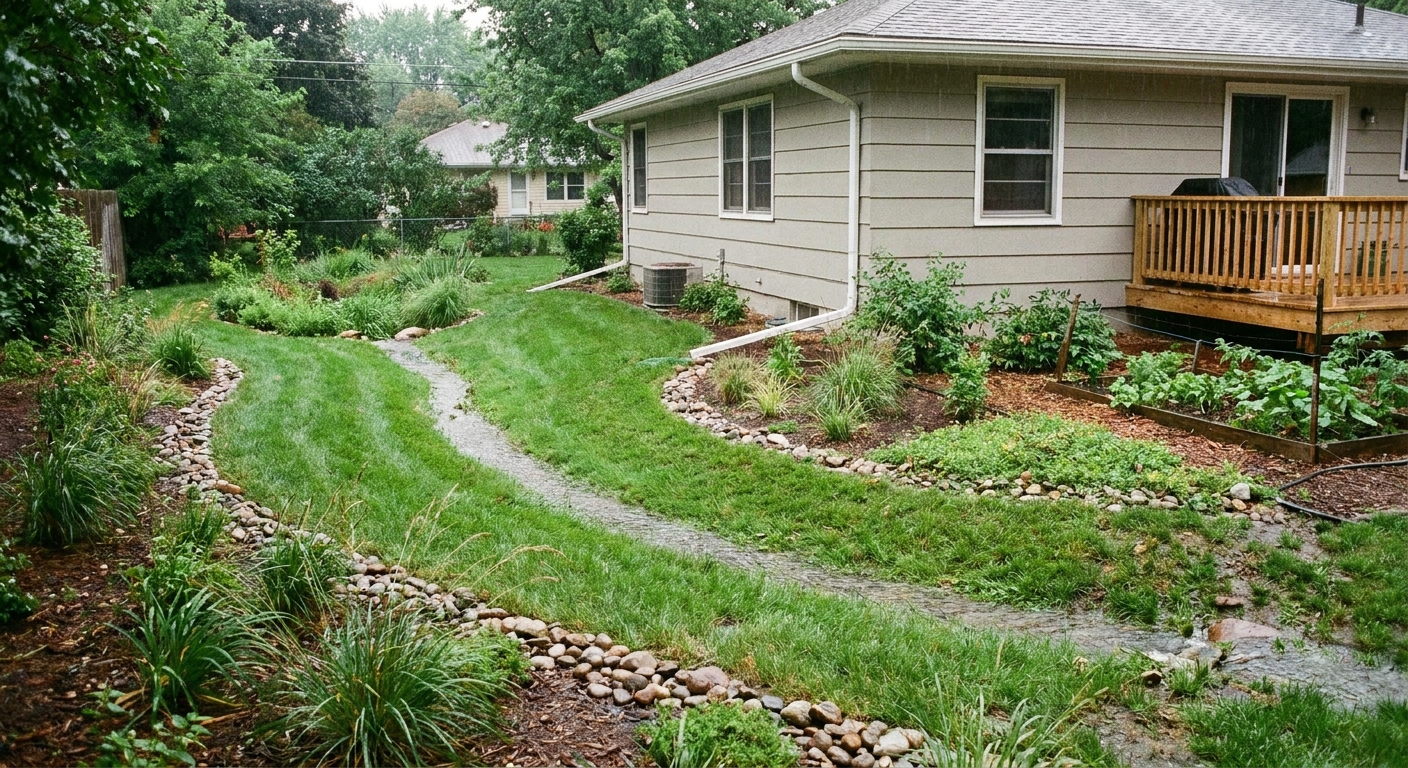
Swale vs French drain
I like to treat grading as Step One because it is cheap and visible. But sometimes you need a next step to keep water moving.
Choose a swale when
- Direct surface water across the yard without creating hazards
- Create a gentle, shallow depression with enough space
- Deal mostly with surface runoff after rain
A swale is basically a wide, shallow channel that guides water along a route. Done well, it looks like a natural dip in the lawn, not a trench.
Choose a French drain when
- Fight persistent soggy soil and need help intercepting subsurface water
- Have a collection zone that stays wet
- Cannot create a reliable surface path to daylight
- Still get water at the foundation after correcting gutters and grade
A French drain is a bigger commitment and a bigger digging job. It also only works as well as its design and discharge point. In other words, it needs a real outlet (daylight, dry well sized for conditions, or another approved option). For this page, the takeaway is simple: grade handles surface flow, drains handle stubborn subsurface water when they have somewhere to go.
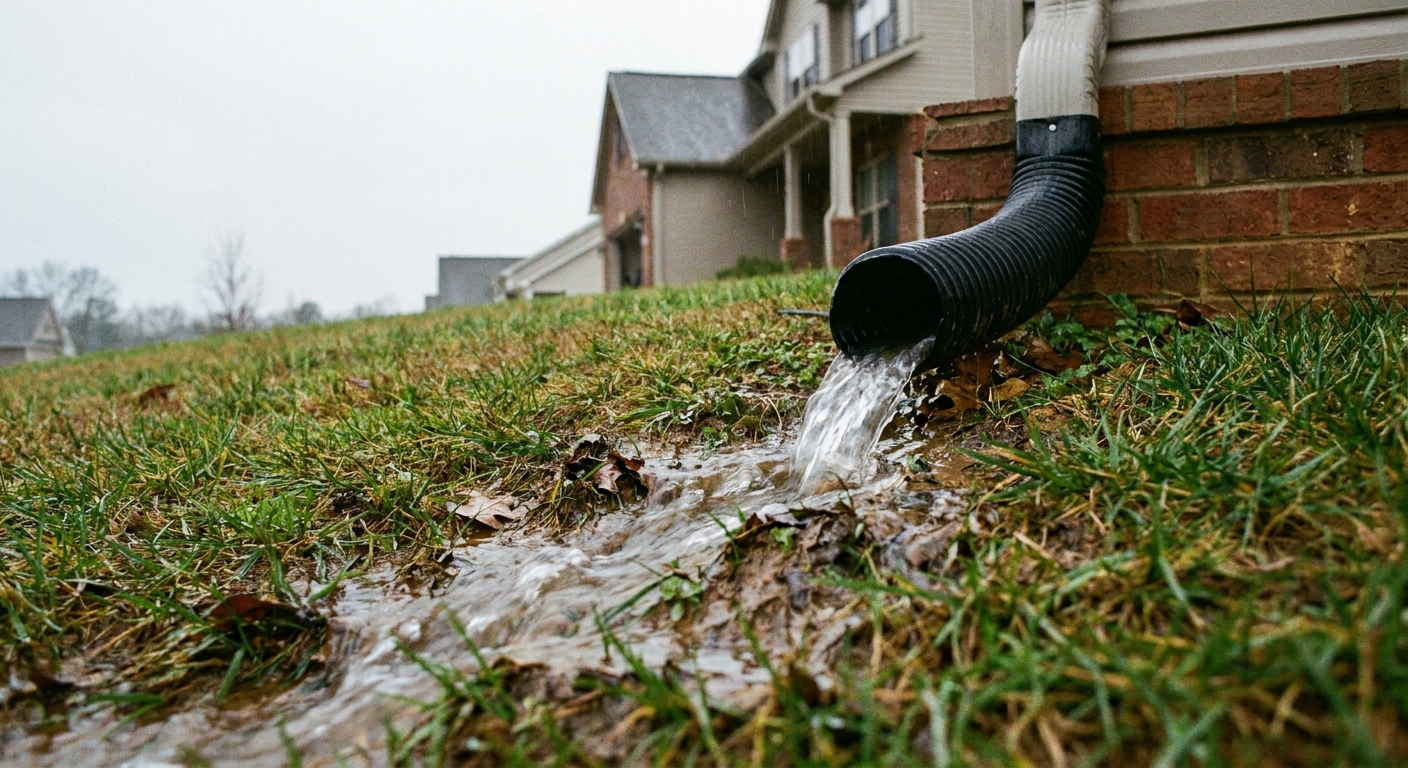
Coordinate gutters
This is the mistake I made early on at my own place: I improved the soil slope, then kept dumping roof water right at the corner of the foundation. Roof runoff is a firehose compared to normal rainfall on the lawn.
Extend downspouts
- Use downspout extensions or solid pipe to move water at least 6 to 10 feet away when possible.
- Aim the discharge so it follows your new slope toward a safe outlet.
- Avoid dumping water into a mulched bed that sits higher than the surrounding lawn.
Keep gutters working
- Clean gutters so they do not overflow at the foundation line.
- Fix leaks at seams and end caps.
- Confirm gutters have proper pitch to the downspouts.
If you only take one action this weekend, it is this: walk outside in a hard rain. Watch where roof water lands, where it flows, and where it pools. That five-minute storm audit tells you more than any guesswork. Also, roof runoff adds up fast, often hundreds to thousands of gallons over a season or a series of storms, so dumping it at one corner is basically inviting trouble.
Avoid common mistakes
- Build a mound at the wall: Make the slope continue outward. Do not peak at the house and dip again.
- Use only fluffy topsoil: Use compactable fill for the build, then topsoil as a finish layer.
- Skip compaction: Uncompacted soil becomes a future low spot.
- Block weep holes or siding clearance: This can create rot and moisture problems even if the yard drains better.
- Ignore corners: Keep positive slope around the perimeter where feasible, and do not create a low bowl at an outside corner where multiple roof planes dump water.
- Fight gutters: A perfect grade cannot compete with roof runoff dumped right at the foundation.
When to call a pro
DIY grading is very doable, but some situations deserve a pro opinion, especially if you are dealing with:
- Foundation cracks that are widening or leaking
- Water entering the basement through the cove joint or floor
- A yard with no legal or physical place to drain (common in tightly packed neighborhoods)
- Significant soil movement near the foundation
A landscaping contractor or drainage specialist can often confirm whether you need surface solutions, subsurface drainage, or both.
Weekend checklist
- Measure existing slope with a string line
- Confirm clearance from siding, weep holes, vents, and window wells
- Call for utility locates before digging deeper or trenching
- Strip mulch and fabric for soil-on-soil contact where you will build grade
- Bring in compactable fill dirt and build in 2 to 3 inch lifts
- Compact each lift and re-check slope
- Finish with topsoil, seed, and erosion protection
- Extend downspouts and verify discharge direction during a rain
- Re-check for settling after a few storms and top off as needed
If you fix the grade and manage roof runoff, you solve a big percentage of “water near the foundation” problems without touching a shovel-sized trench. And if you still have issues afterward, you will be making the next decision, like swale or French drain, from a much better starting point.
The 30-Second Cheat Sheet
Essential takeaways for: Yard Slopes Toward the House? Fix the Grade and Move Water Away
Goal slope
- Aim for about 6 inches of drop over the first 10 feet away from the house (about a 5% grade). Local guidelines vary, but this is the common target.
Fast way to measure
- Use two stakes (or short pieces of rebar), a string, and a line level over 10 feet.
- Measure string-to-ground at both ends. If the string-to-ground distance is larger at the far stake, the ground is lower there. The difference is your fall over 10 feet.
Regrading basics that actually hold
- Use fill dirt to build grade, then a thin top layer of topsoil for grass.
- Add soil in 2 to 3 inch lifts and compact each layer (hand tamper or plate compactor).
- Plan for settling. Finish slightly high and expect a top-off after a few rains.
Do not bury these
- Siding clearance (keep soil below siding and follow manufacturer specs).
- Brick weep holes (never cover them).
- Vents and window wells.
Swale vs French drain (quick decision)
- Swale: best when you can guide surface water across the yard to a safe outlet.
- French drain: best for persistent soggy areas or subsurface flow, but only if you can route it to a proper outlet. Design and discharge location matter.
Gutters and downspouts (non-negotiable)
- Extend downspouts so roof water discharges 6 to 10 feet away, and make sure it follows your new slope.
- Clean and repair gutters so they do not overflow right at the foundation.
Best DIY test
- Go outside during a hard rain and watch where roof water lands, flows, and pools. Fix those paths first.
💡 Tip: Scroll up to read the full article for detailed, step-by-step instructions.
⬆️ Back to topAbout Marcus Vance
Content Creator @ Grit & Home
Marcus Vance is a lifelong DIY enthusiast and self-taught home renovator who has spent the last decade transforming a dilapidated 1970s ranch into his family's dream home. He specializes in budget-friendly carpentry, room-by-room renovations, and demystifying power tools for beginners. Through his writing, Marcus shares practical tutorials and hard-learned lessons to help homeowners tackle their own projects with confidence.