
🚨 In a DIY emergency or rush?
Skip the details and jump straight to our 30-second cheat sheet for the most crucial info.
The first time my basement dehumidifier “leaked,” I assumed the machine was failing and I was already mentally pricing replacements. Turns out it was doing its job just fine. It was pulling moisture out of the air and then dumping it on my slab because I had the unit slightly tilted and the bucket was not seated all the way.
That is the key idea for this whole fix. A puddle usually means the dehumidifier is collecting water successfully, but the water is escaping somewhere between the coils and the bucket or drain. Let’s track the common escape routes and knock them out one by one.
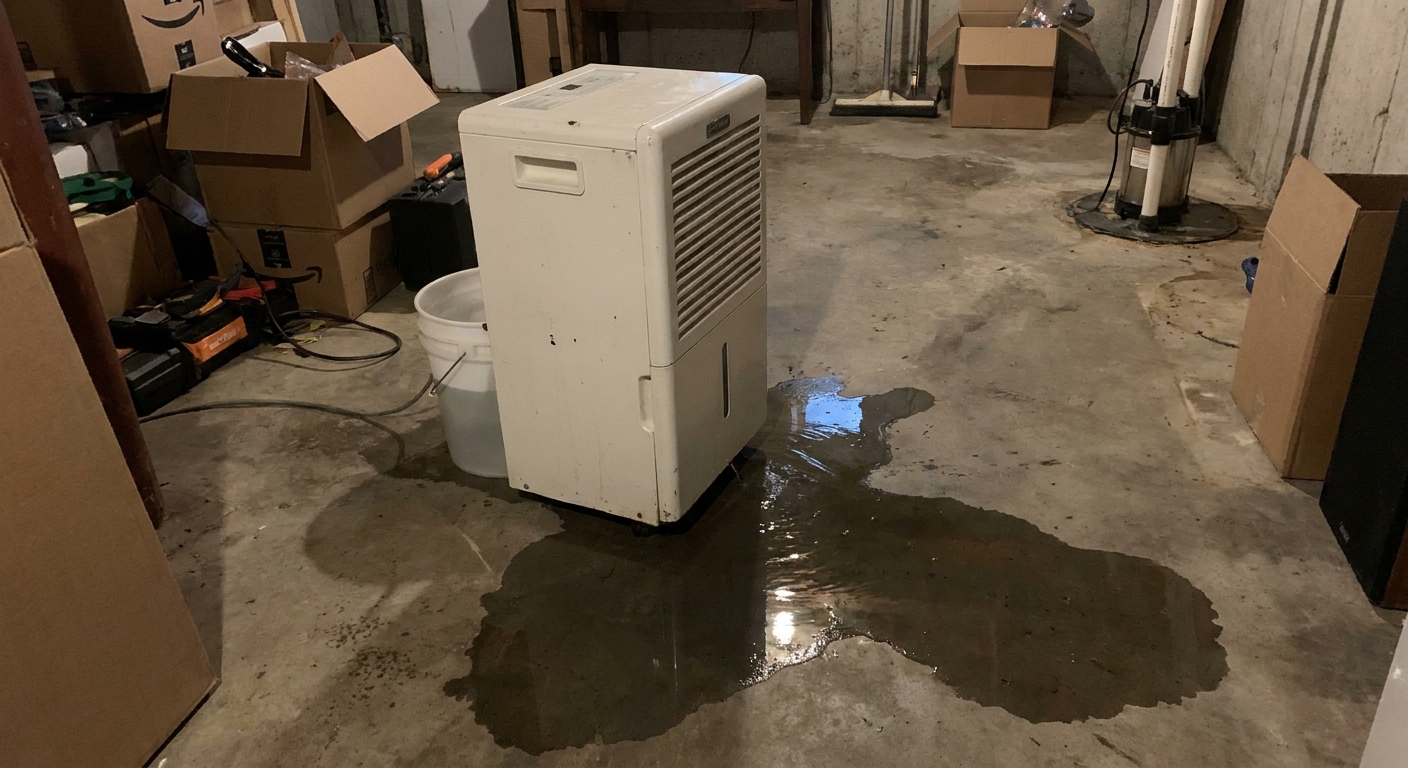
Safety first and quick triage
Before you chase the leak, do two quick things.
- Unplug the dehumidifier and slide it away from the puddle. Water and electricity do not mix.
- Confirm it is actually your dehumidifier. Dry the floor, place a couple of paper towels under the unit, and run it for 15 to 30 minutes. If the towels get wet first, you found the source.
If you have water near a power strip, extension cord, or outlet, kill power at the breaker and dry things out thoroughly before you run anything again.
Follow the puddle
Water on the floor tends to show up in just a few patterns. Use the pattern as a shortcut.
- Water right under the bucket area: bucket cracked, bucket not seated, float stuck, splash-over from a fast fill, or a missing bucket baffle or lid piece (on models that use one).
- Water near the drain hose connection: loose hose, missing gasket, stripped threads, kinked hose, or hose running uphill.
- Water shows up after the unit stops or defrosts: ice on the coils melting and overwhelming a partially clogged drain path.
- Water is coming from a seam in the plastic body: cracked housing or broken internal reservoir, often a replacement decision.
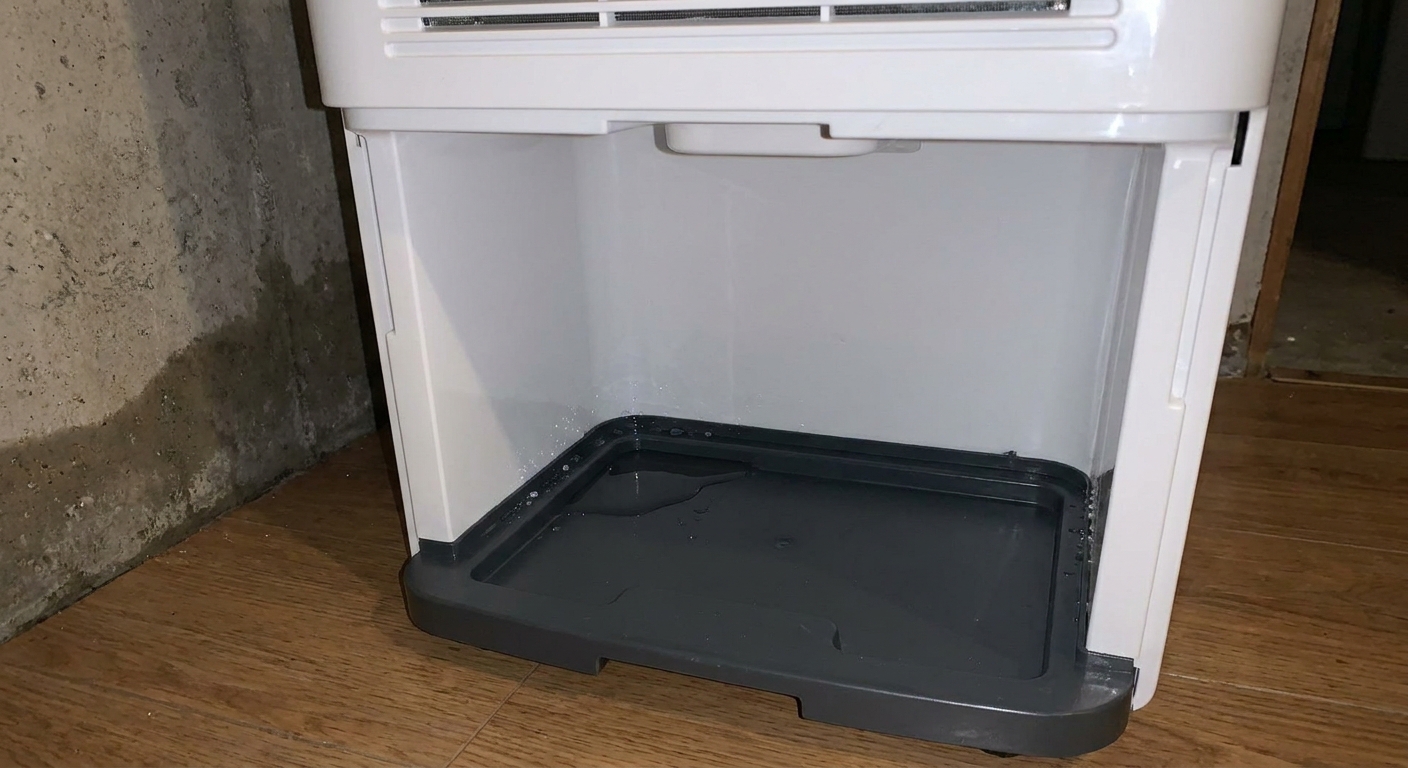
Cause 1: Bucket is cracked or warped
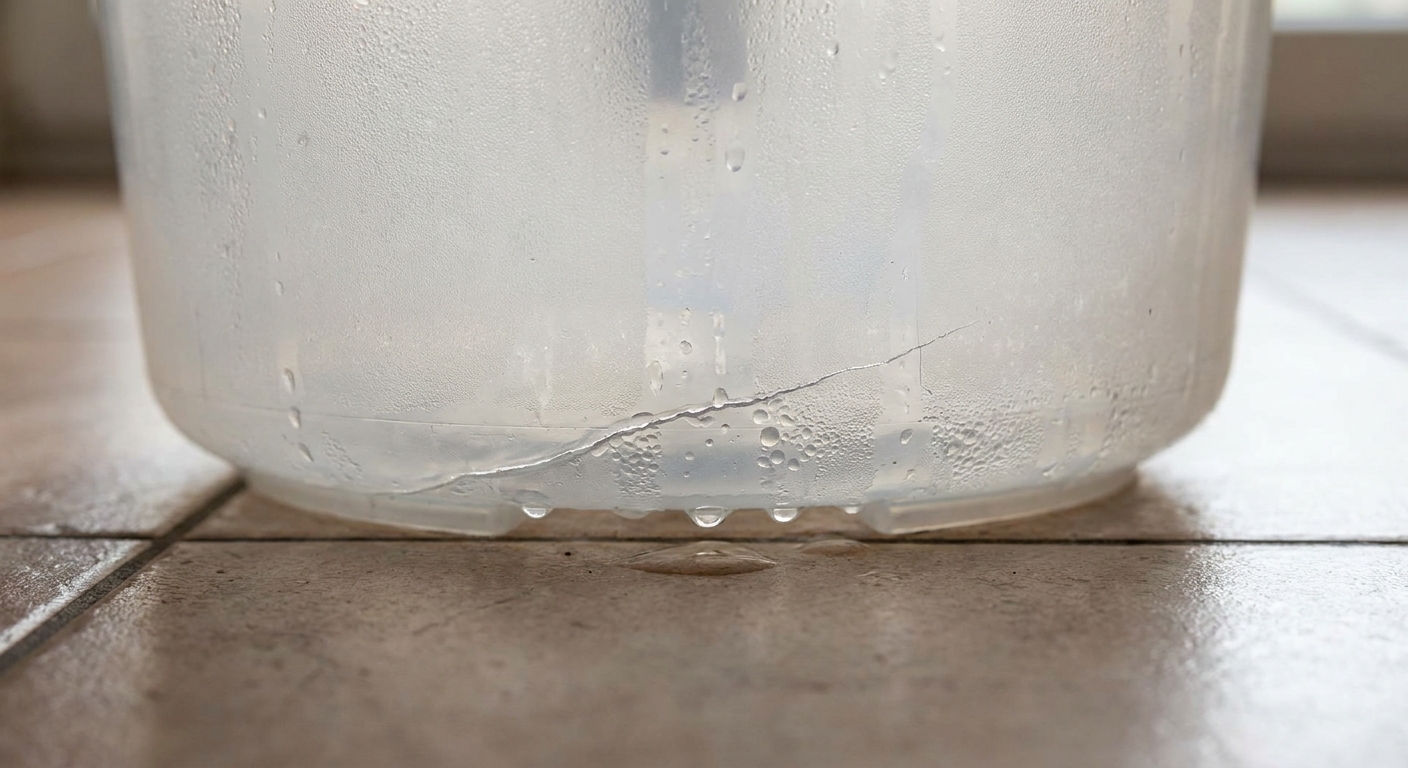
This is one of the most common issues I see, especially if the bucket has been bumped, dropped, or carried around full. A hairline crack can leak only when the bucket gets heavy, so you might not notice it until you come back to a big puddle.
How to check
- Pull the bucket and fill it in a sink or bathtub.
- Set it on dry paper towels for 5 minutes.
- Look for wet spots under corners, seams, and around the handle area.
Fix
- Replace the bucket if the manufacturer sells it. That is the correct fix.
- If you need a temporary patch, clean and dry the crack and use a waterproof epoxy or plastic repair epoxy. Let it fully cure before reinstalling. Treat this as a short-term bandage, not a forever fix.
Thrifty tip: If a replacement bucket costs close to half the price of a new unit, you are often better off replacing the whole dehumidifier, especially if it is older.
Cause 2: Bucket not seated or float stuck
Most dehumidifiers are picky about bucket alignment. If the bucket is even slightly out of position, condensate can miss the bucket opening and run down into the base, then onto the floor.
How to check
- Slide the bucket in firmly until it is fully flush.
- Listen for the bucket switch clicking, if your model has one.
- Inspect the bucket lip and the dehumidifier’s drip path above it for grime, scale, or a shifted plastic guide.
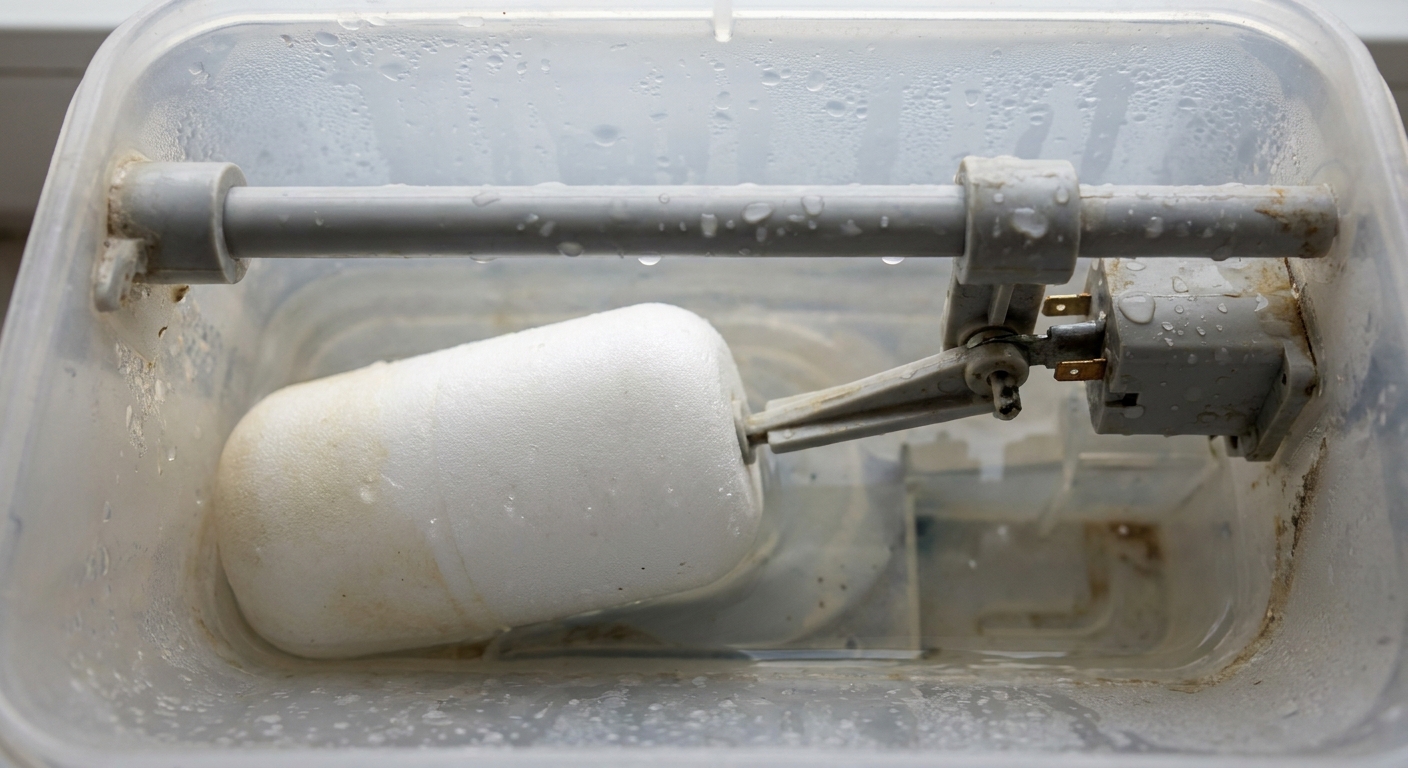
- Move the float in the bucket up and down. It should move freely. A stuck float can stop the unit incorrectly, or in some designs it can interfere with proper drainage into the bucket.
Fix
- Clean the bucket rim and the receiving area with warm water and a little dish soap. Dry it.
- Clean any mineral buildup with a 50/50 mix of white vinegar and warm water, then rinse.
- Re-seat the bucket and make sure the unit is on a flat surface.
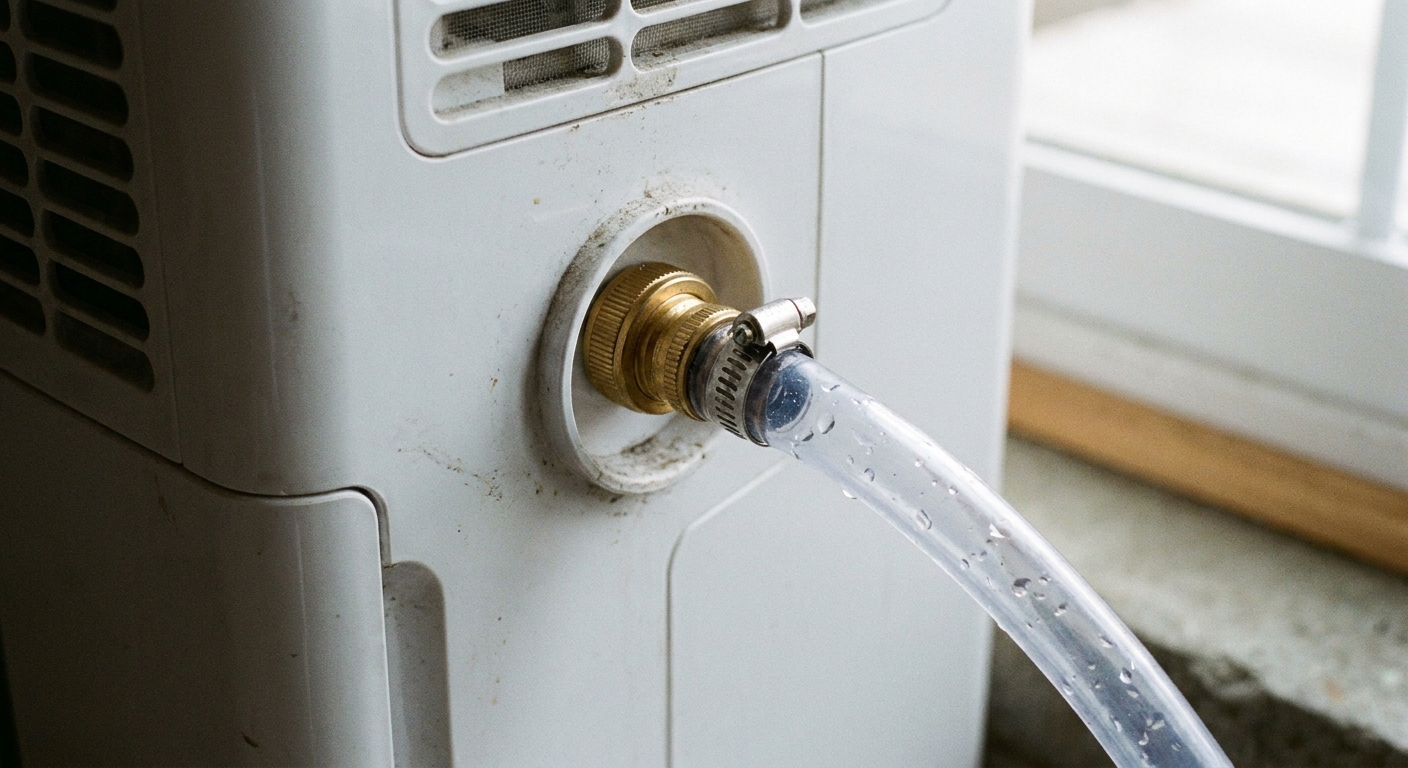
Cause 3: Drain hose loose or gasket missing
If you are using continuous drain, the hose connection is a prime suspect. A tiny drip at the fitting can turn into a surprising puddle over a few hours.
How to check
- Look for moisture right at the hose connection point on the back or side of the unit.
- Gently tug the hose. If it wiggles or slips, it is not secure.
- Inspect for a rubber washer or gasket inside the threaded connector. Many ports are garden-hose-thread style and usually seal on the washer, not the threads.
Fix
- Remove the hose, confirm the washer or gasket is present, and reinstall snugly by hand. Do not crank down so hard you strip plastic threads.
- If your hose end is chewed up or stretched, trim 1 inch off and reattach, or replace the hose.
- If you see drips from the threads, plumber’s tape can help on thread-sealing fittings, but do not rely on tape to replace a missing washer on garden-hose-thread style ports.
Cause 4: Hose kinked or running uphill
A dehumidifier gravity drain is not a pump. If any section of the hose rises above the drain port height, water can back up and overflow into the base or drip out through seams.
How to check
- Follow the entire hose run from the unit to the drain.
- Look for kinks behind the unit or where the hose passes a doorway.
- Make sure the hose slopes continuously downward.
Fix
- Shorten the hose if it has loops and dips.
- Route it so it never rises above the drain port height.
- If you need to drain upward into a sink, you need a condensate pump or a dehumidifier with an internal pump.
Cause 5: Drain channel is clogged
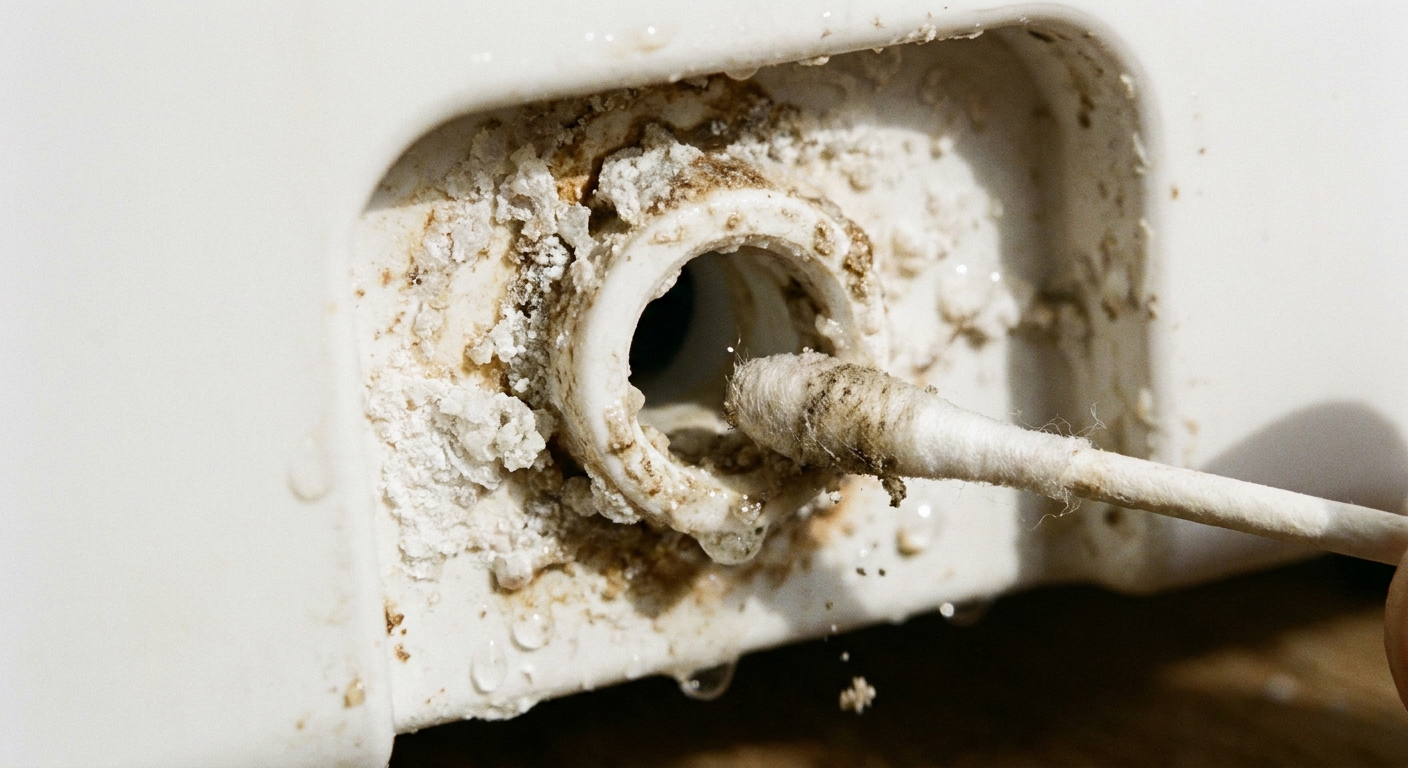
Even if you are using the bucket, most dehumidifiers still rely on a small internal channel to guide condensate into the bucket area. Dust, biofilm, and mineral scale can partially clog that channel, causing water to overflow into the base.
Signs
- Water appears even though the bucket is seated correctly.
- The unit used to drain fine, then gradually started leaving small puddles.
- You see gunk or white scale near the drain outlet area.
Fix (simple, low-risk cleaning)
- Unplug the unit.
- Remove the bucket.
- Use a soft brush and warm soapy water to clean the bucket opening area and any visible channels.
- For scale, wipe with vinegar solution, then rinse and dry.
If your model has a dedicated drain spout or drain plug for continuous drain, remove it and clean the opening with a cotton swab. You are not trying to excavate deep internals here. You are just clearing the obvious chokepoints.
Going forward, I try to clean the filter monthly in dusty basements and give the drain port area a quick check a few times a season.
Cause 6: Unit is tilted
This one is sneaky because the machine still runs, still pulls water, and might even fill the bucket sometimes. But a slight tilt can shift the drip path so condensate hits the wrong surface and runs into the base.
How to check
- Set a small level on top of the unit side to side and front to back.
- Check the floor. Basements often have a subtle slope toward a drain.
Fix
- Move the dehumidifier to a flatter spot if possible.
- Shim with thin composite shims or rubber furniture pads so the unit sits level and stable.
If you shim it, make sure it cannot rock or tip, and do not block the intake or exhaust. Also, do not set it on thick carpet or a fluffy mat. Restricted airflow can cause icing and water issues. A thin, firm surface is fine.
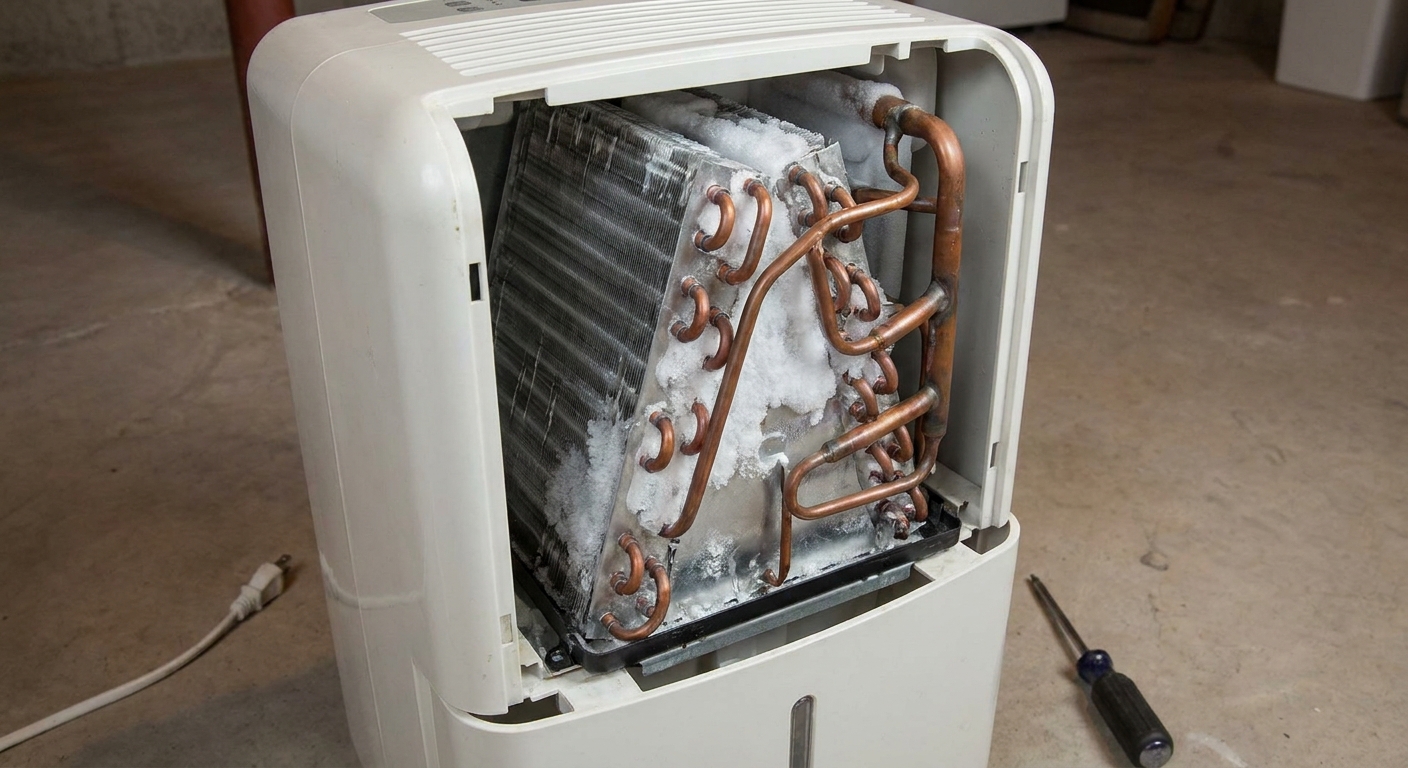
Cause 7: Coils freeze and melt
If you see water mostly after the unit cycles off, defrosts, or after a long run, you may be dealing with the evaporator coil icing up. When that ice melts, it can release a lot of water quickly. If the drain channel is even partly restricted, you get overflow and floor puddles.
Why coils freeze
- Room is too cold: Many standard compressor dehumidifiers struggle below about 60 to 65°F, depending on the model. Some will ice up.
- Dirty filter: Low airflow makes the coil colder and more likely to freeze.
- Blocked intake or exhaust: Unit pushed tight to a wall or stored boxes around it.
Fix
- Turn the unit off and let it fully defrost. Do not chip ice off with tools.
- Clean the air filter and reinstall.
- Give it clearance on all sides, especially at the intake and exhaust.
- If your basement is cold, consider a model rated for low temperatures, or run it only when the space is warmer.
Pump models: One extra spot
If your dehumidifier has an internal pump (or you use an external condensate pump), add this quick check: look for drips at the pump tubing connection, check valve, or where the tube exits the cabinet. A loose tube or cracked tubing can leak only when the pump cycles.
Not a leak: Bucket stays dry
Sometimes people say “leaking” when what they really mean is “it is running but the bucket stays dry.” That is a different problem. Here is how to separate the two quickly.
How to tell the difference
- True leak: you have a puddle or wet base, the room feels drier, and the unit otherwise seems to be dehumidifying normally.
- Dry bucket problem: no puddle, bucket stays empty, and humidity might not change much.
A unit that runs but does not collect water often comes down to one of these: the humidity setting is too high, the room is already dry, the temperature is too low for effective operation, airflow is blocked, the filter is clogged, or there is a refrigerant or sensor issue. If you have a puddle, focus on routing and containment first because the unit is producing condensate.
When to replace the unit
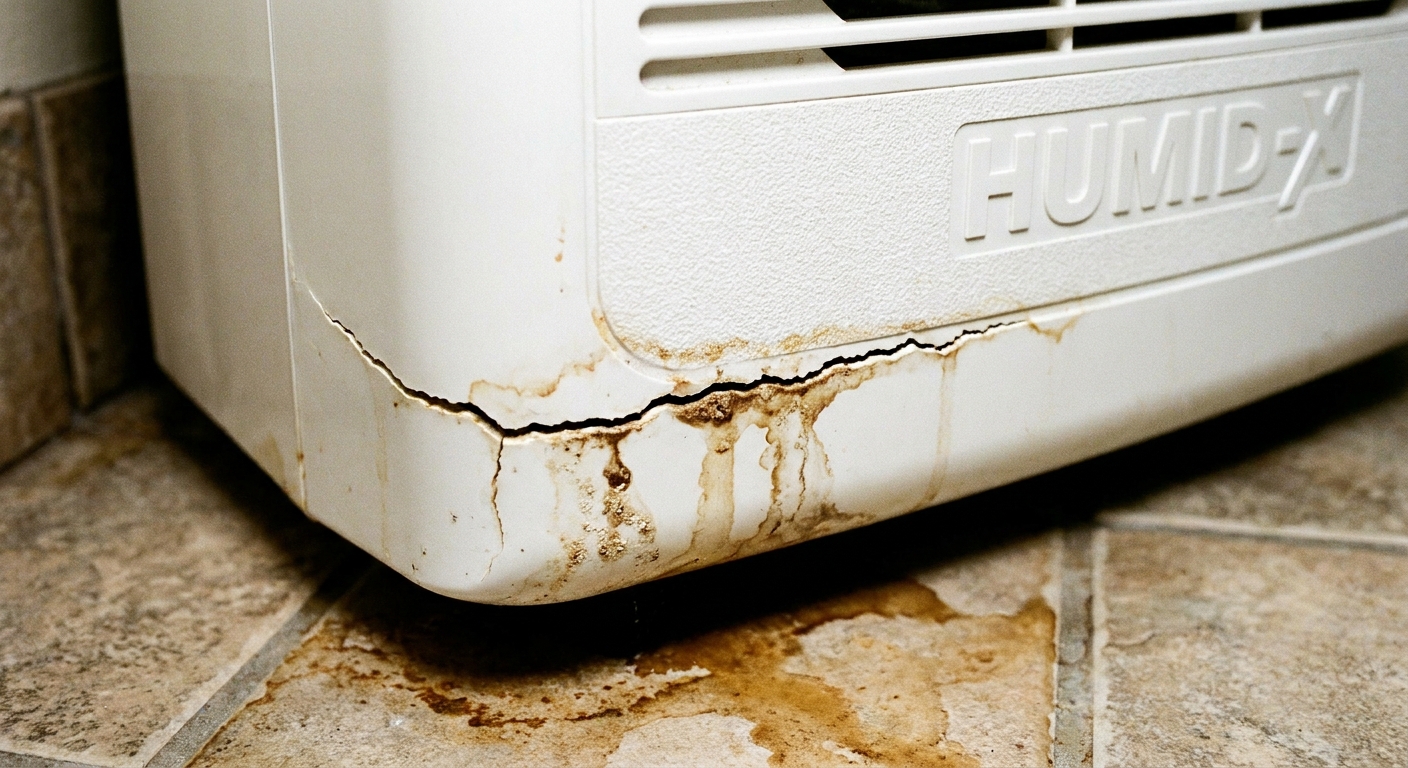
If the water is coming from a seam in the plastic body, or you can see a crack in the base pan area, that is where I stop getting clever.
Replace (or at least price replacement) if:
- The outer housing or base is cracked and leaking.
- The unit was dropped and the frame no longer sits square, so the bucket will not align.
- Water leaks internally even after you confirm bucket seating and the drain path is clear.
- You see electrical components in the base getting wet.
Technically, plastic can be repaired. Practically, a dehumidifier’s base supports a heavy compressor and gets vibrated for hours. A patched crack often comes back, and when it does, it comes back at the worst time.
My troubleshooting order
If you want the fastest path to the fix, this is the order I use in my own house:
- Unplug, dry everything, confirm the dehumidifier is the source.
- Level the unit and re-seat the bucket.
- Check the bucket for cracks in a sink test.
- If using a hose: inspect the washer or gasket, tighten connection, ensure constant downward slope.
- Clean the filter and make sure airflow is not blocked.
- Look for coil icing and let it defrost fully.
- If water is coming from the housing or base: replace the unit.
FAQ
Why is my dehumidifier leaking only sometimes?
Intermittent leaks usually point to bucket alignment, a hairline crack that only leaks when full, or ice melt that dumps water in a rush after a defrost cycle.
Can I run a dehumidifier without the bucket if I use a drain hose?
Some models allow it, some do not. Many still need the bucket seated because it triggers a safety switch. If your unit shuts off with the bucket removed, that is normal for that design.
Should I put my dehumidifier on a towel or tray?
A thin plastic tray can be a good safety net while you diagnose. Avoid thick towels or plush mats that restrict airflow. If you use a tray, still fix the root cause because standing water can cause musty odors and damage flooring.
Is a little water in the base normal?
A small amount of residual water can be normal during operation or after shutdown. Water on the floor is not normal and should be traced to a specific cause like a bucket issue, drain issue, tilt, icing, or a pump tubing leak.
The 30-Second Cheat Sheet
Essential takeaways for: Dehumidifier Leaking Water on the Floor? Causes and Fixes
Do this first (2 minutes)
- Unplug the unit and dry the floor.
- Run it on dry paper towels for 15 to 30 minutes to confirm the dehumidifier is the source.
Most common causes of floor puddles
- Cracked bucket: sink-test the bucket on paper towels. Replace if cracked.
- Bucket not seated or float stuck: re-seat bucket, clean rim, ensure float moves freely.
- Bad hose connection: tighten by hand, confirm gasket or washer is present, replace worn hose end.
- Gravity drain issue: hose kinked or any section running uphill can cause backup and overflow. Route hose with a constant downward slope.
- Clogged drain channel: clean visible drip path and drain port, remove scale with vinegar solution.
- Tilted unit: level it. Basements often slope.
- Ice melting off coils: defrost fully, clean filter, improve airflow, avoid running standard units in cold spaces.
Not a leak: it runs but the bucket stays dry
- No puddle usually means a dry-bucket problem (humidity setpoint, cold room, blocked airflow, dirty filter, or a bigger mechanical issue).
Replace the unit if
- Water leaks from a cracked housing or base.
- The unit is warped from a drop and the bucket will not align.
- Electrical parts in the base are getting wet.
💡 Tip: Scroll up to read the full article for detailed, step-by-step instructions.
⬆️ Back to top
About Grit
Content Creator @ Grit & Home
Grit is Grit & Home’s little blue clay courier, delivering big questions about the place you call home. Expect practical ideas, a raised eyebrow, and a satchel full of curiosity.