
🚨 In a DIY emergency or rush?
Skip the details and jump straight to our 30-second cheat sheet for the most crucial info.
Uneven microwave heating is one of those problems that makes you doubt your own common sense. You pull out a bowl that is bubbling on one side and fridge cold on the other and you think, “Did I do something wrong?”
Most of the time, you did not. Microwaves can create hot and cold zones inside the cavity because energy reflects off the metal walls and forms standing-wave patterns. The turntable and the internal “stirring” parts exist to average those zones out. When one of those helpers is not doing its job, the hot spots get hotter and the cold spots stay stubbornly cold.
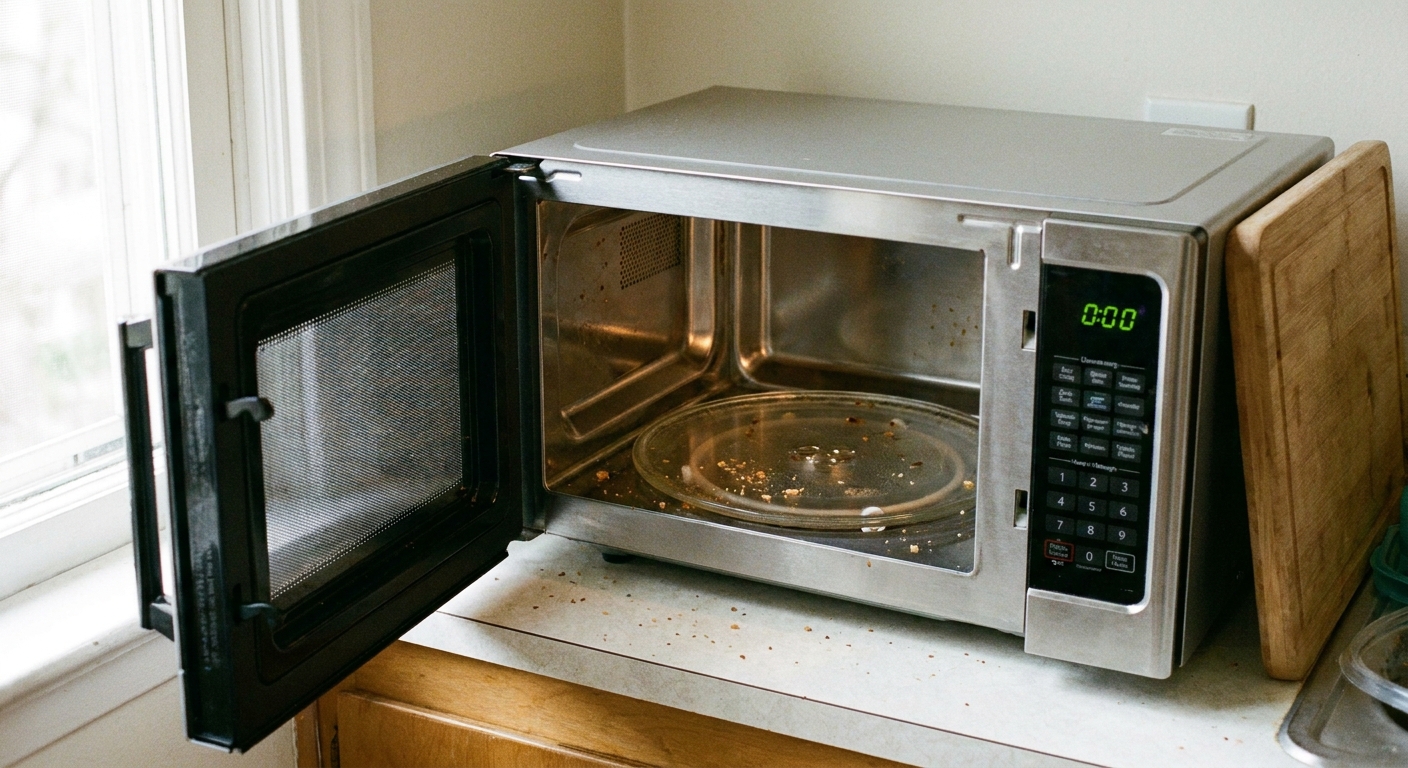
Below is how I troubleshoot uneven heating, from the no-tools stuff first to the parts that may mean it is time to retire the unit.
First: quick checks that fix most hot and cold spots
1) Food placement matters more than you think
If you only change one habit, change this: stop putting food dead center on the turntable. In many microwaves, heating is more even when the food is placed slightly off-center so it passes through more of the oven’s hot zones as it rotates. It is not universal, but it is an easy win to try.
- Put a dinner plate slightly off-center, not centered on the spindle.
- Spread food into a ring when you can. Think: mashed potatoes or rice pushed into a donut shape, leaving a small hole in the middle.
- Use a wider, flatter container instead of a tall, narrow one. Tall containers create a cold core more easily.
- Cover food with a microwave-safe lid or vented cover. It traps steam which helps even out temperatures.
2) Confirm the turntable is actually spinning
I have been fooled by this one. Some turntables “try” to turn, then stall under weight, or they only turn when the tray is perfectly seated.
Do this test:
- Set a mug of water on the tray.
- Put a small piece of tape on the edge of the glass tray so you can see movement.
- Run the microwave for 20 to 30 seconds.
- Open the door and check if the tape moved.
If it did not move, you will get uneven heating because the food is parked in one hot zone and one cold zone instead of rotating through them.
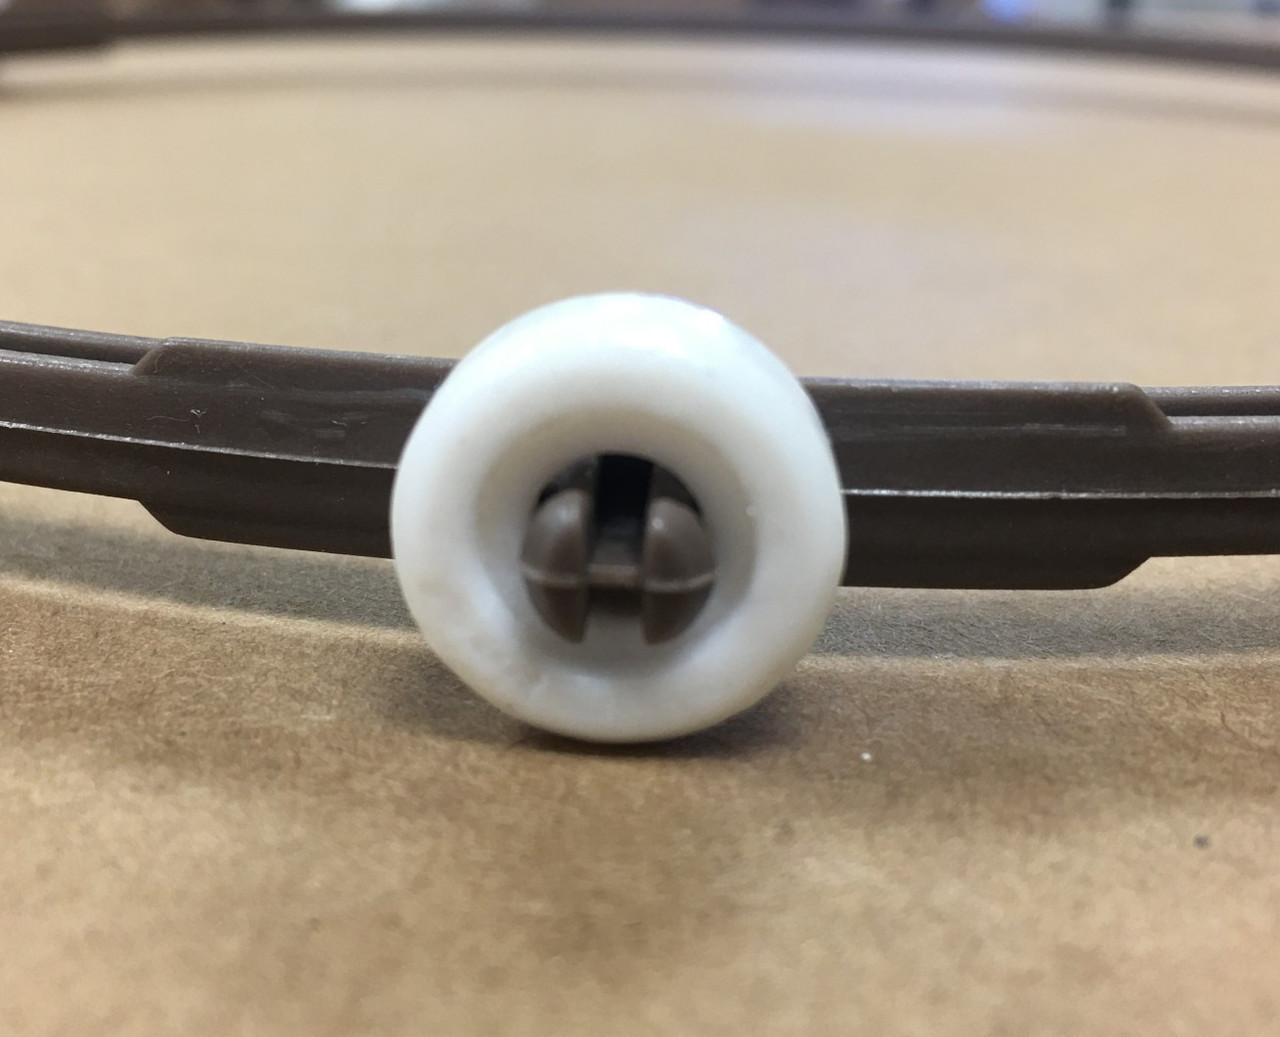
3) Make sure the glass tray and roller ring are seated correctly
Pull the tray out and re-seat everything:
- Clean the roller ring and the floor of the microwave. A single sticky spot can make the ring hop and bind.
- Check the roller ring wheels. If one wheel is missing or jammed with cooked-on gunk, the tray can wobble and stall.
- Confirm the glass tray is engaged with the center coupler. If it is sitting high, it may not “catch.”
Thrifty move: if your glass tray is chipped or the roller ring is cracked, replacements are often cheap compared to a new microwave. Just match your model number exactly.
Splatter and blocked energy: the uneven-heating culprits most people miss
4) Inspect and clean the waveguide cover
If your microwave still heats, but it suddenly started heating unevenly, the waveguide cover is high on my list. The waveguide cover is usually a thin mica or plastic-like panel on the inside of the cavity. Depending on the model, it may be on a side wall or on the ceiling near where the energy enters the cooking area.
When that cover gets coated with grease and food splatter, it can:
- Absorb or scatter microwave energy
- Create arcing or burning
- Cause uneven heating, especially with messier foods
Unplug the microwave, then look at the cover:
- If it is greasy, gently clean it with a damp cloth and mild dish soap.
- If it is charred, warped, cracked, or has holes, replace it. Do not keep running it in that condition.
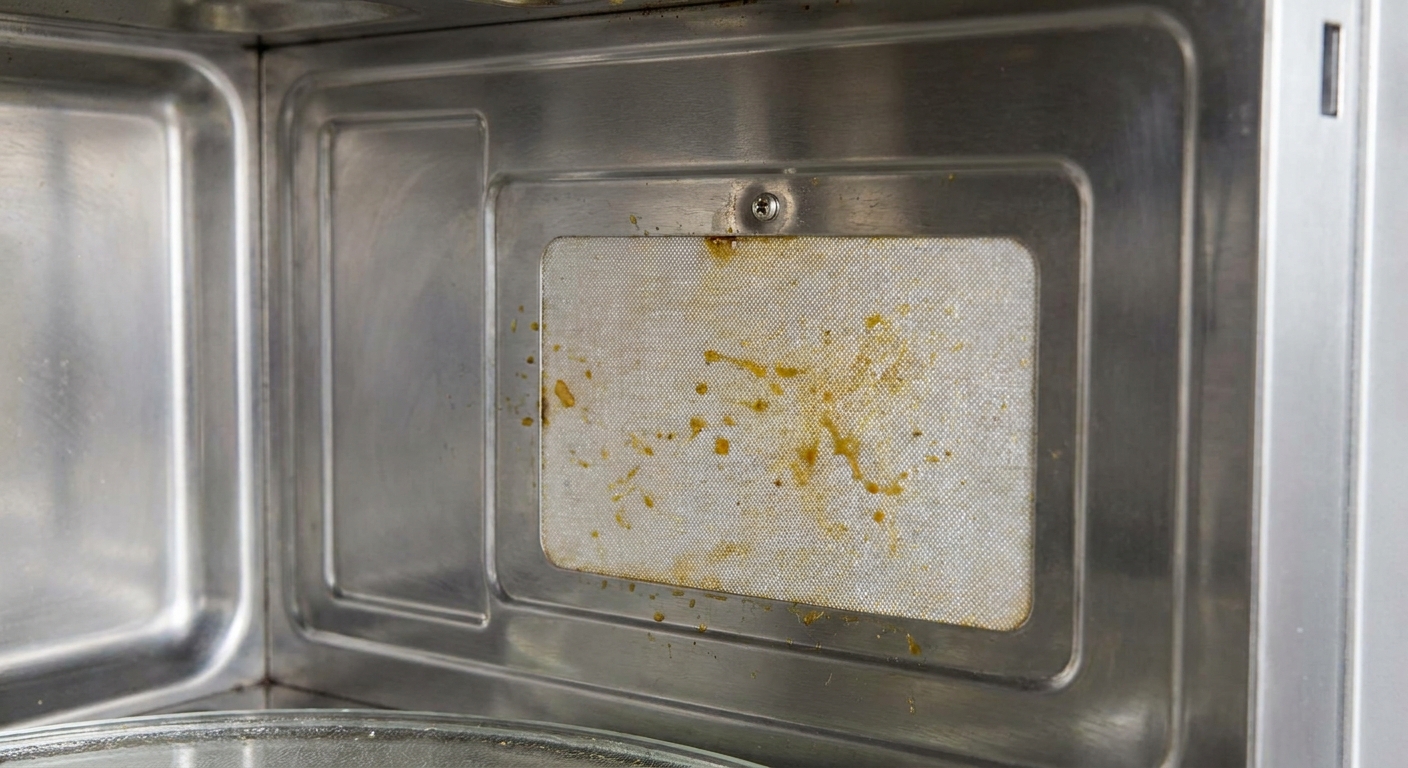
Important: mica is fragile. Do not soak it, do not scrub it aggressively, and do not run the microwave with the cover removed unless your manufacturer specifically says it is allowed. In many models, the cover is part of safe operation.
5) Look for baked-on splatter near the feed area
Microwaves are basically little echo chambers for energy. If one area is coated in old grease or food residue, it can absorb energy and it can also trigger arcing. Either way, distribution gets worse. If you clean it and the heating evens out, you just found your culprit.
Pay special attention to:
- The ceiling area above where you normally place food
- The corner seams
- Any spot that looks like it has a varnished layer of old grease
My go-to cleaning method is simple and cheap: microwave a bowl of water with a splash of vinegar for 3 to 5 minutes, let it sit closed for another 5 minutes, then wipe everything down. It softens the gunk so you are not scraping at paint.
6) If your model has a mode stirrer, check that it is not jammed
Some microwaves use a turntable. Others use a mode stirrer, and some use both. A mode stirrer is basically a small metal fan that scatters microwaves so the hot and cold zones move around instead of staying fixed.
Symptoms of a stirrer issue can include:
- Food that gets very hot in one consistent area of the cavity
- A new rattling or scraping sound during operation
- Uneven heating even though the turntable spins normally
What you can do as a homeowner: unplug the unit and inspect the stirrer cover area for grease buildup or obvious obstruction. On many models the stirrer is behind a cover on the ceiling of the cavity. If you are comfortable removing a simple cover screw and cleaning around it, that is often enough.
If the stirrer motor itself is failing, that is usually a service call or replacement decision, not a casual DIY fix, because it can involve working near high-voltage components.
Don’t confuse uneven heating with “runs but doesn’t heat”
This distinction matters because it changes the likely cause and whether repair is worth it.
Uneven heating (this article)
- The microwave does heat.
- Some bites are hot, some are cold.
- Often tied to placement, turntable rotation, waveguide cover condition, stirrer function, or heavy splatter.
Runs but produces no heat (different problem)
- The light comes on, fan runs, time counts down, but the food stays cold.
- Often points to a failure in the high-voltage system like the magnetron, diode, capacitor, or door interlocks.
I am all for fixing things, but once you are in high-voltage microwave territory, you are in a different safety league. Even unplugged, a microwave capacitor can hold a dangerous charge. For most homeowners, that is where DIY should stop.
Settings and habits that improve even heating
Use lower power for thick foods
Full power heats fast on the outside, but the heat does not have time to travel inward. For leftovers like pasta, casseroles, burritos, and dense proteins, try Power Level 50 to 70 percent and add a little more time.
Stir, rotate, and rest
Microwaving is a process, not a one-and-done event.
- Stir halfway through soups and sauces.
- Flip or rotate thicker items if you can.
- Rest for 1 to 2 minutes after heating. Carryover heat and steam finish the job and smooth out temperature differences.
Watch out for “cold center” foods by nature
Some foods heat unevenly no matter what because of how microwaves interact with water, fat, and sugar.
- Donuts and breads can feel hot on the outside and cool inside.
- Cheese heats fast, sometimes faster than the food around it.
- Large chunks of meat heat unevenly and should be checked carefully for food safety. If you reheat meat often, a quick temperature check with a food thermometer is worth it.
Avoid running it empty or almost empty
Do not run a microwave with nothing in it, and be cautious with very tiny portions. If you are reheating a small amount of something, I will often add a mug of water alongside it to give the microwave some load and help smooth out heating.
When to retire the microwave
Uneven heating is often fixable, but there are times when replacing the unit is the smarter and safer move.
Replace it if you see or smell this
- Repeated arcing (sparks) that cleaning does not fix
- Burn marks inside the cavity, especially around the waveguide cover area
- A waveguide cover that keeps scorching shortly after replacement
- Cracked door, loose hinges, or a damaged door seal
- Unusual buzzing or burning smell that is new and persistent
Replace it if repair does not make financial sense
If you have tried the basics, the waveguide cover is in good shape, the turntable system is working, and heating is still wildly uneven, you may be looking at an internal distribution problem or a weakening magnetron. At that point, the cost of parts and labor often climbs close to the price of a new countertop unit.
My personal line: if it is an older countertop microwave and it needs anything beyond cleaning, a waveguide cover, or a turntable part, I usually retire it. Built-in or over-the-range units are a different conversation because replacement cost is higher.
Quick troubleshooting checklist
- Place food slightly off-center and use a wider dish
- Confirm the turntable spins under load
- Clean and re-seat the roller ring and tray
- Clean the interior walls and ceiling, especially greasy buildup
- Inspect the waveguide cover for grease, scorching, cracks, or holes
- Check for mode stirrer obstruction if your model uses one
- Use lower power levels for thick leftovers and let food rest
- Avoid running the microwave empty or with very small loads
If you want, tell me your microwave brand and model number and describe whether the hot spot is always in the same location. That little detail can narrow the cause fast.
The 30-Second Cheat Sheet
Essential takeaways for: Microwave Heats Unevenly? Causes and Fixes
Fast fixes (start here)
- Place food slightly off-center on the turntable, not dead center (this works in many microwaves).
- Use a wide, shallow container and cover food to trap steam.
- Stir, flip, and rest: stir halfway, rotate thick foods, then rest 1 to 2 minutes.
- Avoid tiny loads: very small portions can heat unevenly. Add a mug of water if needed.
Confirm the turntable is doing its job
- Run 20 to 30 seconds with a mug of water and a tape mark on the tray edge.
- If it does not move, clean and re-seat the glass tray and roller ring.
- Check the roller ring wheels for missing parts or cooked-on gunk.
Most common hidden cause: waveguide cover
- Unplug the microwave, then inspect the thin panel inside the cavity wall or ceiling.
- If greasy, clean gently with mild soap and water.
- If burned, warped, cracked, or holey, replace it. Do not keep running it.
Uneven heating vs no heat
- Uneven heating: it still cooks, but has hot and cold spots. Often placement, turntable, waveguide cover, stirrer, or splatter.
- No heat at all: runs but stays cold. Often high-voltage parts (magnetron, diode, capacitor, interlocks). Usually not a DIY-safe repair.
Retire the microwave when
- You see repeated sparks or arcing even after cleaning.
- There are burn marks in the cavity or around the waveguide area.
- The door is damaged, misaligned, or does not seal firmly.
- It needs internal electrical repair beyond simple turntable parts or a waveguide cover.
💡 Tip: Scroll up to read the full article for detailed, step-by-step instructions.
⬆️ Back to top
About Grit
Content Creator @ Grit & Home
Grit is Grit & Home’s little blue clay courier, delivering big questions about the place you call home. Expect practical ideas, a raised eyebrow, and a satchel full of curiosity.