
🚨 In a DIY emergency or rush?
Skip the details and jump straight to our 30-second cheat sheet for the most crucial info.
Small courier. Big home questions.
When wood starts looking suspicious, your brain tends to sprint straight to termites. Understandable. But plenty of scary-looking damage is actually moisture doing long, quiet work.
This page is about sorting the two, fast. We are going to look for termite clues like mud tubes, galleries, and (in some cases) kick-out holes, and compare them to rot clues like cubical cracking, spongy wood fibers, and soft wet wood. Then I will give you a simple inspection order for sills, joists, and window trim, plus a clean next step: pest inspection or moisture repair.
First, the big idea: termites eat wood, rot breaks it down
Termites remove wood as food. They can leave hidden voids, thin surface layers, and depending on the termite type, either muddy material or pellet-like debris.
Wood rot is a fungus problem. It needs moisture for long enough that wood fibers break down. Rot often looks and feels like a moisture story because it is.
If you remember only one shortcut, make it this: termites can leave wood that looks “mostly fine” on the surface but sounds hollow, while rot often looks visibly degraded, cracked, or punky and may feel damp or crumbly. Not a law of physics, just a helpful first pass.
Termite signs you can actually spot
One quick clarity point that saves a lot of confusion: the two big homeowner categories are subterranean termites (the mud tube people) and drywood termites (the pellet and kick-out hole people). You do not need to identify the species perfectly, but you do want to match the signs to the right bucket.
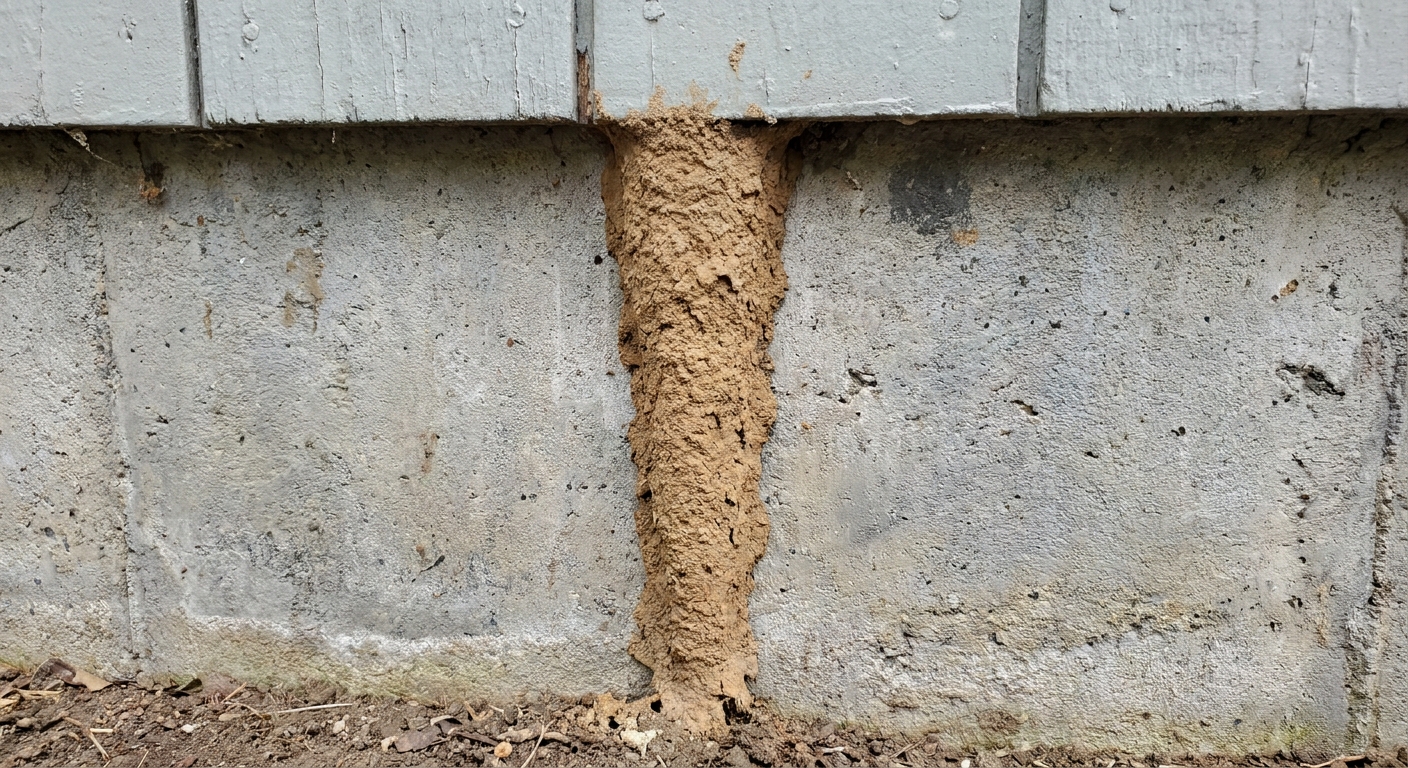
Mud tubes (subterranean clue)
What you see: pencil-width to finger-width tubes made of mud and wood bits. They may run up a foundation, across a sill, or along a basement wall. If you break one open, it may look layered or moist inside.
Why it matters: subterranean termites use tubes to travel while staying humid and protected.
Galleries (tunnels inside wood)
What you see: when wood is split or opened, termite galleries look like winding channels that follow the grain.
- Subterranean galleries: often look muddy or mud-lined.
- Drywood galleries: often look cleaner and may contain pellets (frass).
Quick feel test: the outside can seem intact, but the wood may sound hollow when tapped with a screwdriver handle.
Kick-out holes and pellets (drywood clue)
What you see: tiny holes where drywood termites push out sand-like pellets (called frass). The giveaway is the little pile of pellets collecting below the hole, like someone sprinkled gritty pepper.
Common confusion: small holes can be old fasteners, other insects, or random damage. The context matters. A hole plus pellets is more meaningful than a hole by itself.
Swarm evidence (helpful for both types)
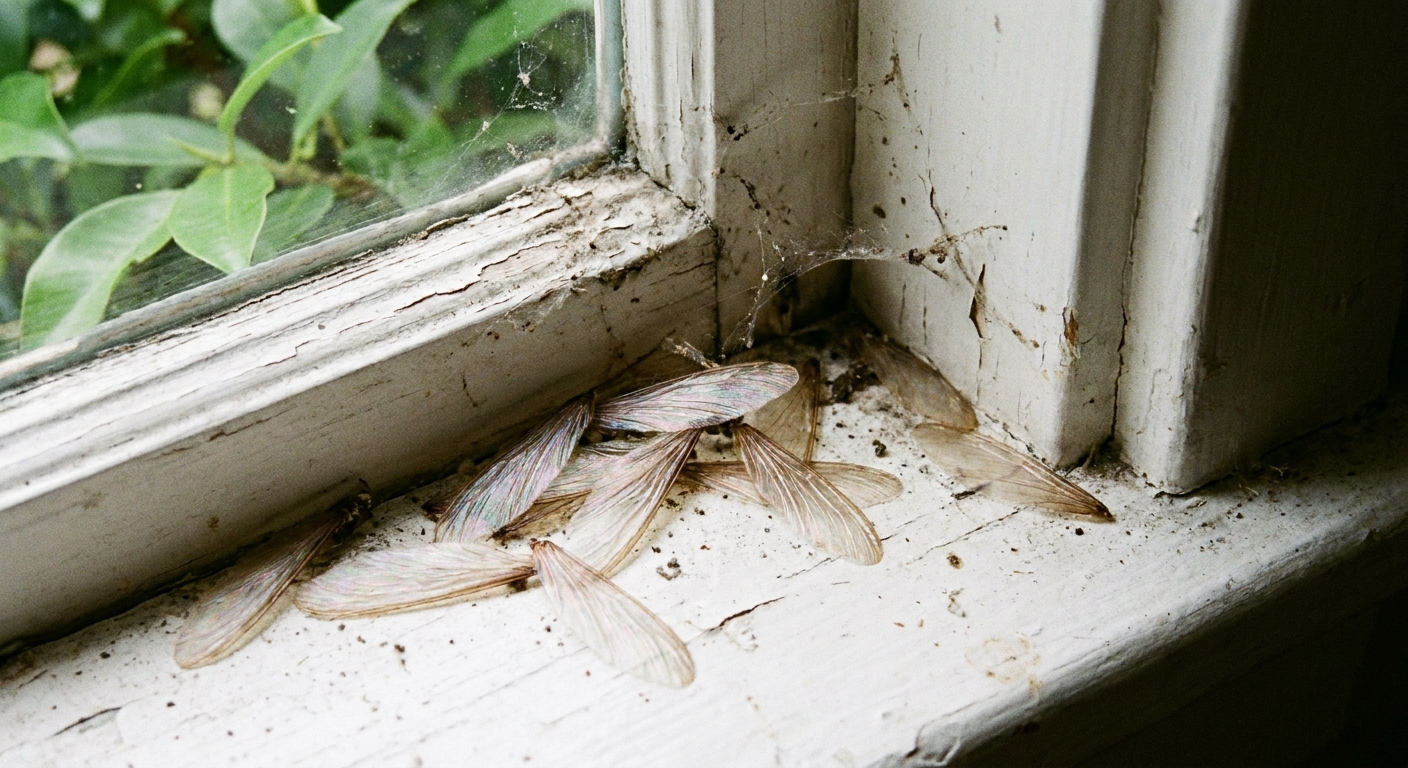
What you see: discarded wings on a windowsill, spiderweb, or near lights. Swarmers are reproductive termites and they drop wings after landing.
Termites vs flying ants: termites tend to have a thicker, more uniform body and two pairs of equal-length wings. Flying ants usually show a pinched waist and wings that are not the same length.
Wood rot signs that point to moisture
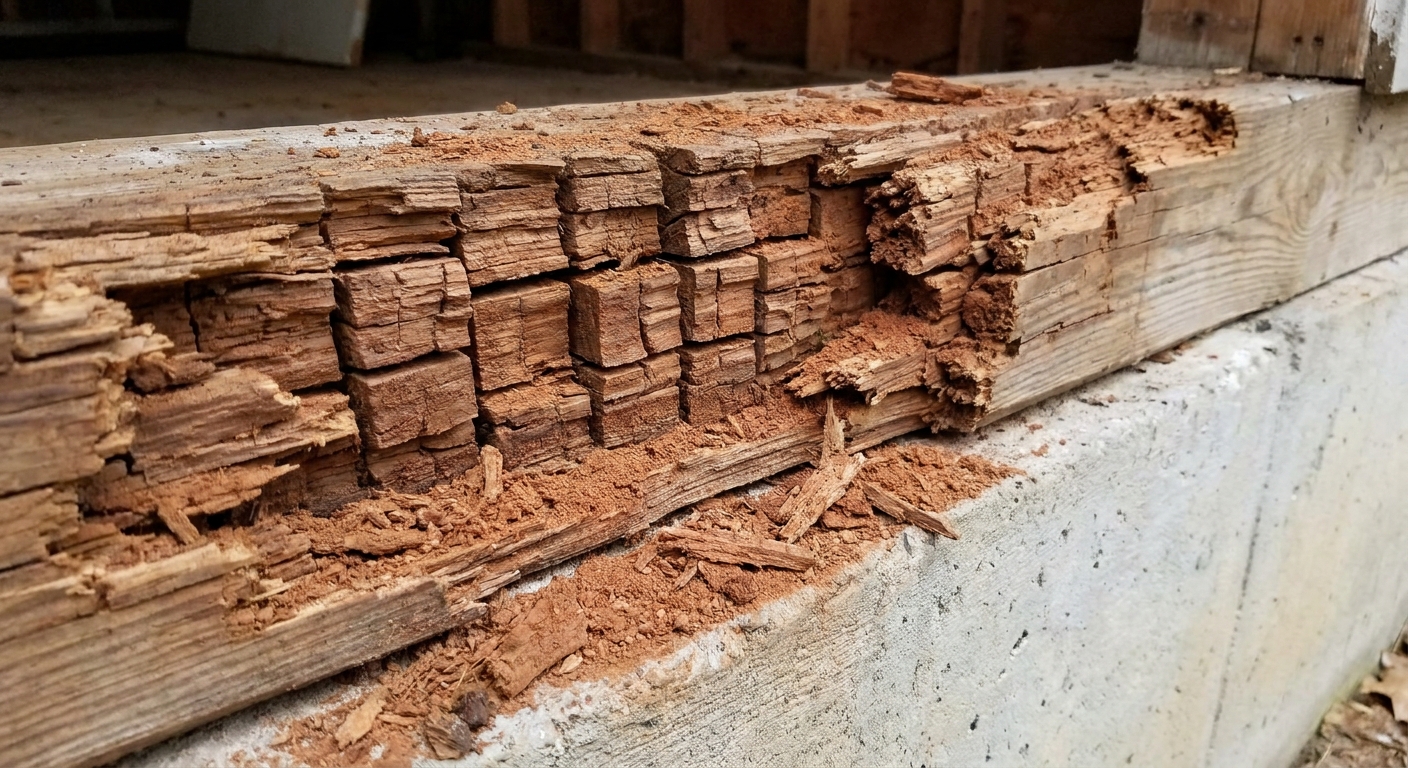
Cubical brown rot (the crack-into-cubes look)
What you see: wood checks and cracks into blocky, cube-like chunks along and across the grain. It can look dry on the surface after the area dries out, but the pattern is a tell.
Common locations: sills, rim joists, porch posts, window trim, door thresholds, and any place water repeatedly gets in and lingers.
Soft, wet, spongy wood (active moisture)
What you see and feel: the wood feels spongy and you can push a screwdriver into it with modest hand pressure. Paint may be bubbling or peeling nearby.
Smell clue: musty odors often travel with rot, especially in enclosed cavities.
White rot or soft rot (stringy decay)
What you see: wood can look bleached, stringy, or fuzzy, especially where it stays damp. Soft rot can show surface erosion and a softened layer, commonly in exterior wood that is frequently wet.
A simple inspection order: sills, joists, trim
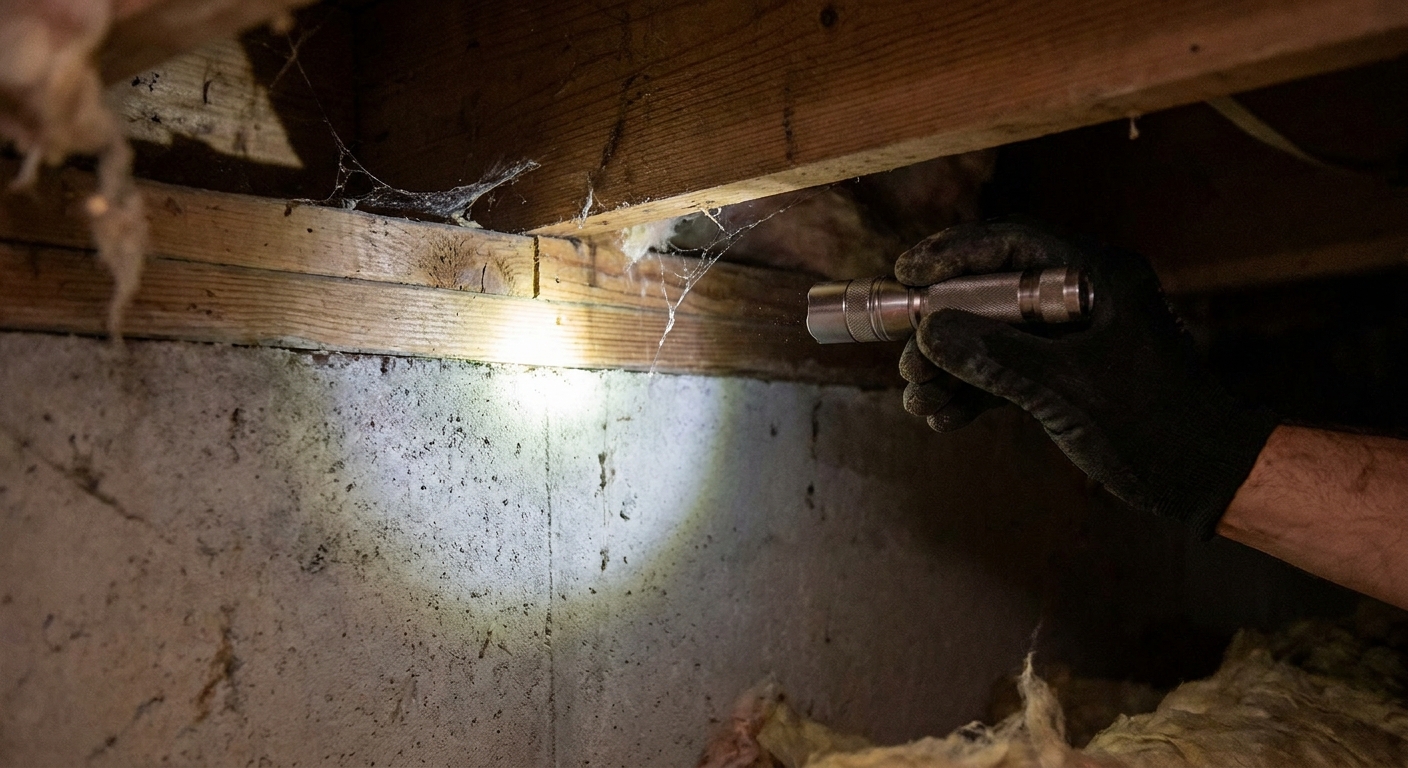
Here is the route I would take if I had ten minutes, a flashlight, and a mildly suspicious feeling. You are not trying to win a detective badge. You are trying to decide what kind of help to call next.
Step 0: Grab the basics
- Flashlight
- Flathead screwdriver or awl for gentle probing
- Disposable gloves
- Painter’s tape to mark questionable spots
- Phone for photos
1) Start at the sill and rim area
Where: basement, crawl space, or the lowest accessible wood above the foundation. Look at the sill plate, rim joist, and the ends of floor joists.
- Look for subterranean termites: mud tubes on foundation walls, tubes bridging from concrete to wood, mud-packed voids.
- Look for drywood clues: pellets collecting on top of block, ledges, or insulation, and tiny kick-out holes nearby.
- Look for rot: dark staining, visible cubical cracking, damp fibers, condensation patterns, or water trails.
- Probe: pick one or two suspicious spots. If the tool sinks in easily and the wood feels wet or crumbly, moisture is a prime suspect.
2) Move to floor joists and subfloor edges
Where: especially under bathrooms, kitchens, laundry areas, and exterior doors.
- Termite-leaning: localized hollowing, galleries visible where wood is already cracked or opened, mud lining in channels.
- Rot-leaning: broad staining, soft areas near plumbing leaks, slow sagging areas tied to long-term moisture.
3) Finish at window trim and door thresholds
Where: exterior-facing trim, lower corners of window casings, sill noses, and door jamb bottoms.
- Rot-leaning: peeling paint, end-grain exposure, caulk gaps, soft punky corners, recurring dampness after rain.
- Termite-leaning: possible, especially in warm regions or if there are other signs nearby. Look for hollow-sounding trim, swarm wings, or pellets collecting below small holes.
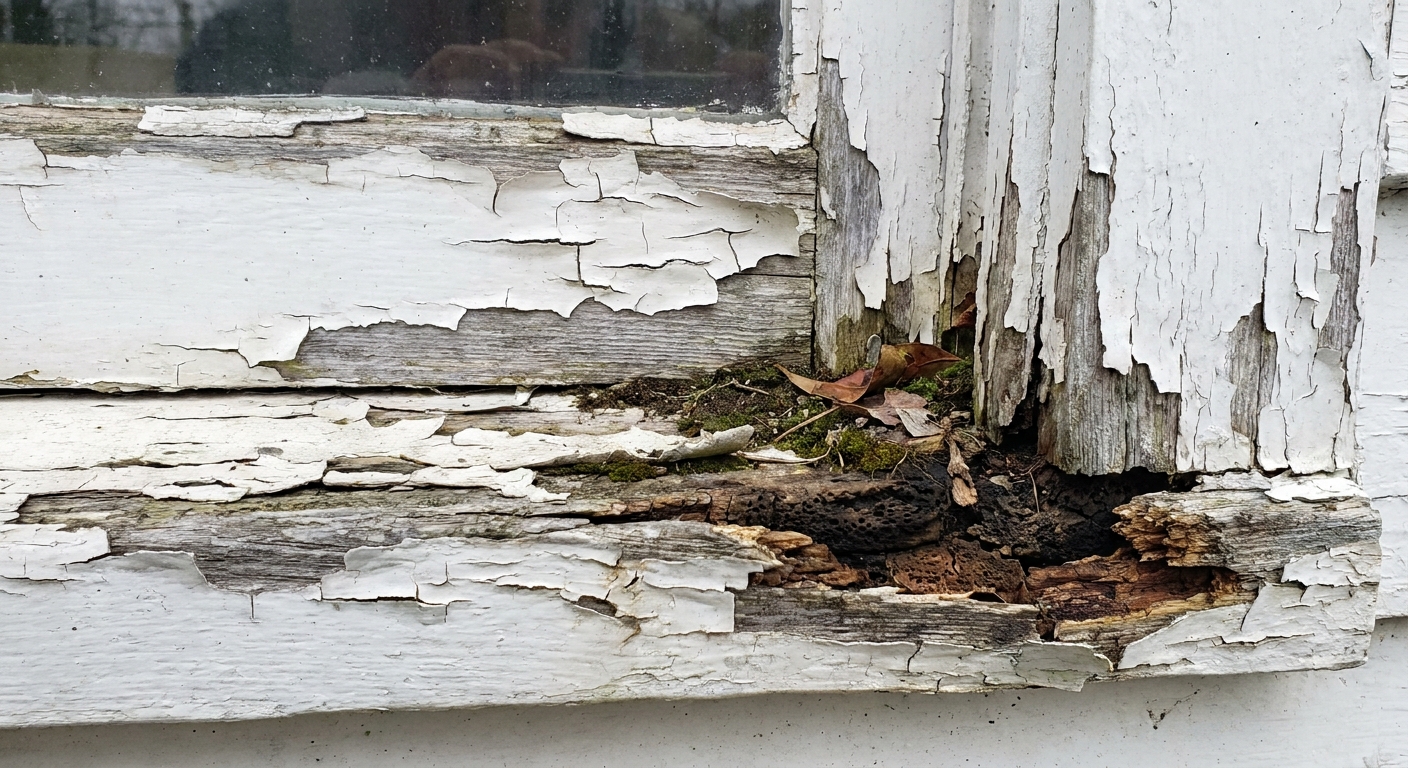
Quick ID cheat: damage up close
If you see this, think termites
- Mud tubes on concrete or masonry (subterranean)
- Hollow-sounding wood with a thin intact surface layer
- Mud-lined galleries inside wood (subterranean)
- Kick-out holes plus pellets collecting below (drywood)
- Discarded wings near windows or lights
If you see this, think rot and moisture
- Cubical cracking and blocky fractures
- Soft, wet, spongy wood that compresses under a probe
- Peeling paint, swollen trim, recurring caulk failure
- Widespread staining tied to leaks, condensation, or poor drainage
- Musty smell in enclosed areas
So what now? Pest pro vs moisture repair
This is the part where my little courier eyebrow goes up. Because homeowners often do the exact opposite of what helps: they treat for termites when the real issue is water, or they replace rotted trim without fixing the moisture that caused it.
Call a pest inspector if:
- You find mud tubes, even small ones.
- You see galleries with mud or clearly insect-made tunneling.
- You find pellets collecting below tiny holes, especially on sills, ledges, or basement/crawl space surfaces.
- You find discarded wings indoors, especially near windows.
- Multiple areas of wood sound hollow without a clear moisture trail.
Why: termites can be present without obvious surface decay. Also, fixing moisture helps but it does not automatically eliminate an established termite colony. You still want clear identification and a real plan.
Call a moisture-focused pro, or start moisture repairs, if:
- The wood is wet or spongy and you can trace it to a leak, splash-back, or condensation.
- You see cubical cracking plus drainage or flashing problems nearby.
- Damage is concentrated at window sills, trim bottoms, thresholds, or deck ledger areas with obvious water paths.
Why: rot does not stop until the wood stays dry. Replacing wood without fixing the water source is like putting a fresh bandage on a running faucet.
Do both when:
- You find mud tubes or pellets and also see obvious chronic moisture.
- A crawl space is damp and the sill area shows suspicious tunneling or hollowing.
Reality check: termites like moisture, and rot needs it. Sometimes you have a two-problem duet.
Safety and do not do this
- Do not aggressively tear into structural framing to “see how bad it is.” If it is load-bearing, that can turn an inspection into damage.
- Do not assume one spot tells the whole story. Check at least two areas on the same side of the house, especially near known water sources.
- Wear a respirator in dusty crawl spaces or if you suspect moldy materials. An N95 or better is a sensible minimum for basic inspection work.
- Be cautious around older materials like pipe insulation or duct wrap. If you suspect asbestos, do not disturb it during your investigation.
- If you find active insects, take clear photos and close the area back up. Identification comes before action.
FAQ
Can termites make wood look rotten?
Yes. Termites can make wood look rough, blistered, or distorted. But their classic move is hidden hollowing. Rot is more likely to look visibly degraded with cracking or punky fibers, especially where water repeatedly hits the same area.
What if the wood is dry now but still crumbly?
Rot can dry out after the leak stops or after seasons change. The damage pattern can remain. Look for the cubical cracking pattern, staining, and signs that the area was wet for long stretches.
Are kick-out holes always termites?
No. Small holes can come from other insects or even old fasteners. Kick-out holes become more convincing when there are pellets (frass) collecting below, or when they show up alongside other termite clues like discarded wings.
Should I treat it myself first?
If you are not sure what you are looking at, the most useful first move is documentation and proper identification. This page is intentionally not a termite treatment guide. Your next best step is usually a pest inspection (when termite signs show up) or moisture repair (when rot signs dominate).
The 30-Second Cheat Sheet
Essential takeaways for: Termite Damage or Wood Rot? How to Tell
Fast tell: termites vs rot
- Subterranean termites: mud tubes on concrete or masonry, mud-lined galleries, hollow-sounding wood with a thin surface layer, swarm wings near windows.
- Drywood termites: tiny “kick-out” holes plus sand-like pellets (frass) collecting below, cleaner galleries with pellets inside, wings indoors even without mud tubes.
- Wood rot: cubical cracking (blocky fractures), soft spongy wood that probes easily, peeling paint and swollen trim, widespread staining tied to leaks, splash-back, or chronic condensation.
10-minute inspection order
- Sill plate and rim joist: scan for mud tubes and probe any dark or soft areas.
- Joists and subfloor edges: focus under kitchens, baths, laundry, and exterior doors.
- Window trim and thresholds: press lower corners and end grain, look for peeling paint and soft spots.
What to do next
- Call a pest inspector if you find mud tubes, mud-lined galleries, discarded wings, or pellets and kick-out holes.
- Fix moisture first if wood is wet or spongy, shows cubical cracking, and you can trace water to leaks, failed caulk, poor flashing, or drainage.
- Do both if you have termite clues plus chronic dampness in the same area.
One caution
Do not start tearing into structural framing to investigate. Take photos, mark spots with tape, and get the right pro involved once you see termite-specific signs.
💡 Tip: Scroll up to read the full article for detailed, step-by-step instructions.
⬆️ Back to top
About Grit
Content Creator @ Grit & Home
Grit is Grit & Home’s little blue clay courier, delivering big questions about the place you call home. Expect practical ideas, a raised eyebrow, and a satchel full of curiosity.