
🚨 In a DIY emergency or rush?
Skip the details and jump straight to our 30-second cheat sheet for the most crucial info.
Small courier. Big home questions.
If your laundry room feels like it is doing double duty as a steam room, or your attic smells faintly like warm fabric softener, I have a raised eyebrow for you: your dryer vent might not be venting outside at all.
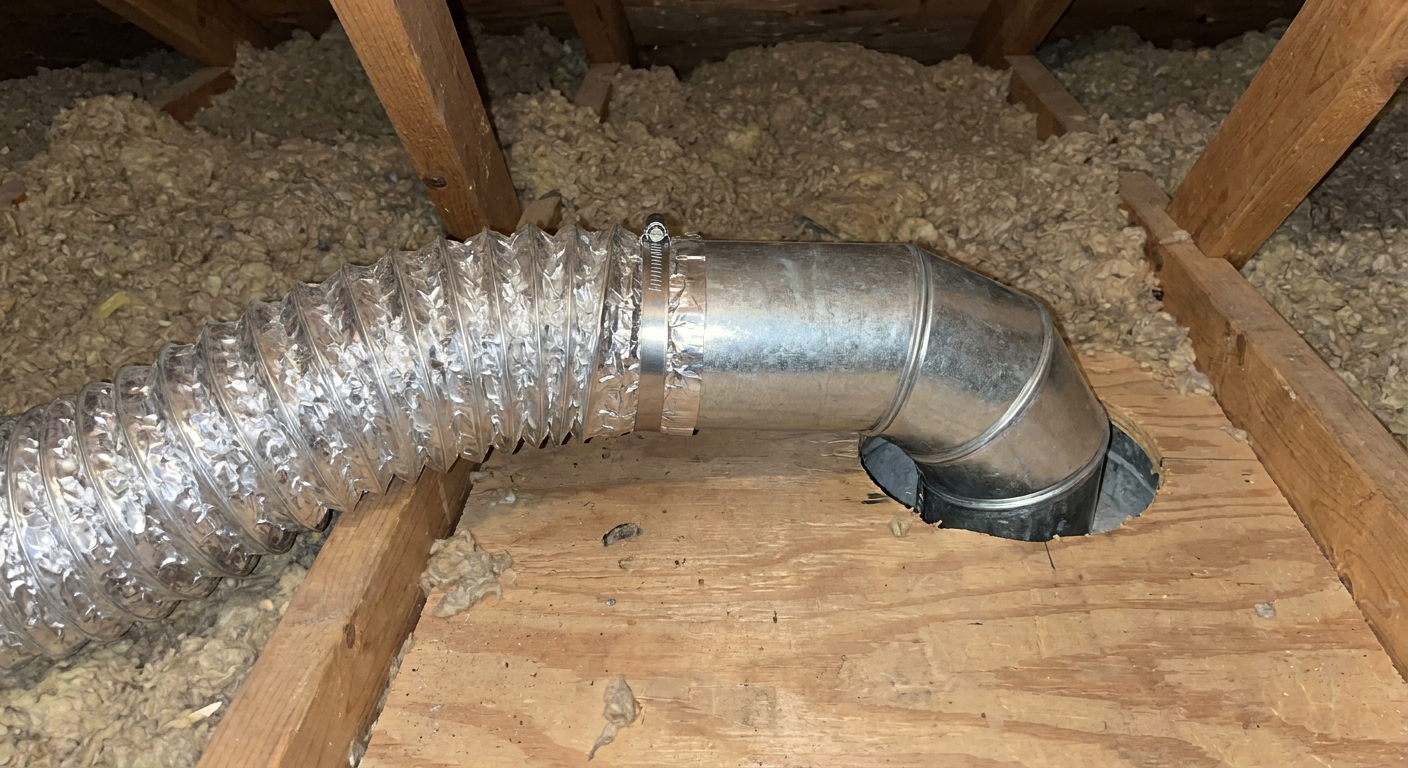
A dryer exhaust that ends in an attic, crawl space, garage, or wall cavity is not just “a little sloppy.” It is a routing defect that can feed mold, rot wood, and load hidden spaces with lint. That lint is great fuel when something sparks or overheats.
Quick safety note: If you smell gas, shut the dryer off, avoid flames and sparks, and call your gas utility or a qualified pro.
Fast answer: indoor termination
No. Standard dryer exhaust should discharge outdoors through a proper exterior termination hood. Dumping moisture and lint indoors is a common cause of attic condensation and crawl space mold, and it can increase fire risk by building up lint where you cannot see it.
If you suspect this in your home, avoid using the dryer until you confirm where the duct ends. If you confirm indoor termination or a disconnected duct, stop running it until it is routed outside.
How to confirm where the duct ends
You are trying to answer one question: does the duct connect all the way to an exterior hood, or does it stop short and blow into a hidden space?
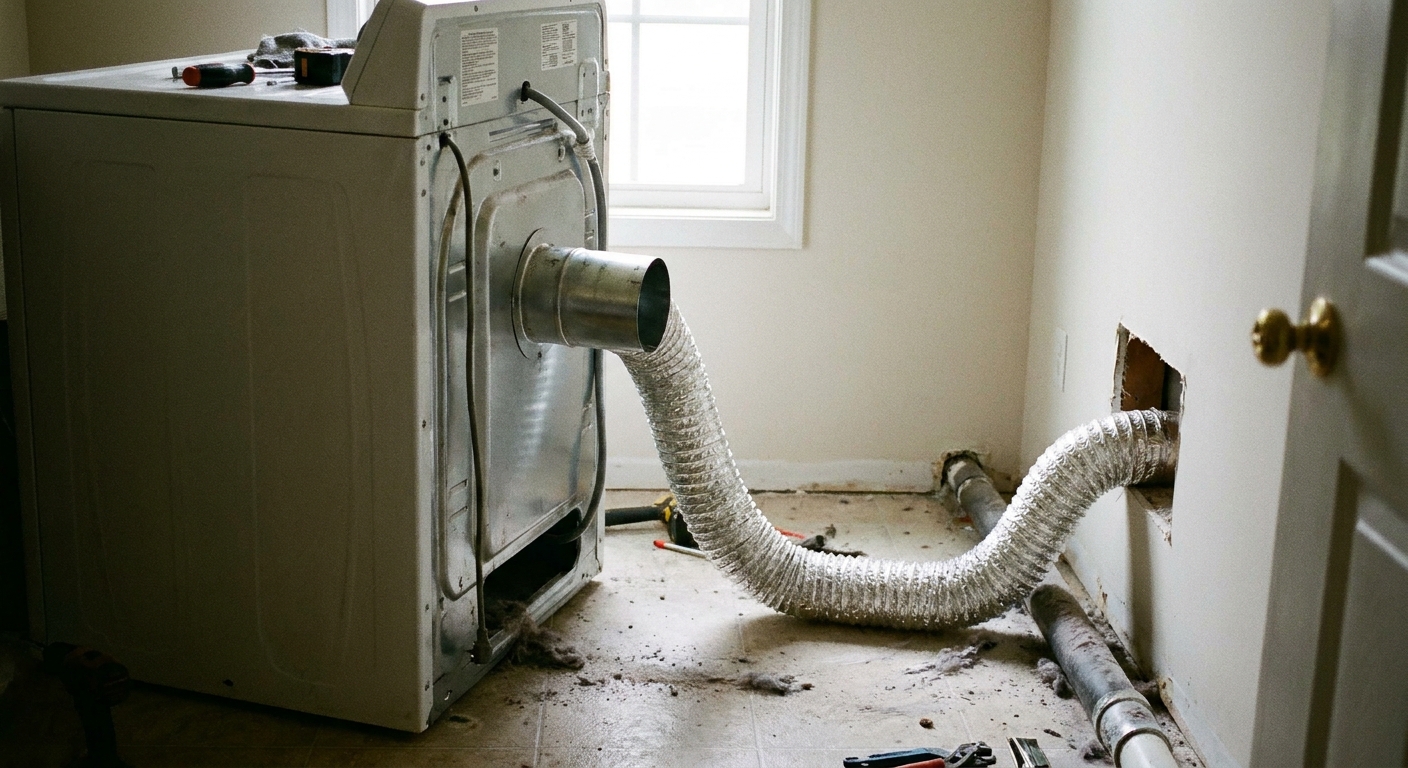
Step 1: Find the duct at the dryer
- Pull the dryer gently away from the wall and locate the exhaust connection.
- Look for a duct that transitions from the dryer to a wall, floor, or ceiling penetration.
- If you see white vinyl or thin foil “accordion” duct used for anything beyond a short transition, flag it. It crushes easily and traps lint.
Step 2: Find the exterior vent hood
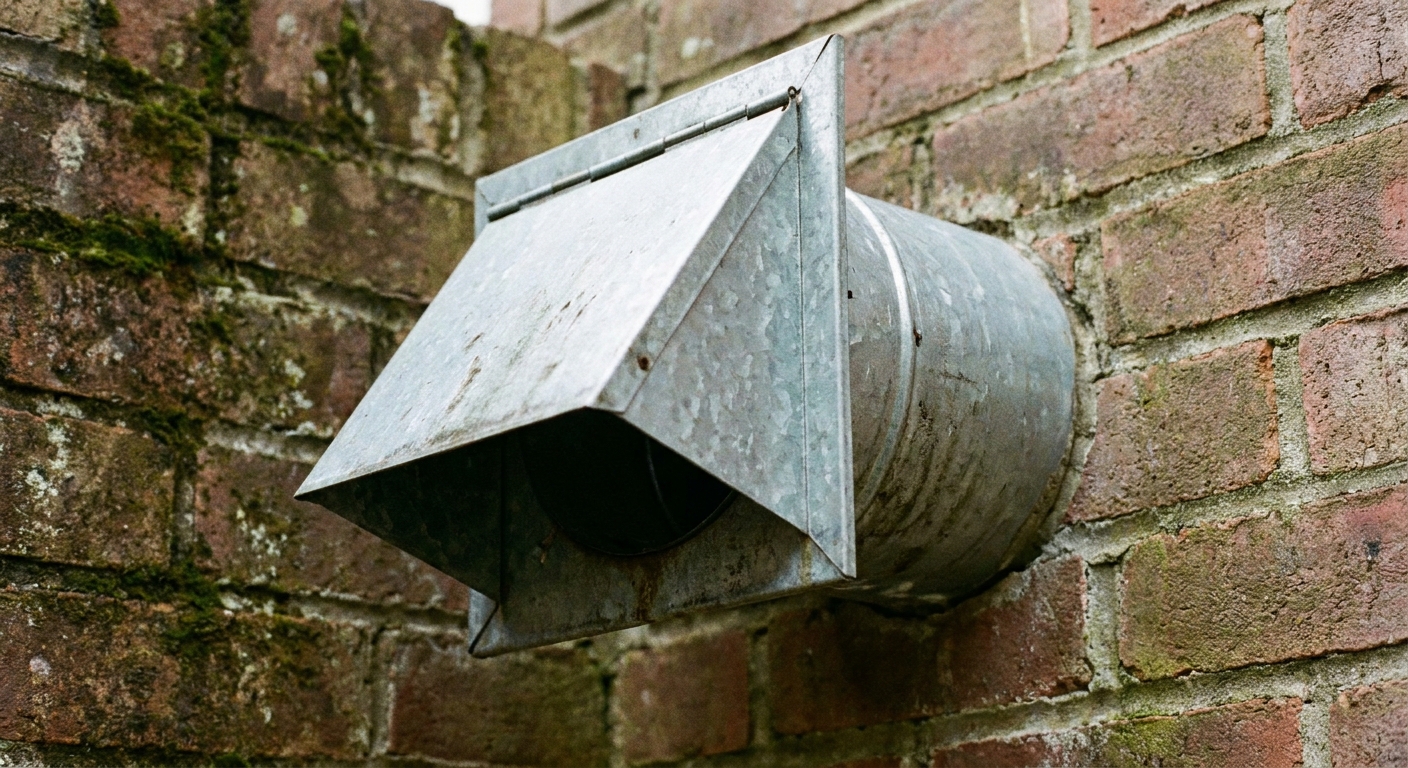
Walk the outside of the house and look for a dryer vent hood with a damper. Common locations:
- Exterior wall behind the laundry room
- Gable end wall near the attic
- Roof termination (sometimes used, usually a pain to service)
No obvious hood outside is your first big clue.
Step 3: Trace the run if the hood is missing
Depending on your layout, the duct may run:
- Up into an attic (laundry on first floor, duct rises through walls)
- Down into a crawl space or basement (laundry on first floor, duct drops through the floor)
- Sideways in a soffit or chase (duct disappears into a boxed-in ceiling area)
To confirm termination, use any combination of these checks:
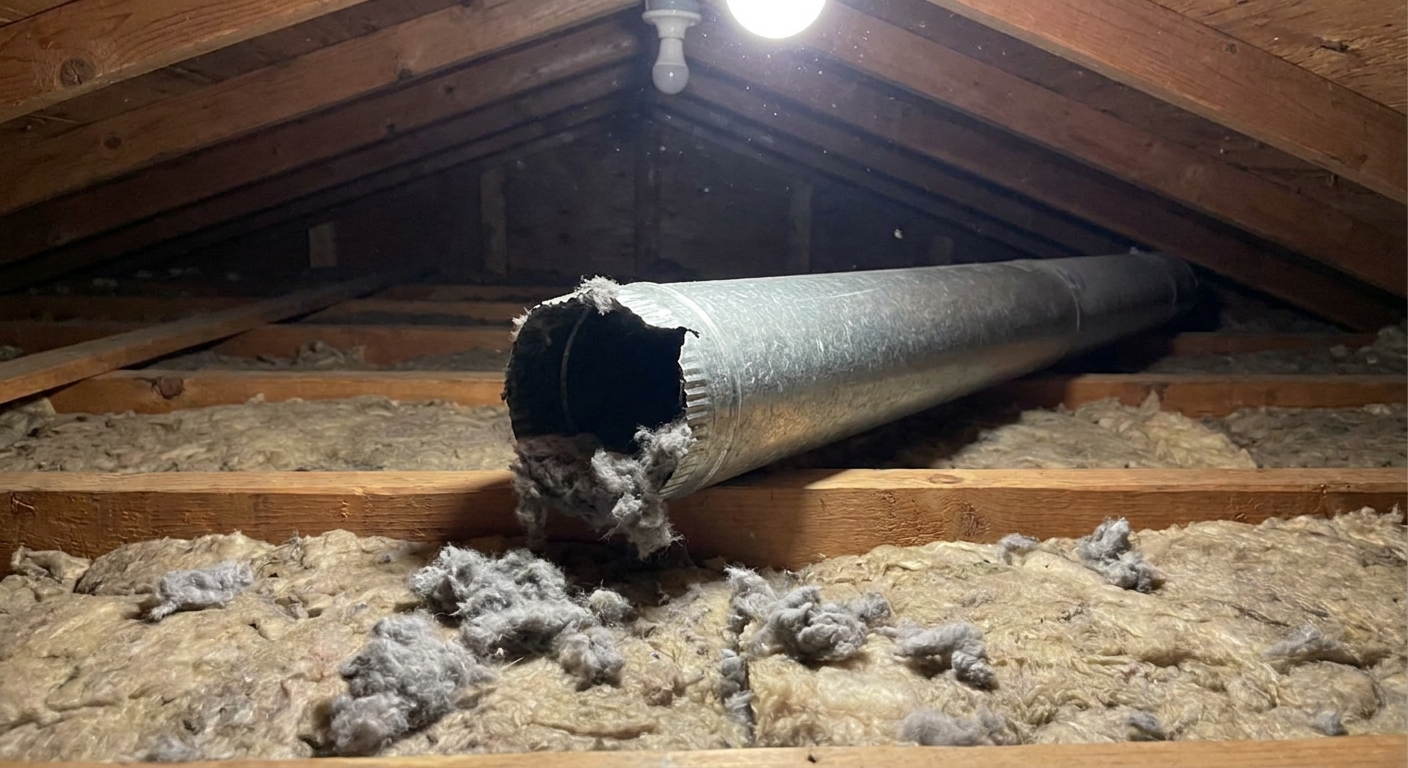
- Visual check: In the attic or crawl space, look for the end of a metal duct that is open, disconnected, or taped off poorly. You may also see a lint “snowdrift” on insulation or joists.
- Airflow check: With the dryer briefly running, feel for strong warm airflow at the suspected termination point in the attic or crawl space. Do not run it long if you suspect indoor termination.
- Flashlight check: With the dryer off, shine a flashlight into the duct from an accessible joint. If the run ends nearby, you may spot an open end, a tear, or a gap within a short distance.
- Camera check: A basic borescope or phone-on-a-stick approach can help confirm whether the duct continues or dead-ends.
What indoor termination looks like
- A duct that ends with no connection to an exterior hood
- A duct joint that has slipped apart, leaving a gap
- A duct pushed into a roof vent, soffit vent, ridge vent, or gable vent (still wrong)
- A lint trail on insulation or framing near the duct end
Why this is a serious problem
1) Moisture: a mold machine
Dryers move a lot of damp air. When that warm, moist air dumps into a cold attic or a cool crawl space, it condenses on wood, nails, roof sheathing, ducts, and insulation. Over time, that can mean:
- Mold growth on framing and sheathing
- Compressed, damp insulation that stops insulating well
- Wood rot and corrosion on fasteners
- Musty odors that migrate into living spaces
2) Lint: hidden fuel
Lint is highly combustible. When it accumulates inside the duct, around a disconnected joint, or on attic insulation, it becomes easy kindling. Add heat, friction, a failing dryer component, or a restricted duct run, and you have a situation that can escalate fast.
3) Air quality: that “clean laundry smell” is not the goal
Even if you do not see mold yet, exhausting inside can spread fine lint and whatever else is in the exhaust stream into the building enclosure. In crawl spaces, that air can be pulled upward into the home through gaps and penetrations.
What to do right now
- Avoid using the dryer until you confirm it vents outdoors. If you confirm it vents indoors or the duct is disconnected, stop using it until repaired.
- Do not “solve” it with a vent bucket indoors in an attic, crawl space, or inside the house. Indoor vent kits are only intended for certain electric dryers in limited situations. They are typically discouraged, may be restricted by local code, and they do nothing about keeping lint out of the building. Never use an indoor vent kit with a gas dryer. Check your dryer installation manual and local rules.
- Plan the new route before buying parts. The best route is usually the shortest, straightest path to an exterior wall.
Reroute it to the outside
The goal is simple: a continuous metal duct run from the dryer to the outdoors, with joints that stay together and a termination hood that closes when the dryer is off.
Duct basics to get right
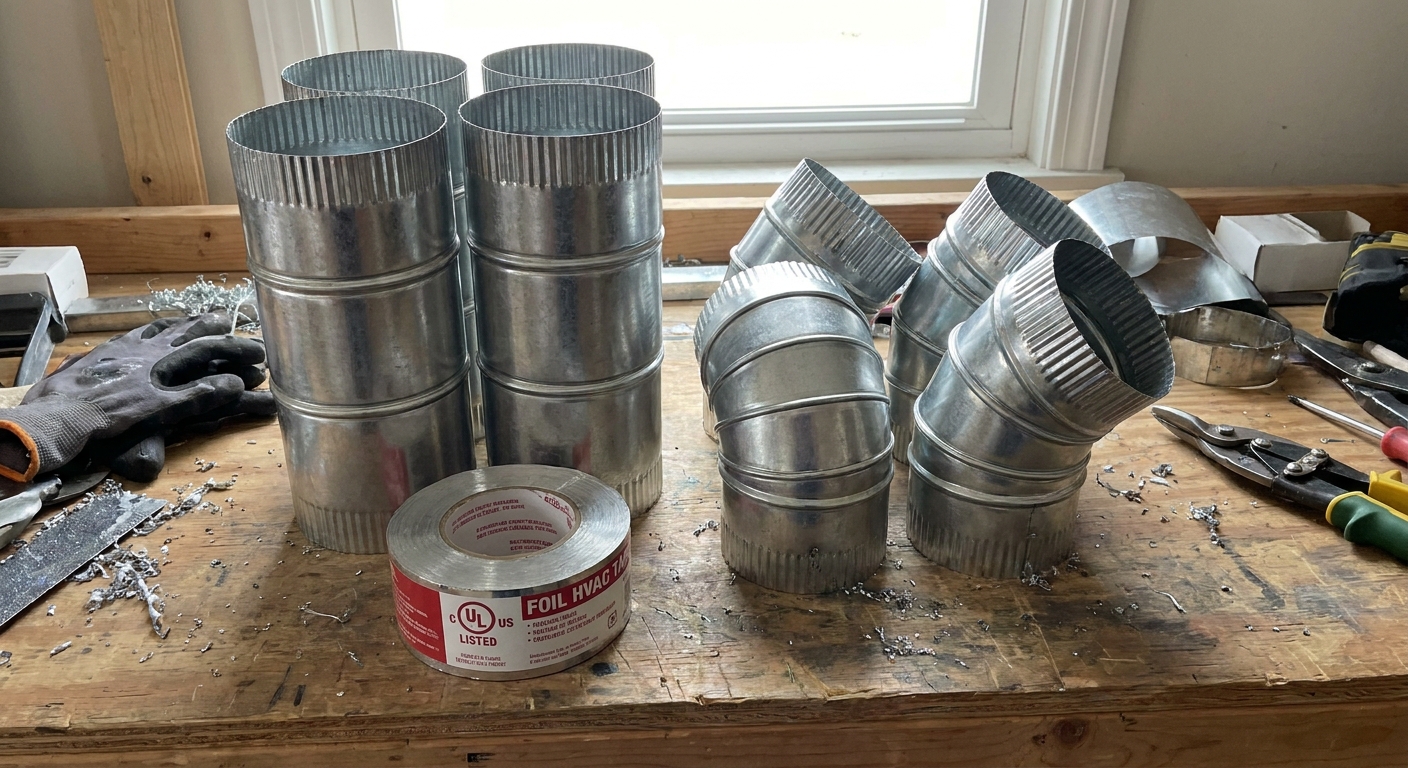
- Diameter: Most dryers use 4-inch ducting. Match what your dryer manual specifies.
- Length: Many standards use a baseline maximum of about 35 feet of duct, then subtract for turns (elbows reduce the allowed length). Your dryer manual may be stricter, and it wins. If your run is long or twisty, look up your exact model’s allowed equivalent length.
- No screws in the duct: Avoid sheet metal screws or fasteners that protrude into the airflow. They snag lint. Use proper connections and seal with UL listed foil HVAC tape.
Materials that are typically right
- Rigid metal duct (galvanized steel or aluminum) for most of the run
- Short metal transition duct from the dryer to the wall connection (often semi-rigid, if needed for movement)
- UL listed foil HVAC tape for sealing joints (not cloth duct tape)
- Exterior termination hood with a damper (and a proper connection collar)
- Metal worm-gear clamps where appropriate (commonly on the transition duct)
Avoid long runs of flexible duct, especially plastic or thin foil types. They crush easily and trap lint.
Route planning rules
- Shortest path: Less duct length means better airflow and less lint settling out.
- Fewest turns: Every elbow adds resistance. Use gentle sweeps where possible.
- Stay accessible: Do not bury key connections where you can never inspect them again.
Termination placement basics
- Pick a spot with room for the hood and damper to move freely.
- Keep it away from openings where exhaust can be pulled back in, like windows, doors, and fresh-air intakes. Local code and appliance instructions vary, so verify clearances for your situation.
Reroute options (best to worst)
- Best: Straight through an exterior wall behind the dryer (short run, easy to verify)
- Good: Through a nearby side wall using rigid duct and one or two elbows
- Sometimes necessary: Down and out through a rim joist if the dryer is near a crawl space or basement
- Usually last resort: Up and out through the roof (harder cleaning, damper issues in cold weather, and one more roof penetration to keep watertight)
Step-by-step: reroute to an exterior hood
1) Choose the termination location. Pick an exterior wall spot with room for the hood and clearance from obstructions.
2) Lay out the run. Dry fit rigid sections and elbows so the path makes sense. Aim for solid support so the duct does not sag.
3) Install the exterior hood. Cut the opening, insert the hood collar, fasten it, and seal the perimeter with appropriate exterior-rated sealant. The damper should swing freely.

4) Assemble duct from the hood back toward the dryer. Orient each joint so the connection does not create an upstream lip that can catch lint. In practice, that means the male end is pointed toward the outside, so airflow is moving over a smooth overlap instead of into an edge.
5) Seal joints with foil HVAC tape. Wrap the tape smoothly around each joint. You are building an airtight path so exhaust does not leak into the home.
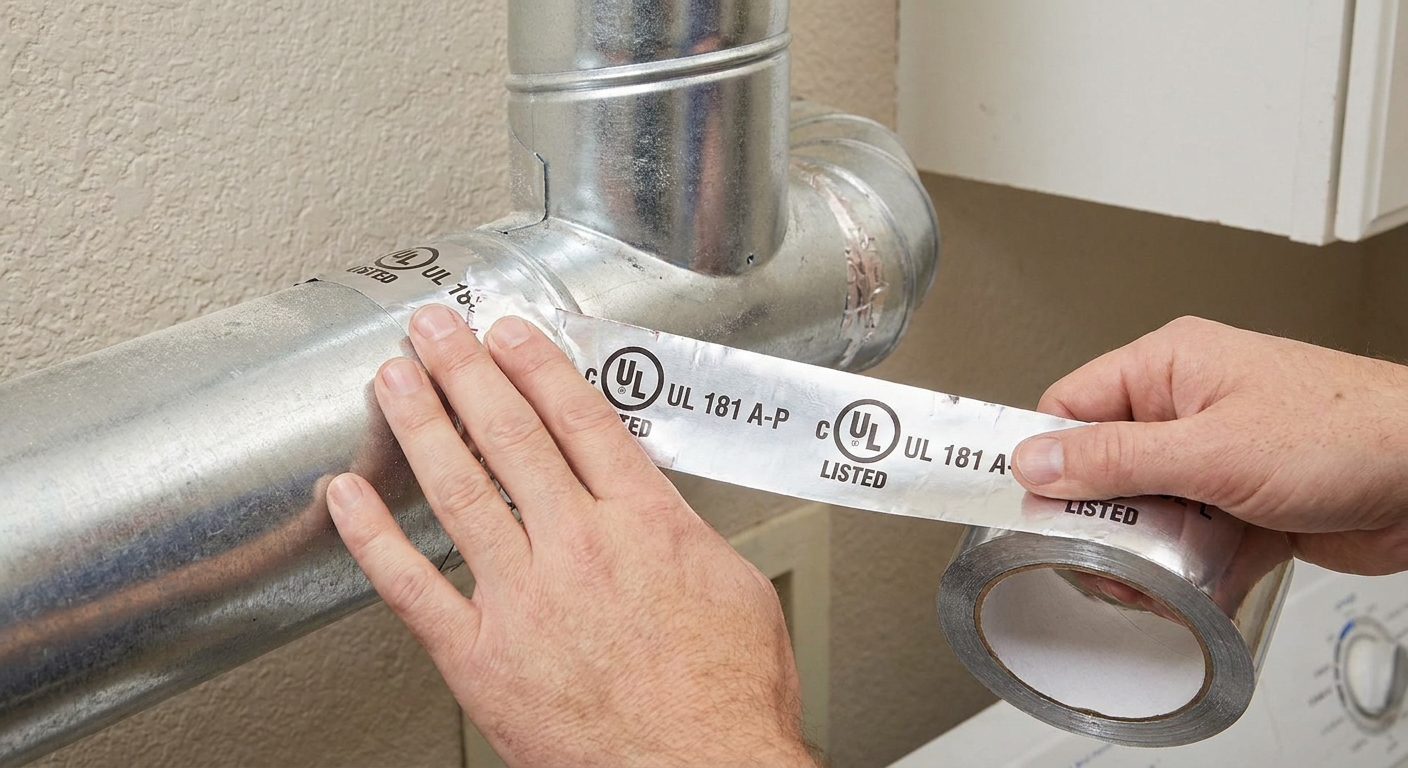
6) Support the duct. Use strapping or supports so long horizontal runs do not sag. Sagging equals lint settling.
7) Connect the dryer with a short transition. Keep the transition as short and straight as practical, and make sure the dryer can slide back without crushing it.
8) Test. Run the dryer briefly and confirm strong airflow at the exterior hood and no leaks at indoor joints.
Seal the old opening
Once the duct is correctly routed outside, seal and repair the old penetration so you are not leaving an open pathway for air leakage, pests, or moisture movement.
Clean up and maintain
After you fix the routing, do not stop at “it blows outside now.” If the system has been venting indoors or leaking into a cavity, assume lint is everywhere it should not be.
- Clean the full duct run from the dryer connection to the exterior hood.
- Clean behind and under the dryer, including the area around the motor and heater compartment if your model allows safe access (or have a pro do it).
- Check the hood damper for lint buildup so it opens fully.
- If you have heavy buildup, a long run, or a roof termination, consider professional dryer vent cleaning.
When to call a pro
I love a good DIY reroute, but there are times it is smarter to phone in a specialist:
- The duct run requires cutting through masonry, stucco, or complex siding details
- You need a new roof penetration or you suspect roof leaks
- The best route crosses fire-rated assemblies in a multi-family building
- You find significant mold, wet insulation, or damaged framing near the termination
- Your dryer is gas and you smell gas or suspect combustion issues
If you are in a condo or apartment, check building rules before altering exterior walls or penetrations.
Quick FAQ
Is it ever OK to vent into an attic?
As a practical home-safety matter, no. Attics are not designed to receive moist exhaust and lint. Even if someone claims it is “fine because the attic is ventilated,” you are still pumping concentrated moisture and combustible lint into a concealed space.
What if it is connected to a soffit or ridge vent?
That is still an improper termination. Those vents are part of the attic ventilation system, not a dryer exhaust outlet. You want a dedicated dryer termination hood to the outdoors.
What if I cannot reach an exterior wall easily?
Look for a shorter alternate path, such as through a nearby side wall, a rim joist, or a different laundry placement. If the only option is a long, twisty run, get help designing it so airflow stays strong, equivalent length stays within spec, and key connections stay accessible.
The 30-Second Cheat Sheet
Essential takeaways for: Dryer Vent Ends in the Attic or Crawl Space?
What is happening
- If your dryer duct ends in the attic or crawl space, it is dumping moisture and lint indoors instead of outside.
Why it matters
- Mold and rot risk: Warm humid exhaust condenses on cold attic or crawl surfaces.
- Fire risk: Lint buildup in hidden spaces is combustible.
How to confirm
- Look for a real exterior vent hood. If you cannot find one, suspect indoor termination.
- Trace the duct in the attic or crawl space. A bad setup often has an open duct end or a disconnected joint.
- Briefly run the dryer and check for warm airflow where the duct ends (do not keep using it if it vents indoors).
What to do
- Avoid using the dryer until you confirm it vents outdoors. If you confirm indoor termination or a disconnected duct, stop using it until fixed.
- Reroute using rigid metal duct (most of the run), seal joints with UL listed foil HVAC tape, and terminate at a proper exterior hood with a damper.
- Keep the run short, straight, and supported. Fewer elbows is better.
Call a pro if
- You need a roof penetration, are in a multi-family building, or you find wet insulation, mold, or damaged wood.
- Your dryer is gas and anything about the setup seems unsafe, or you smell gas.
💡 Tip: Scroll up to read the full article for detailed, step-by-step instructions.
⬆️ Back to top
About Grit
Content Creator @ Grit & Home
Grit is Grit & Home’s little blue clay courier, delivering big questions about the place you call home. Expect practical ideas, a raised eyebrow, and a satchel full of curiosity.