
🚨 In a DIY emergency or rush?
Skip the details and jump straight to our 30-second cheat sheet for the most crucial info.
The first time stink bugs hit my tomatoes, I thought I had a watering problem. The fruit looked fine from a distance, but up close it had little cloudy spots and weird, puckered scars near the blossom end. By the time you see that kind of damage, the bug has already moved on and the plant will not “heal” the fruit.
The good news is you can absolutely knock stink bugs back in a home garden without turning your yard into a chemical zone. The trick is learning what the damage looks like, scouting at the right times, and choosing controls that actually match the bug’s life stage.
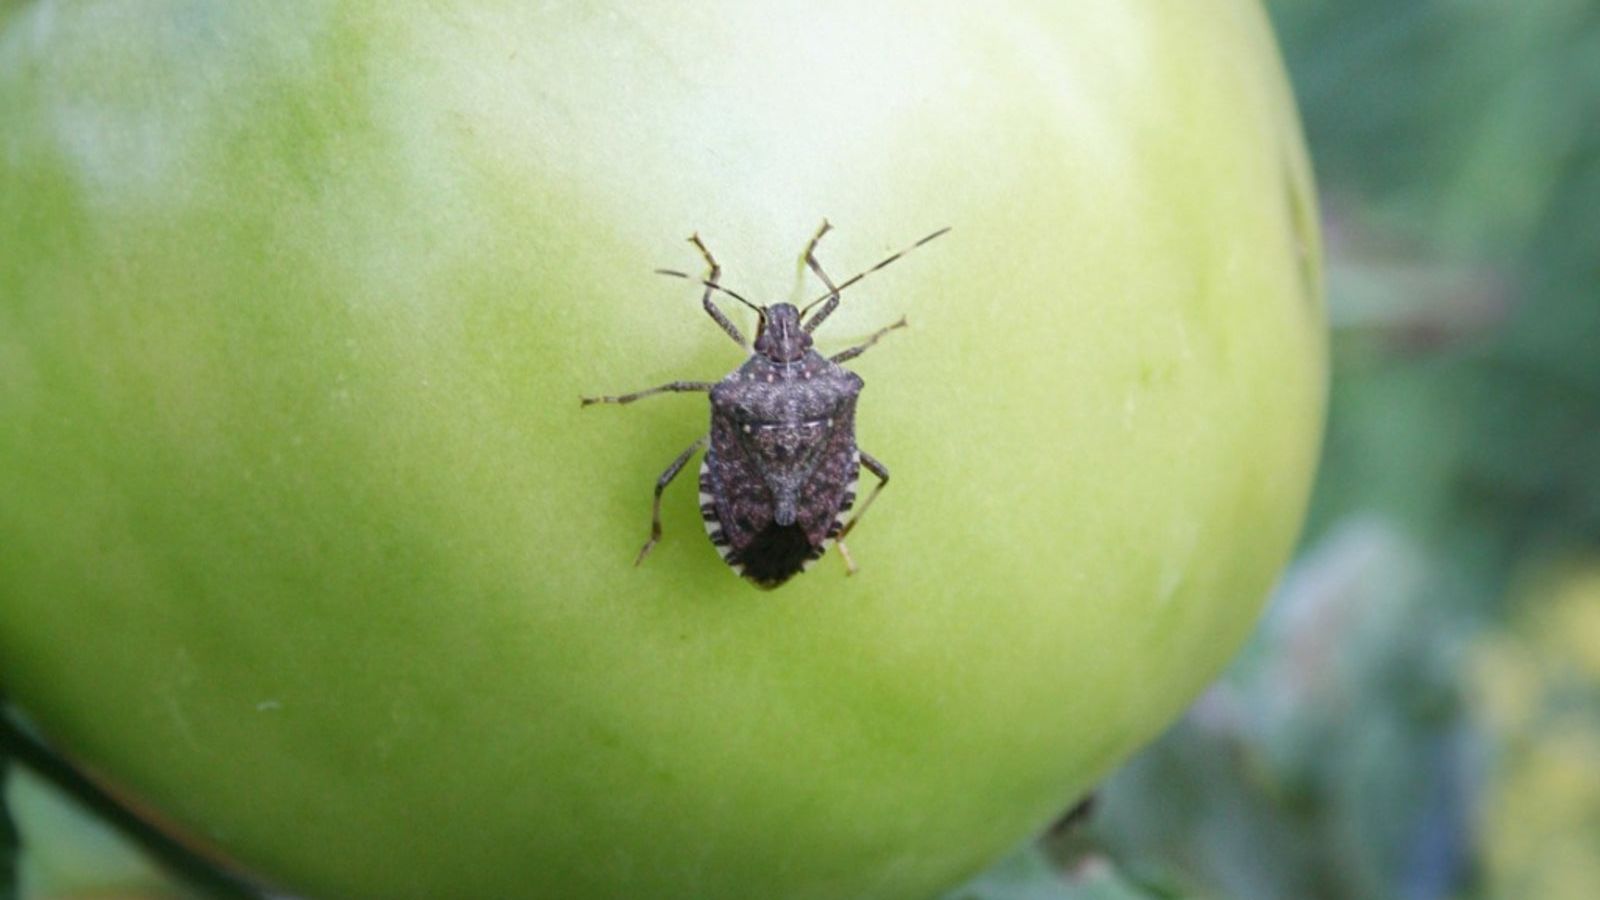
Know your enemy: what stink bugs are doing to your crops
Stink bugs are piercing-sucking insects with a straw-like mouthpart. Instead of chewing holes like caterpillars, they stab plant tissue and pull fluids out. That means the “wound” can be tiny, while the damage underneath is bigger than you expect.
Common garden culprits
- Brown marmorated stink bug (invasive in many areas) tends to show up in big numbers and hits fruit hard.
- Green stink bug and other native species can still cause serious damage, especially in hot weather when populations spike.
No matter the species, the control approach is mostly the same: keep them off fruit during the vulnerable window and reduce nymphs before they turn into a repeating cycle of feeding, dispersing, and reinfesting.
How to recognize stink bug feeding damage (tomatoes, beans, and fruit)
If you are seeing “mystery blemishes,” use these crop-by-crop clues to confirm stink bugs are the cause.
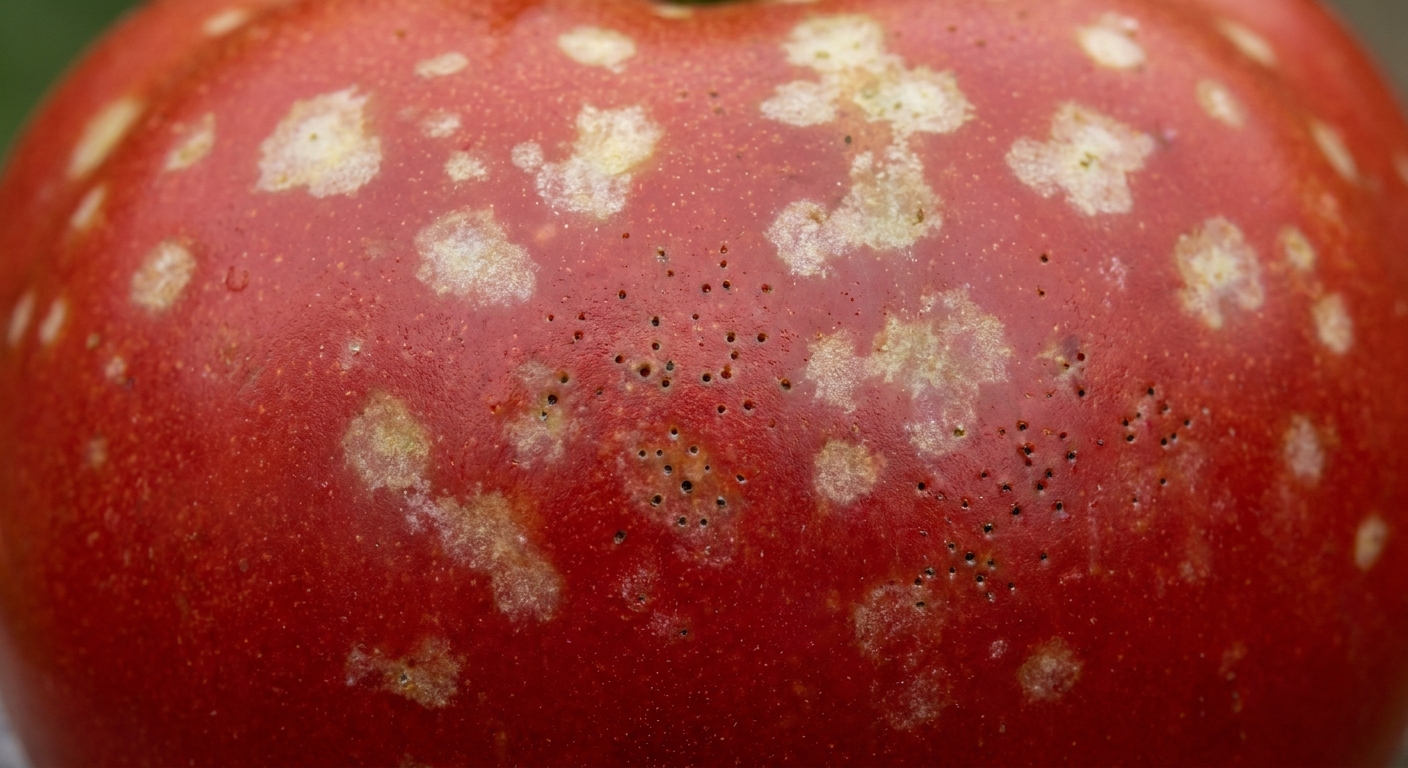
Tomatoes: cloudy spots, pale pinpricks, and puckering
On tomatoes, stink bug feeding often shows up as:
- Cloudy spots: pale or yellowish patches under the skin, sometimes with a tiny puncture in the center.
- Hard white or corky tissue inside when you slice through the spot.
- Puckered scars near the blossom end or along the shoulders. These can mimic catfacing.
Important caveat: true catfacing on tomatoes is often caused by flower disruption (temperature swings, plant stress, variety quirks). Stink bug injury can look similar, but the clues that point to bugs are the tiny punctures, the cloudy spot pattern, and that corky tissue under the skin.
Reality check: once a tomato is scarred or corked, that fruit will not “grow out of it.” Your goal shifts to protecting the next set of fruit.
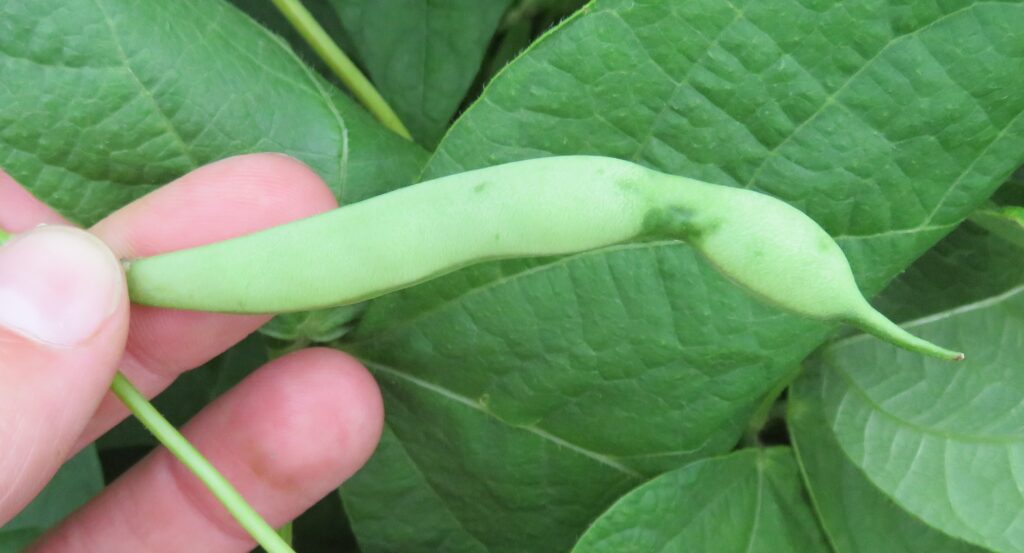
Beans: dimpled pods and shriveled seeds
Stink bugs like developing pods. Signs include:
- Dimpled or misshapen pods
- Tiny dark pinpricks on the pod surface
- Flat, shriveled, or discolored seeds inside older pods
If your beans look lumpy or the seeds inside are poorly formed, start scouting every day or two during pod fill. Beans can go from fine to frustrating fast.
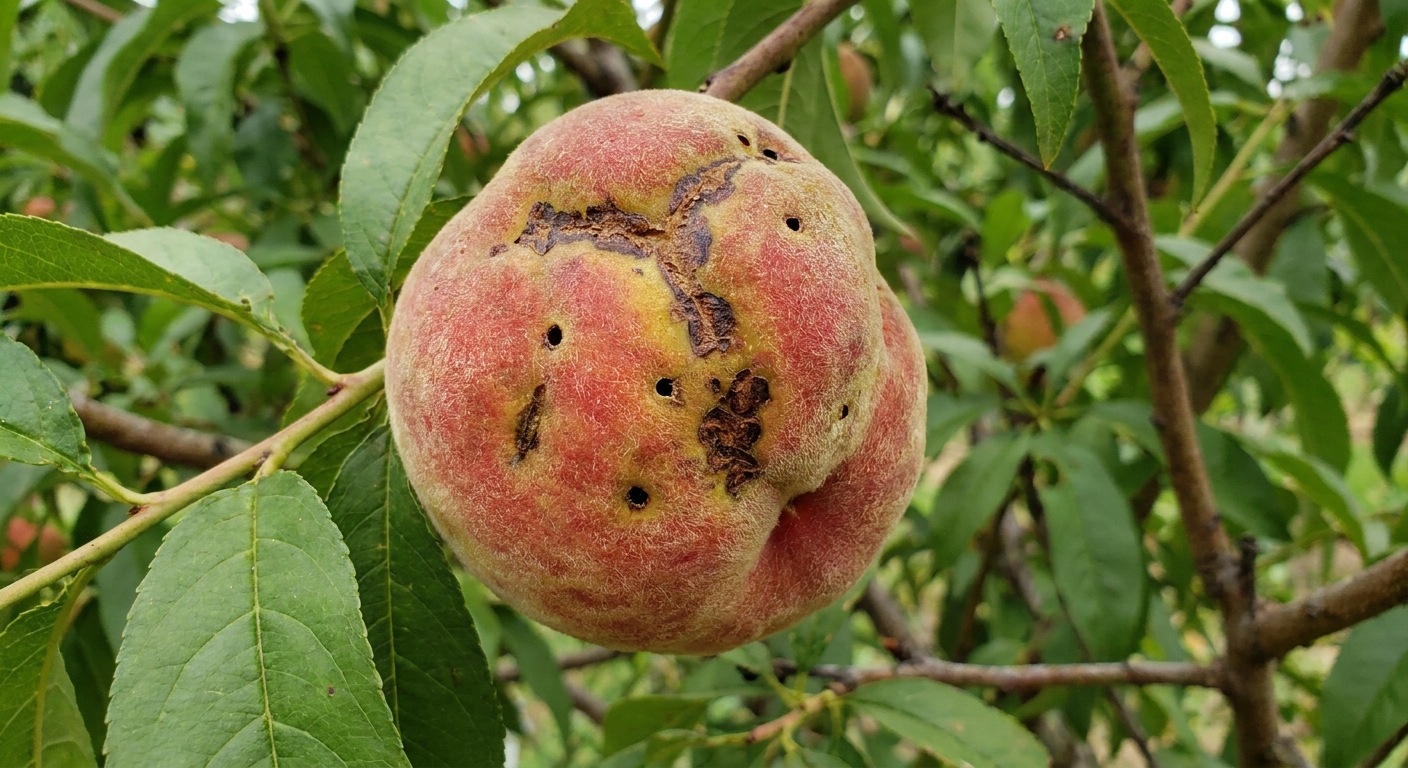
Fruit (peaches, apples, berries): corking, deformities, and “catfaced” fruit
On tree fruit and soft fruit, stink bug feeding can cause:
- Depressed, misshapen areas that stay firm and do not ripen normally
- Corky brown tissue under the skin
- Catfacing on peaches or apples, with irregular ridges and scars
On peaches and apples, this can be mistaken for other issues, so the giveaway is usually the pattern: scattered individual fruits with punctures and internal corking, especially on edges of the canopy or near weedy borders.
Rule out lookalikes (quick check)
I have learned the hard way that you can treat the wrong problem really well and still lose the crop. If you are not seeing bugs yet, compare the symptom pattern:
- Blossom-end rot (tomatoes): a dark, sunken, leathery patch on the blossom end, usually without punctures. Often tied to uneven moisture and calcium uptake.
- Sunscald (tomatoes and peppers): bleached, papery patches on the side facing direct sun, often after pruning or leaf loss.
- Fungal spots (anthracnose on tomatoes): round, sunken lesions that can show concentric rings as they expand, more “rot” than “cork.”
- Bacterial speck or spot: lots of small dark specks, often with leaf spotting too, not just a few corky patches on fruit.
- Physiological catfacing (tomatoes): deep creases and deformities, usually without the pinpoint punctures and cloudy spot look.
If you are still unsure, slice the fruit. Stink bug injury often has that telltale corking under an otherwise small-looking surface mark.
Scout smarter: where stink bugs hide and when to look
If you only look at midday from the path, you will miss them. I find the most bugs when I slow down and check the spots they prefer.
Best places to check
- Upper leaves and growing tips, especially on tomatoes and peppers
- Inside the canopy where it is shaded
- Near fruit clusters and along trellises
- Garden edges near tall weeds, brush, or ornamentals
Best times to check
- Early morning: bugs are slower and easier to hand-remove.
- Late evening: also decent, but you will miss small nymphs if light is poor.
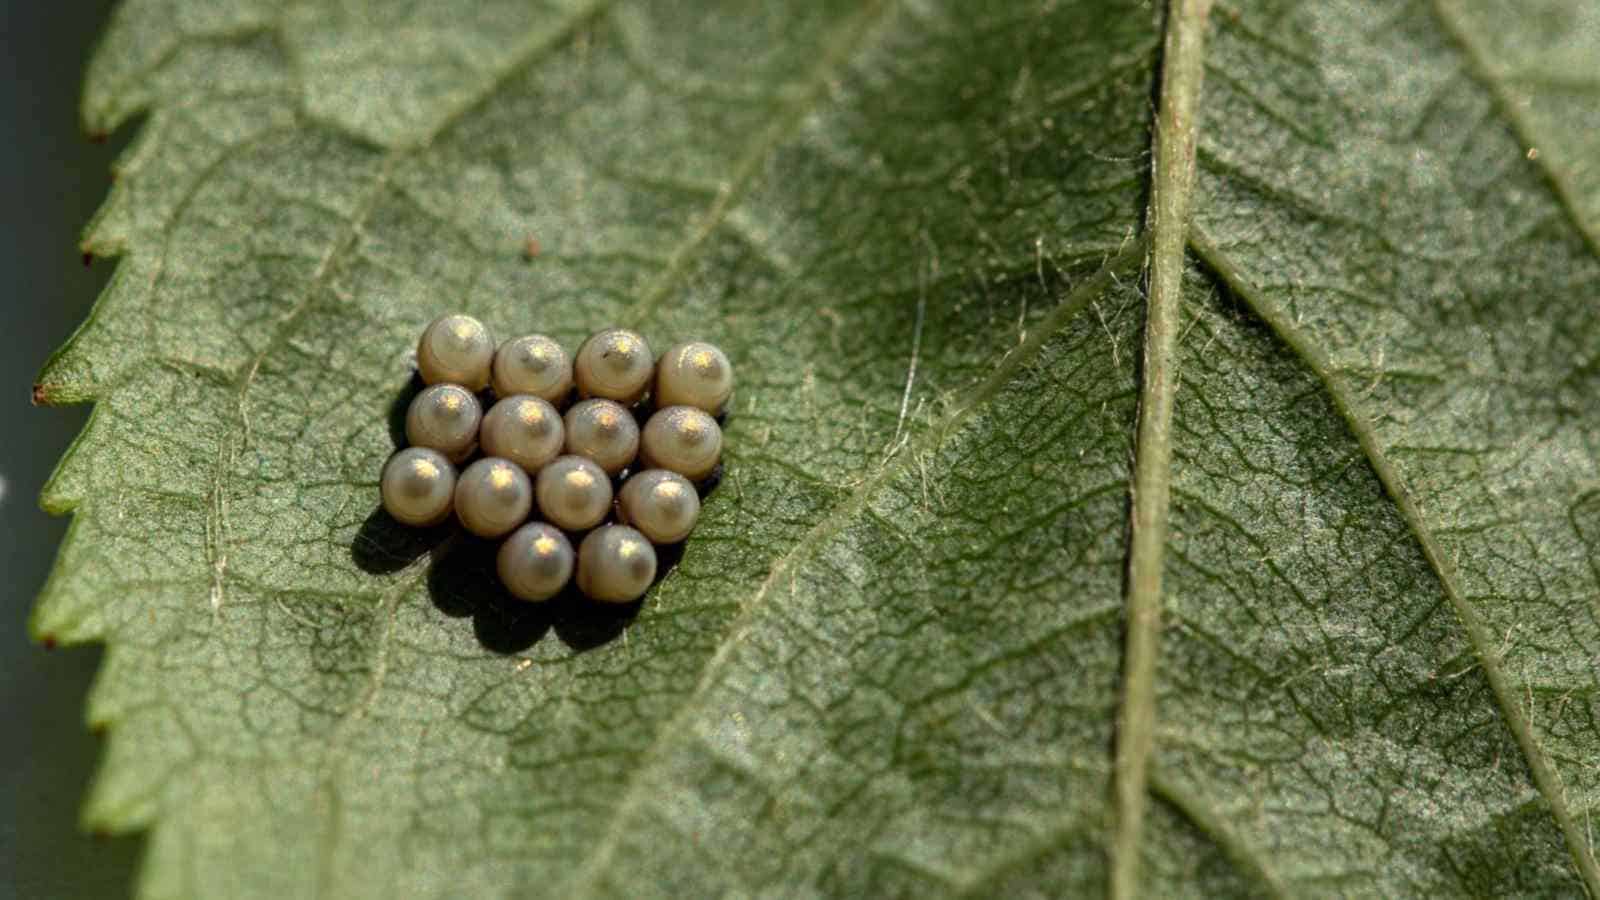
Look for egg clusters too. They are typically barrel-shaped and laid in groups on the underside of leaves. Catching eggs and tiny nymphs is the cheapest control you will ever do.
Start with the simplest control: hand removal that actually works
For most home gardens, hand removal is the highest return on effort, especially early in the season and on small plantings.
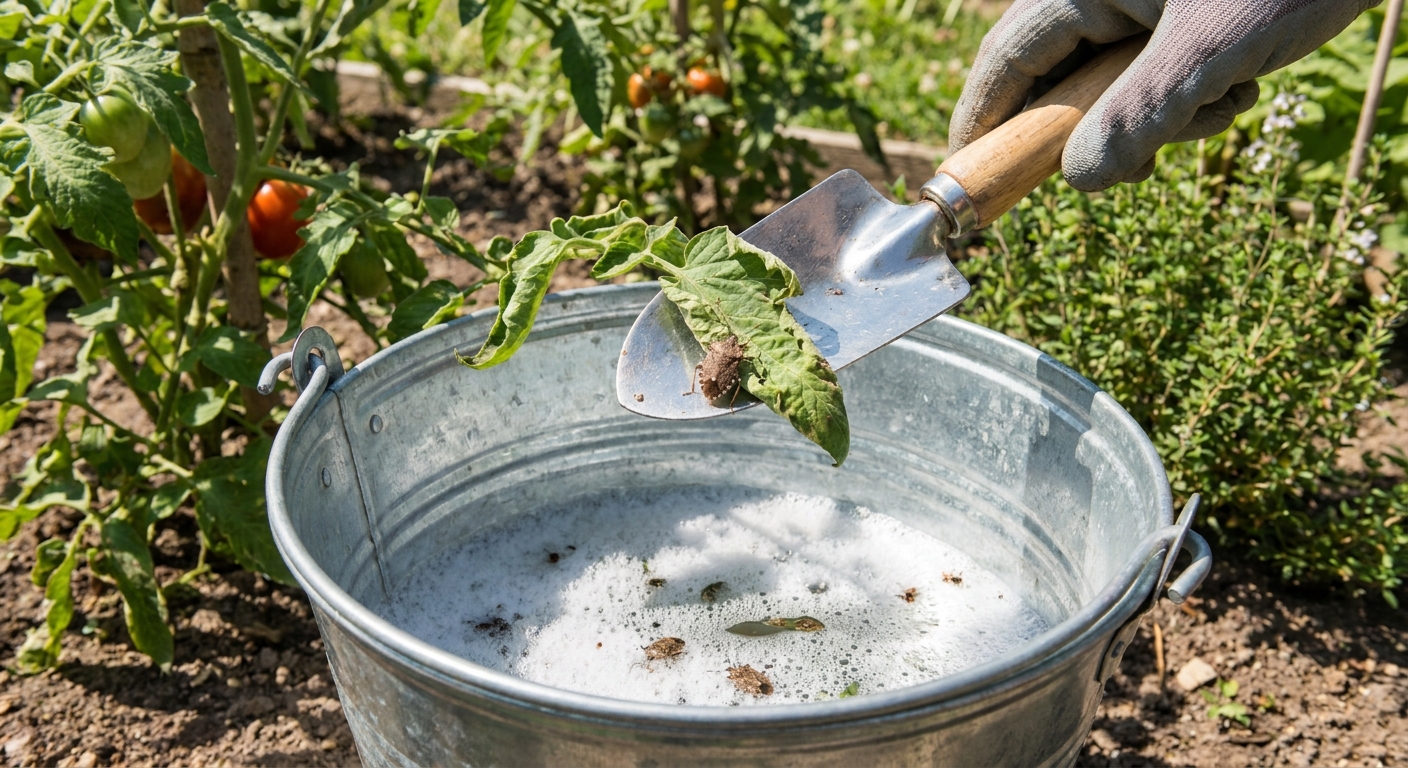
My low-mess hand-pick setup
- A small bucket or wide-mouth jar
- Water mixed with a little dish soap
- Gloves if you hate the smell
Knock the bugs into the soapy water. Do not smash them on the plant if you can help it. You will see why the first time you do.
Two extra tricks when numbers jump
- Shake and catch: in early morning, I will hold the bucket under a branch or tomato cluster and give it a firm shake. A surprising number drop straight in.
- Handheld vacuum: a small hand vac can work for quick knockdown, especially on trellised crops. Empty it immediately into soapy water. Do not store a stink-bug vacuum in your kitchen unless you enjoy regrets.
Do not ignore nymphs
Nymphs cannot fly yet, so they tend to cluster and are easier to wipe out in batches. If you see a group of small, roundish nymphs on one stem, that is your chance to cut the population down before the next wave of adults starts hopping from plant to plant.
Row covers: the timing that makes or breaks them
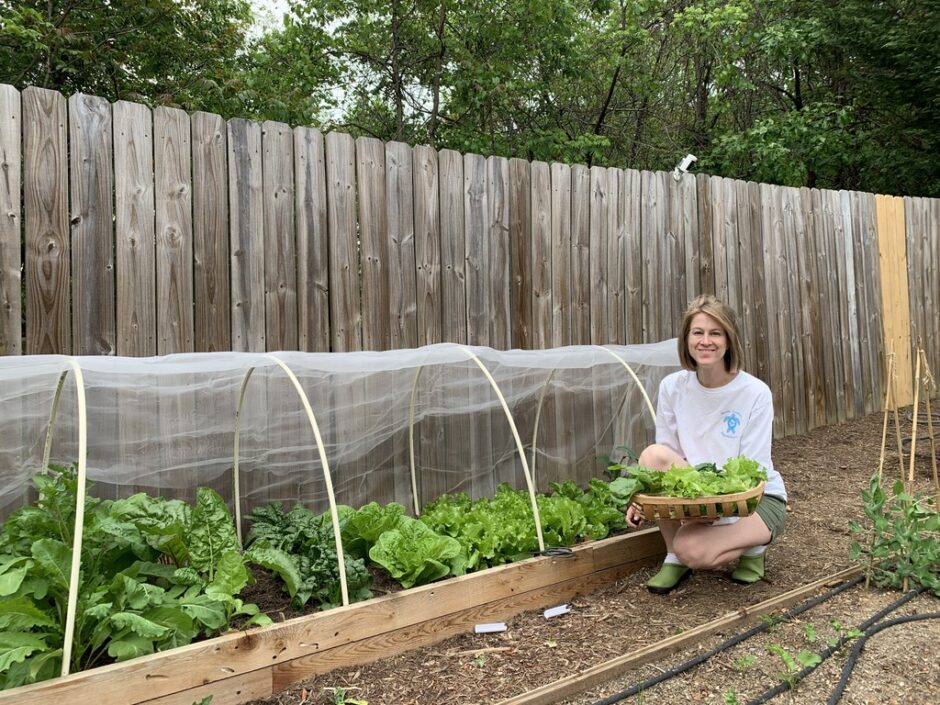
Row covers can be fantastic, but only if you use them like a door, not a blanket you toss on whenever you feel like it. They work by excluding the bugs.
When row covers work best
- Right after planting to protect young plants before pressure ramps up
- During early fruit set on crops that do not need insect pollination under the cover
When row covers get tricky
- Tomatoes, peppers, squash, cucumbers: once flowers need pollination, you either uncover during the day, hand pollinate, or switch strategies.
- If bugs are already inside: you can accidentally trap stink bugs under the cover with a buffet.
Practical row-cover tips
- Seal the edges with soil, boards, or sandbags. Gaps defeat the whole point.
- Check under the cover weekly for hitchhikers and egg clusters.
- Use hoops so the fabric does not rub blossoms and growing tips.
Traps: useful for monitoring, not miracles
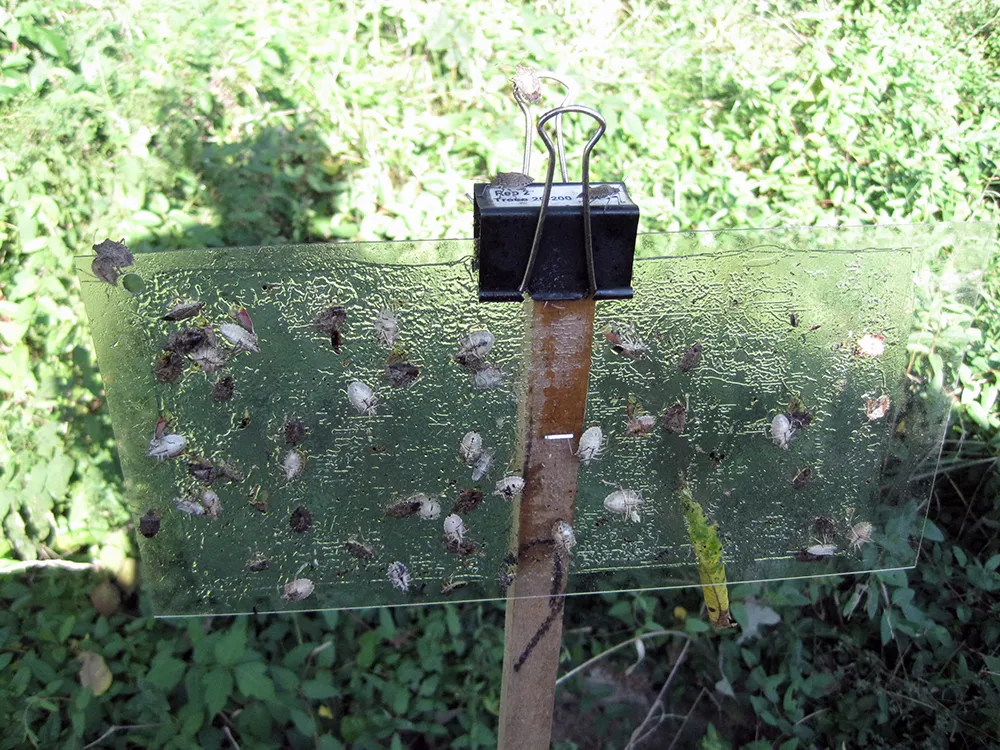
There are stink bug traps and lures on the market, and they can help you confirm you have a stink bug problem and roughly when pressure is rising. But they are rarely a stand-alone solution in a backyard garden.
Trap limits to understand upfront
- They can attract more bugs to the general area, especially if the trap is too close to your crops.
- They do not catch every life stage equally. Adults are more likely than tiny nymphs to end up in traps.
- They do not protect fruit by themselves. You still need exclusion or knockdown methods.
How to use traps without making things worse
- Place traps away from your most valuable plants, not inside your tomato patch.
- Use them as a scouting tool so you know when to step up hand removal or protect developing fruit.
When a garden spray is worth it (and when it is not)
I am thrifty and cautious with sprays because the wrong product at the wrong time can wipe out helpful insects and still barely touch stink bugs. Stink bugs are tough, especially adults. The key is being honest about what you are trying to accomplish.
Sprays are worth considering when
- You have consistent, visible feeding on new fruit or pods.
- You are seeing nymph clusters regularly and hand removal cannot keep up.
- Your plants are at a high-value stage like heavy green-fruit set on tomatoes or pod fill on beans.
Sprays are usually not worth it when
- The damage is already on older fruit and you are close to harvest.
- You only see an occasional adult passing through.
- You cannot spray thoroughly, including leaf undersides where bugs rest.
Lower-impact options (best for nymphs)
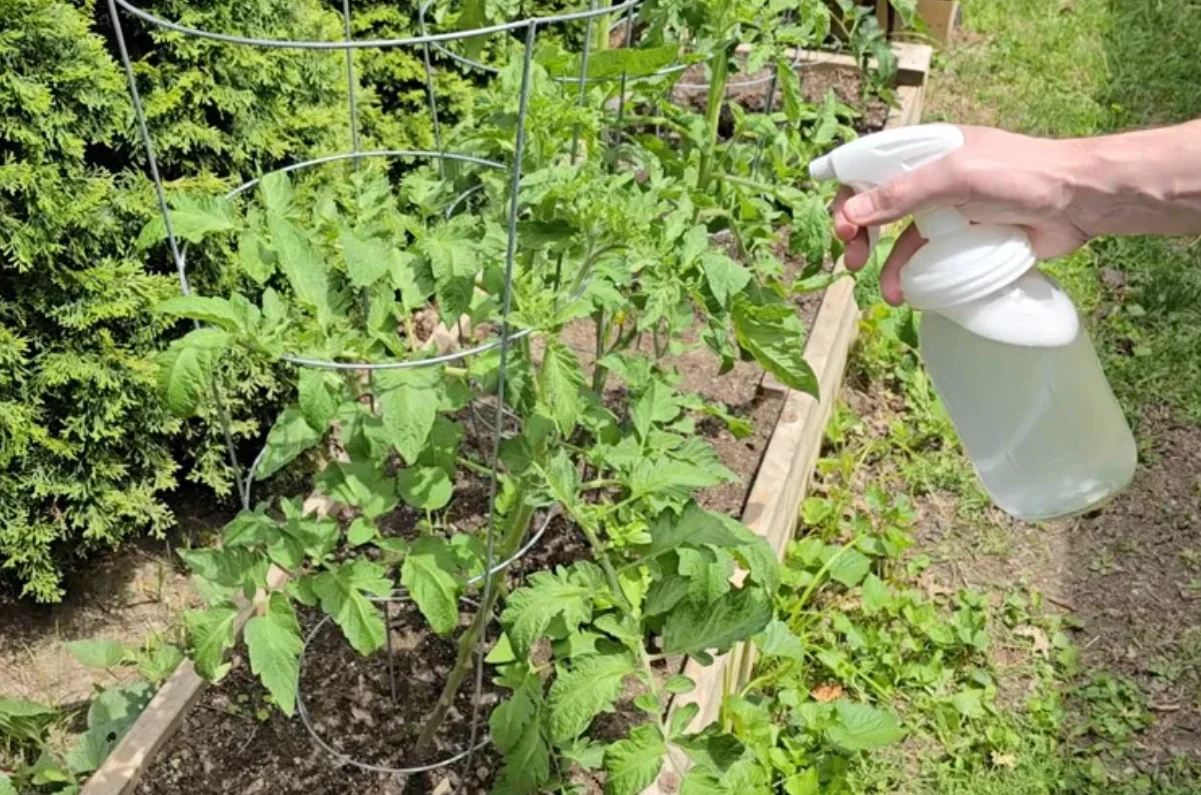
For many home gardeners, insecticidal soap can help with small nymphs if you hit them directly. It is contact-dependent. If you spray and do not actually wet the bug, do not expect results.
Neem-based products can be helpful too, but results are more variable than people expect. Depending on the formulation, neem often works more as an antifeedant or growth disruptor than a fast knockdown, so repeat applications and good coverage matter.
Tip from my own mistakes: spraying in hot sun can stress plants, and some products can cause leaf burn in high heat. I get better results in early morning or evening, and I follow the label closely for temperature cautions.
Stronger options (read the label, protect pollinators)
Some garden insecticides can knock down stink bugs, and the labels that mention stink bugs often include active ingredients in the pyrethrins or pyrethroid family. These can also hit beneficial insects, so if you go this route:
- Choose a product labeled for stink bugs and for your specific crop.
- Follow the pre-harvest interval and reapplication limits exactly.
- Spray when pollinators are not active, and avoid spraying open blooms whenever possible.
If you are unsure what is allowed in your area or you are growing food for kids who snack straight off the vine, your local extension office is a solid, no-sales-pitch resource for crop-safe recommendations.
Build a stink-bug-resistant garden over time
You do not have to redesign your whole yard, but a few small habits reduce pressure year after year.
Keep edges less inviting
- Control tall weeds and brush around the garden perimeter.
- Harvest ripe fruit promptly so plants are not holding a long buffet.
Clean up hiding spots
Stink bugs overwinter in sheltered places like leaf litter, dense weeds, wood piles, and sometimes buildings. A simple fall cleanup around the garden, plus keeping brushy “bug hotels” a little farther from your beds, can reduce the spring jump-start.
Make scouting easy
- Prune tomatoes for airflow so you can actually see clusters and stems.
- Trellis beans and keep rows spaced so you can check undersides quickly.
Encourage beneficials, but stay realistic
Birds, spiders, and predatory insects do eat stink bug eggs and nymphs, and that helps. But with stink bugs, I treat beneficials as pressure reducers, not a complete control plan. You still need hands-on management during peak season.
Quick troubleshooting
I see damage, but no bugs. What now?
Check early morning, look inside the canopy, and inspect undersides of leaves for egg clusters. Stink bugs are excellent at “being gone” when you come looking at midday.
My tomatoes are scarred. Should I pick them?
If the tomato is ripening normally and only has cosmetic damage, it is usually fine to eat once you cut away the corky spot. If it is badly deformed or starting to rot around the wound, compost it and protect the next fruit set.
Why do I keep getting stink bugs even after I remove them?
Adults fly in from surrounding areas. That is why combining methods works best: hand removal plus edge management, and row covers during the most vulnerable periods.
The 30-Second Cheat Sheet
Essential takeaways for: How to Get Rid of Stink Bugs in the Garden
What stink bug damage looks like
- Tomatoes: pale cloudy spots with tiny punctures, corky white tissue inside, and puckered scars that can mimic catfacing.
- Beans: dimpled pods, pinpricks, and shriveled or poorly formed seeds.
- Fruit: depressed hard spots, internal corking, and misshapen “catfaced” fruit.
Fastest controls that work in home gardens
- Hand removal: knock bugs into a jar or bucket of soapy water, especially early morning when they move slower.
- Target nymphs: nymph clusters are easier to eliminate than flying adults.
- Row covers: install early and seal edges tight. Do not trap bugs under the cover, and plan for pollination needs.
Traps and sprays in one sentence
- Traps: good for monitoring, not a stand-alone fix, and keep them away from your best plants.
- Sprays: only worth it when active feeding is ongoing and you can hit bugs directly; always use a product labeled for stink bugs and your crop, and avoid spraying blooms.
My simple weekly routine
- Scout 3 times a week (daily during heavy fruit set).
- Remove adults and wipe out nymph clusters.
- Check leaf undersides for eggs and remove them.
- Clean up weeds and garden edges so stink bugs have fewer hiding places.
💡 Tip: Scroll up to read the full article for detailed, step-by-step instructions.
⬆️ Back to top
About Marcus Vance
Content Creator @ Grit & Home
Marcus Vance is a lifelong DIY enthusiast and self-taught home renovator who has spent the last decade transforming a dilapidated 1970s ranch into his family's dream home. He specializes in budget-friendly carpentry, room-by-room renovations, and demystifying power tools for beginners. Through his writing, Marcus shares practical tutorials and hard-learned lessons to help homeowners tackle their own projects with confidence.