
🚨 In a DIY emergency or rush?
Skip the details and jump straight to our 30-second cheat sheet for the most crucial info.
Small courier. Big home questions.
If Canada thistle has moved into your yard, it rarely arrives as a single polite plant. It shows up like an uninvited committee, linked underground, popping up in a widening circle. That linked root system is the whole trick, and it is why the usual “just pull it” advice goes sideways.
Let me save you some sweat: Canada thistle is not a “pull it once and forget it” weed. It is a deep-rooted perennial that spreads by creeping roots (rhizomes). Your plan should be less about one heroic afternoon and more about boring, consistent follow-through.
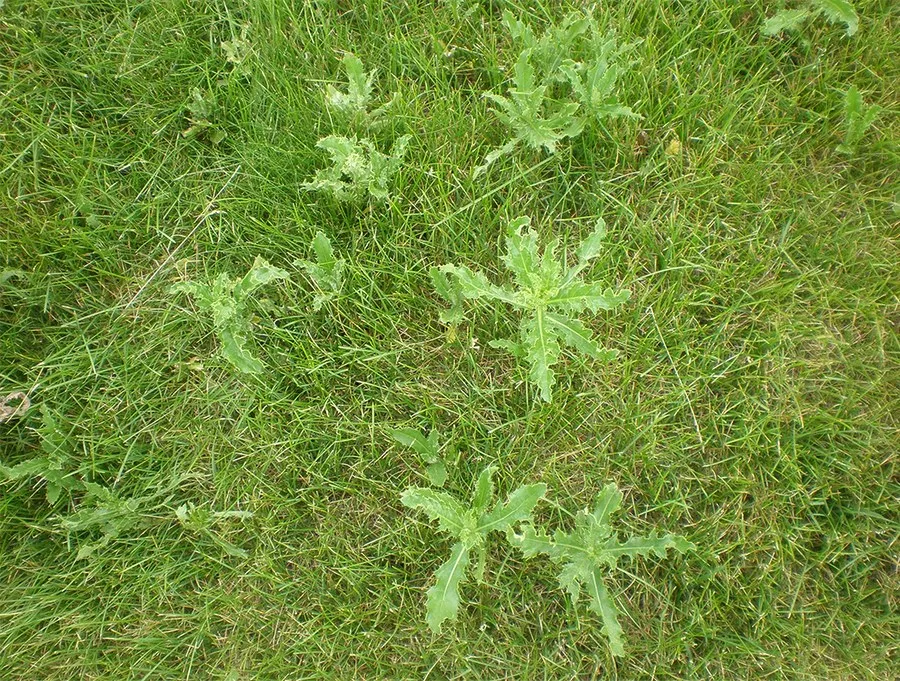
First, make sure it is Canada thistle
Before you go to war, confirm the opponent. A lot of plants get called “thistle,” and control can differ.
Quick ID clues
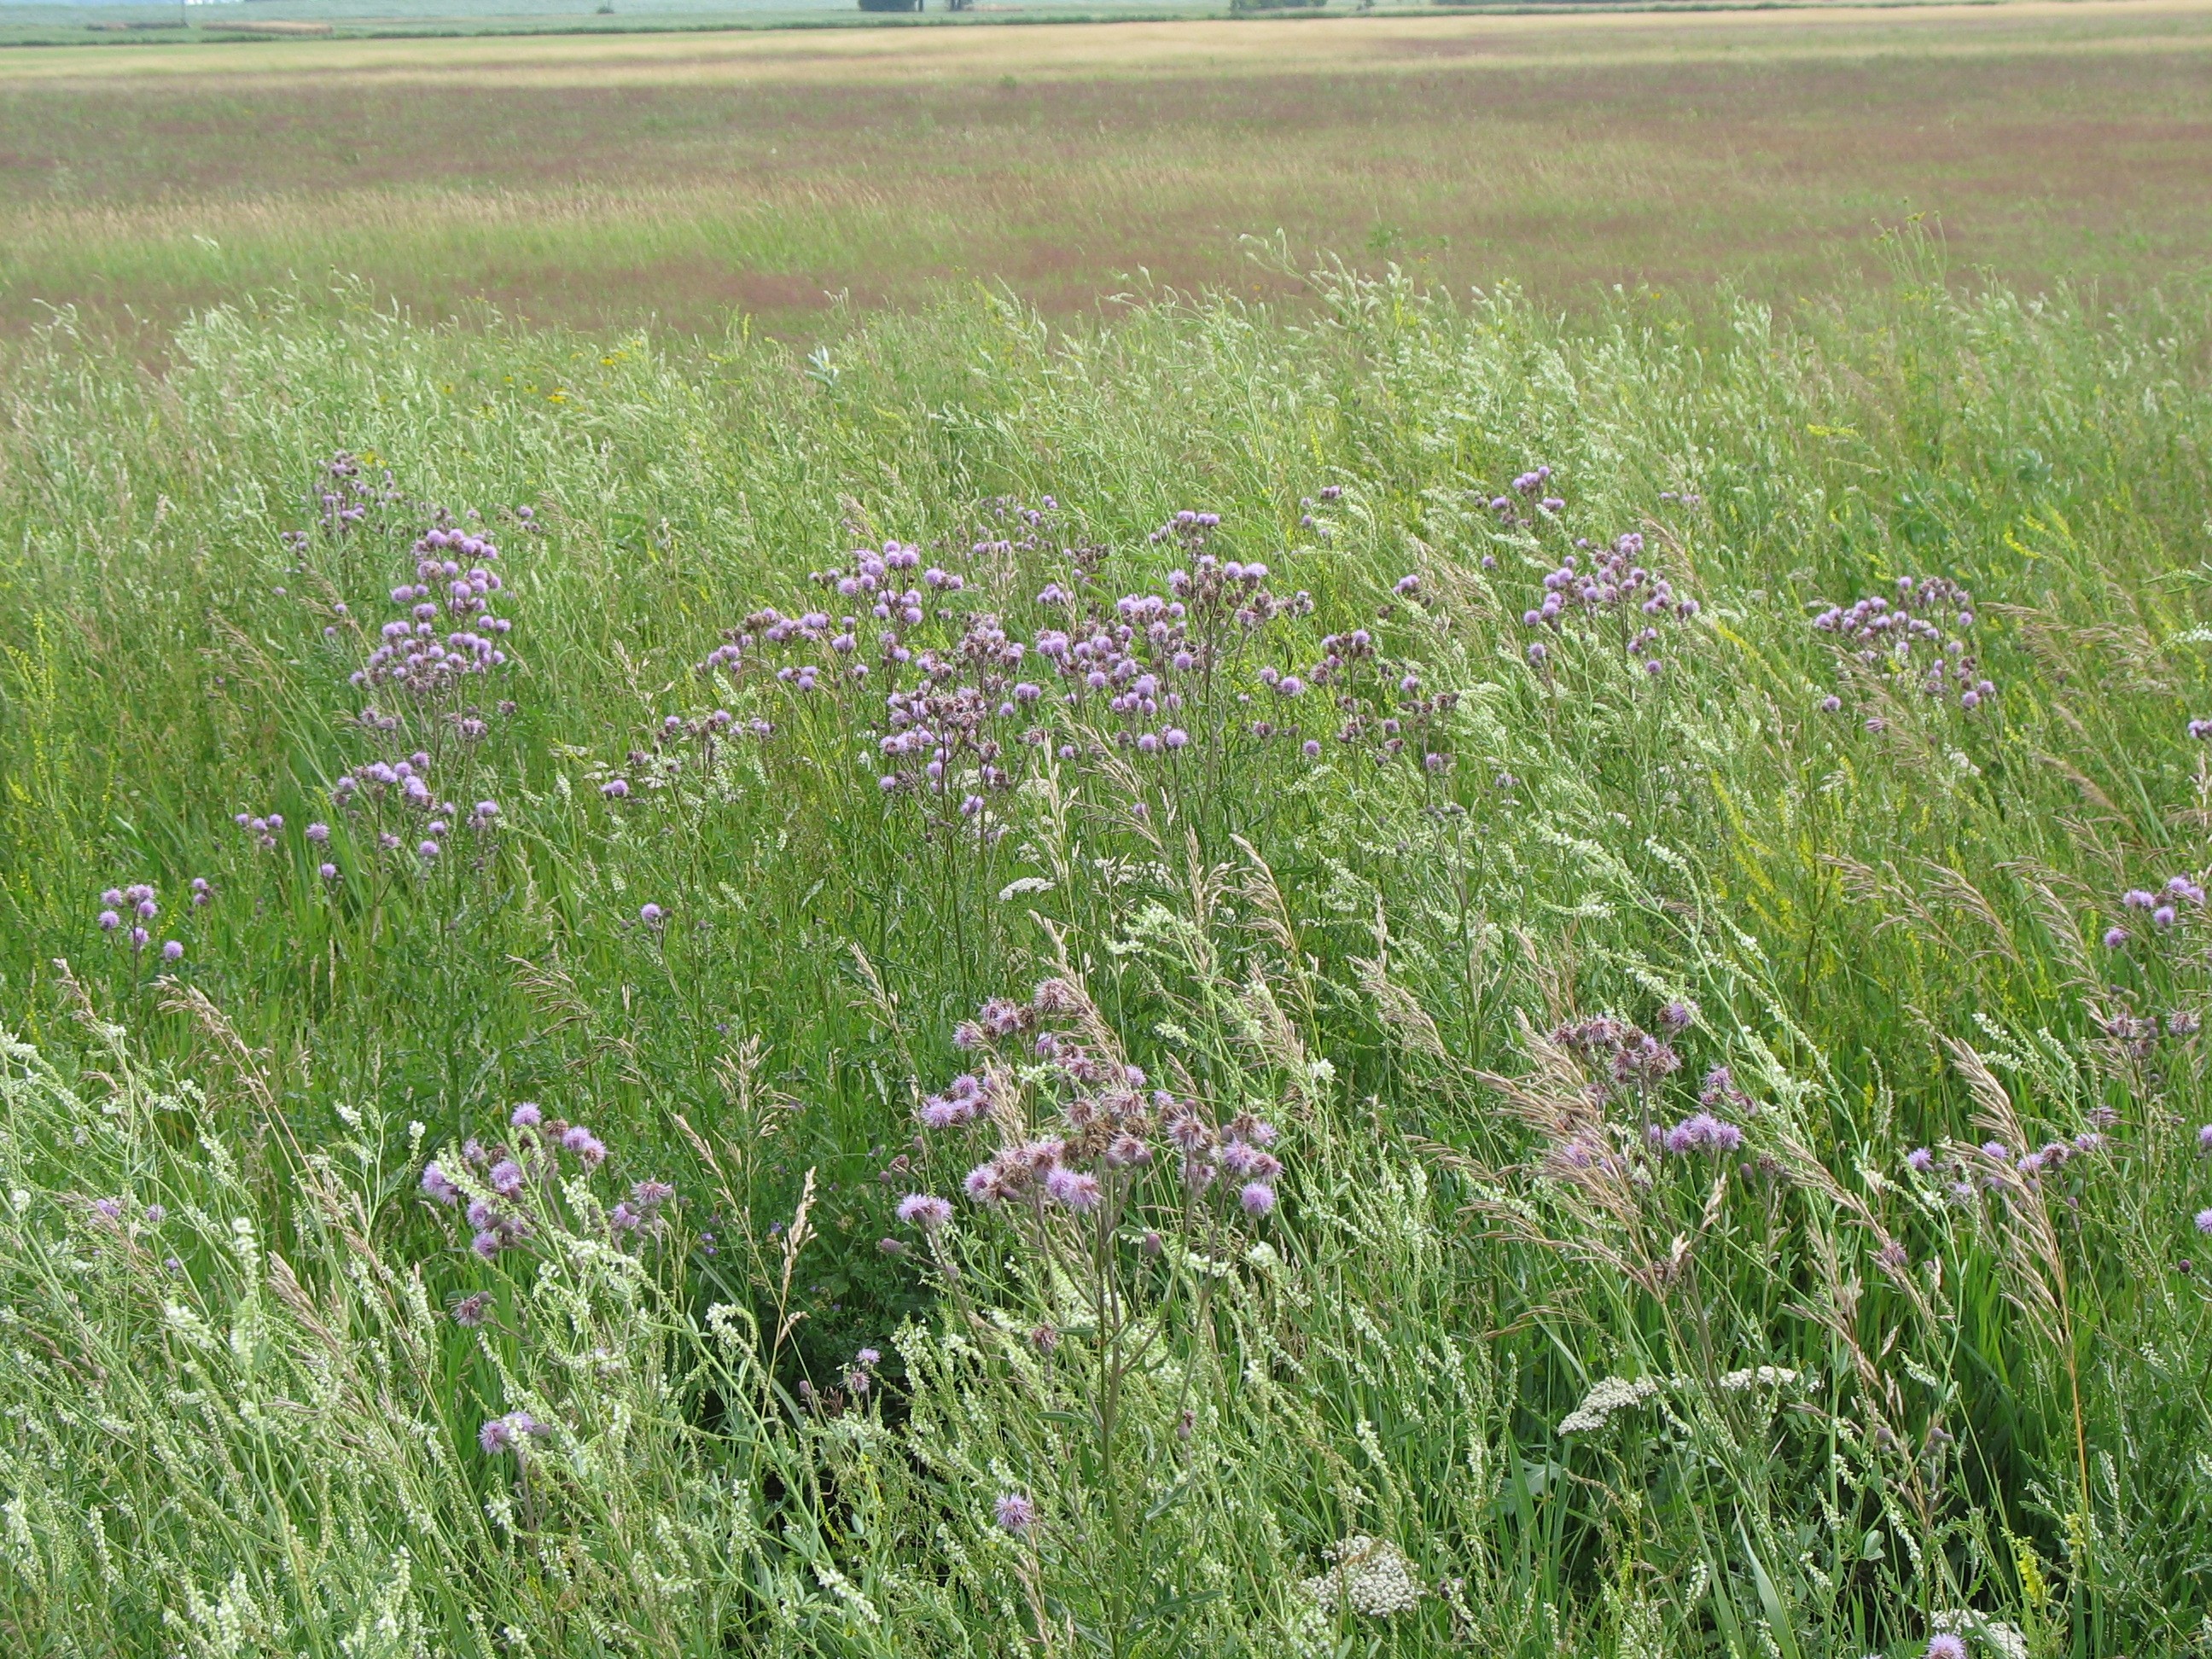
- It grows in colonies. You will often see a patch of many stems rather than one plant, because many stems are connected to the same creeping root system.
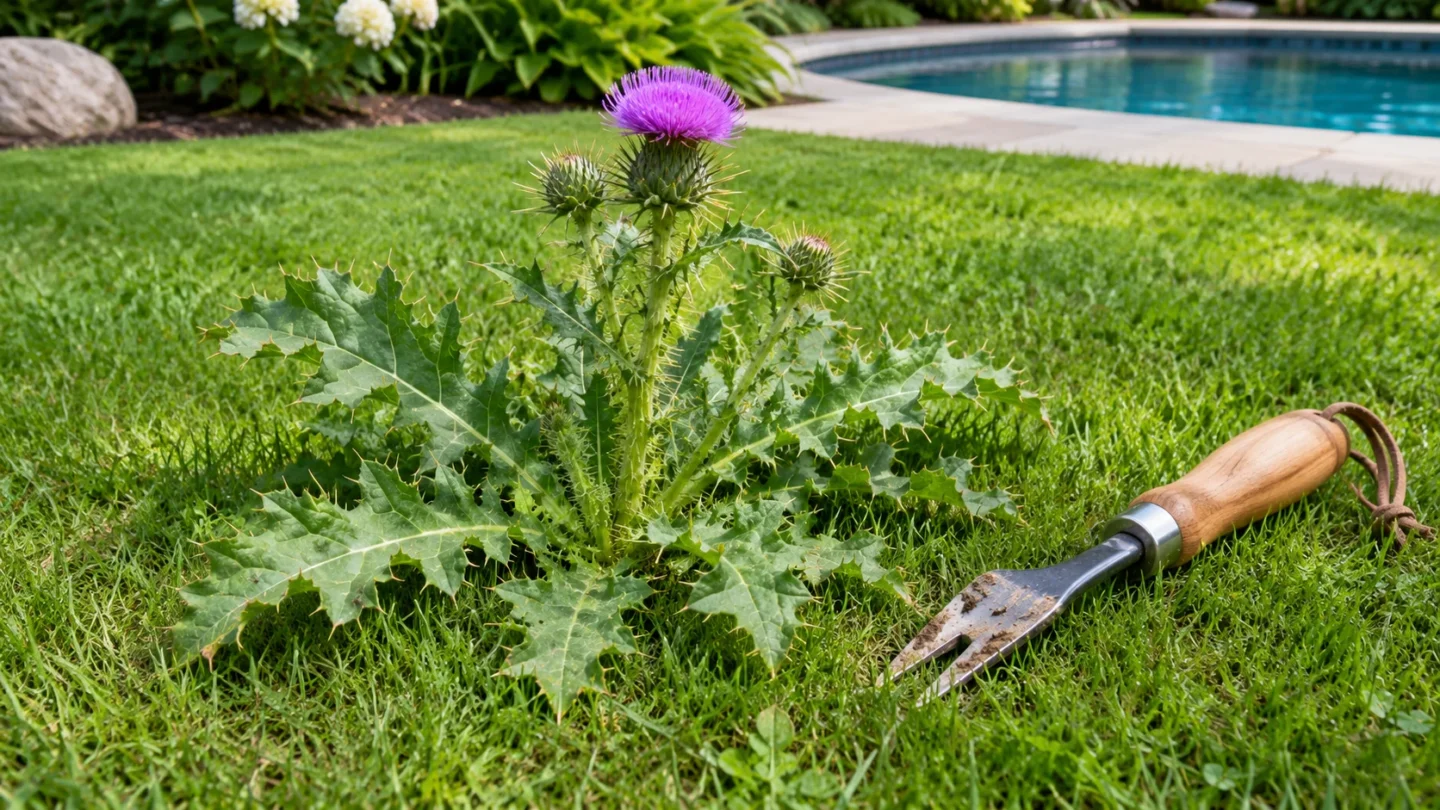
- Leaves are spiny, but not always dramatically so. Canada thistle leaves are lobed and have sharp prickles along the edges. They are usually not as thick and armored as some other thistles.
- Leaves are alternate and often clasp the stem. On many plants, the leaf base has small “ears” that wrap the stem a bit.
- Stems are relatively smooth. Canada thistle stems are typically green and branching near the top. They are not usually covered in spiny “wings.”
- Flowers are small and tufted. Blooms are commonly purple to pink (sometimes white), and smaller than many other thistles. Plants are often 2 to 4 feet tall when allowed to grow.
Look-alike watch: Bull thistle is usually a single plant (biennial) with a very hairy look and larger, showier flowerheads. Canada thistle is more about the patch and the underground spread.
One more nerdy detail (optional, but helpful): Canada thistle plants can be male or female, so not every patch flowers the same way or produces seed every year. Do not let that lull you into thinking it is harmless.
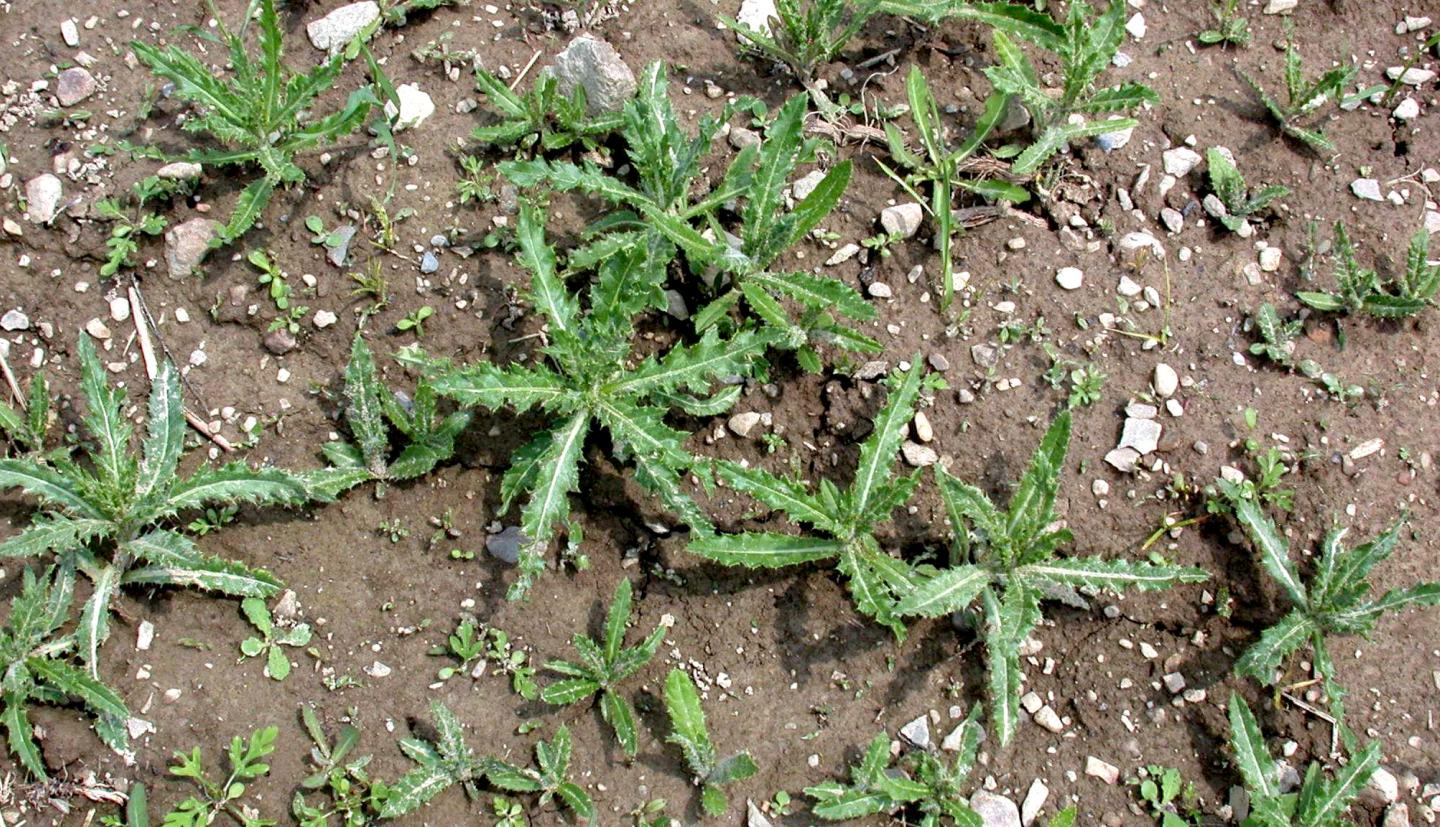
Why pulling Canada thistle usually fails
Pulling feels productive. With Canada thistle, it often is not.
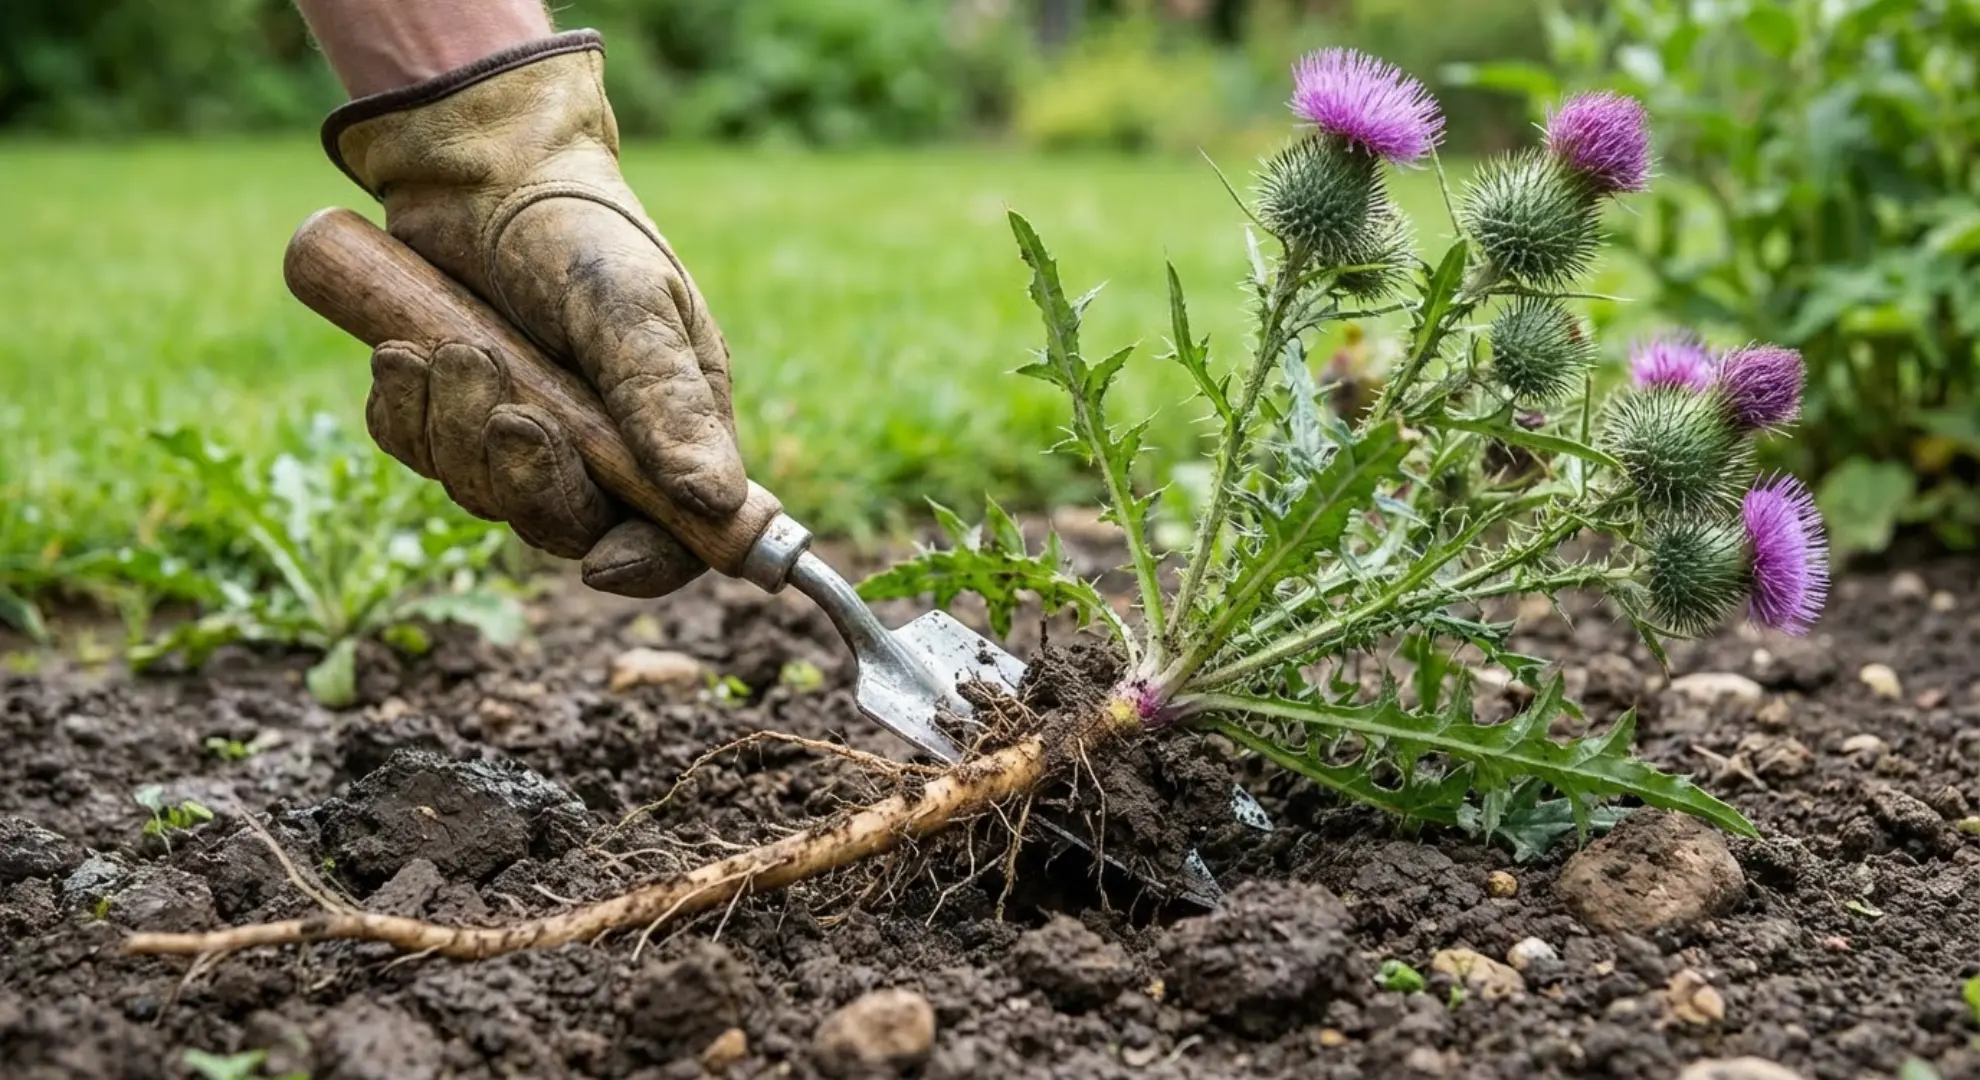
Here is what is happening underground: Canada thistle stores energy in an extensive root system that can run laterally and send up new shoots from buds along those roots. When you pull the top growth, you almost always leave root and rhizome pieces behind. Those pieces resprout. Sometimes that means you see even more shoots afterward, not because you “created” new roots, but because the root system that was already there is still calling the shots.
It is the same reason a bad haircut does not fix a bad habit. You removed what you could see, not what was doing the deciding.
When pulling can still help
- Very young plants that are not yet established can sometimes be removed if you get as much root as possible.
- After you have weakened the patch with repeated cutting, hand removal of stubborn survivors can be useful.
- When you are preventing seed from mature flowerheads, removing and bagging tops can reduce spread to new areas.
If you do pull, do it when the soil is moist, use gloves, and expect follow-up sprouts.
The two-part plan that works
Canada thistle control is usually a combination of depleting the roots and hitting the plant when it is moving energy downward.
Part 1: Repeated cutting to drain the roots
Think of the roots like a battery. Leaves recharge it through photosynthesis. Your job is to keep the plant spending energy to regrow, without letting it fully recharge.
How to cut it
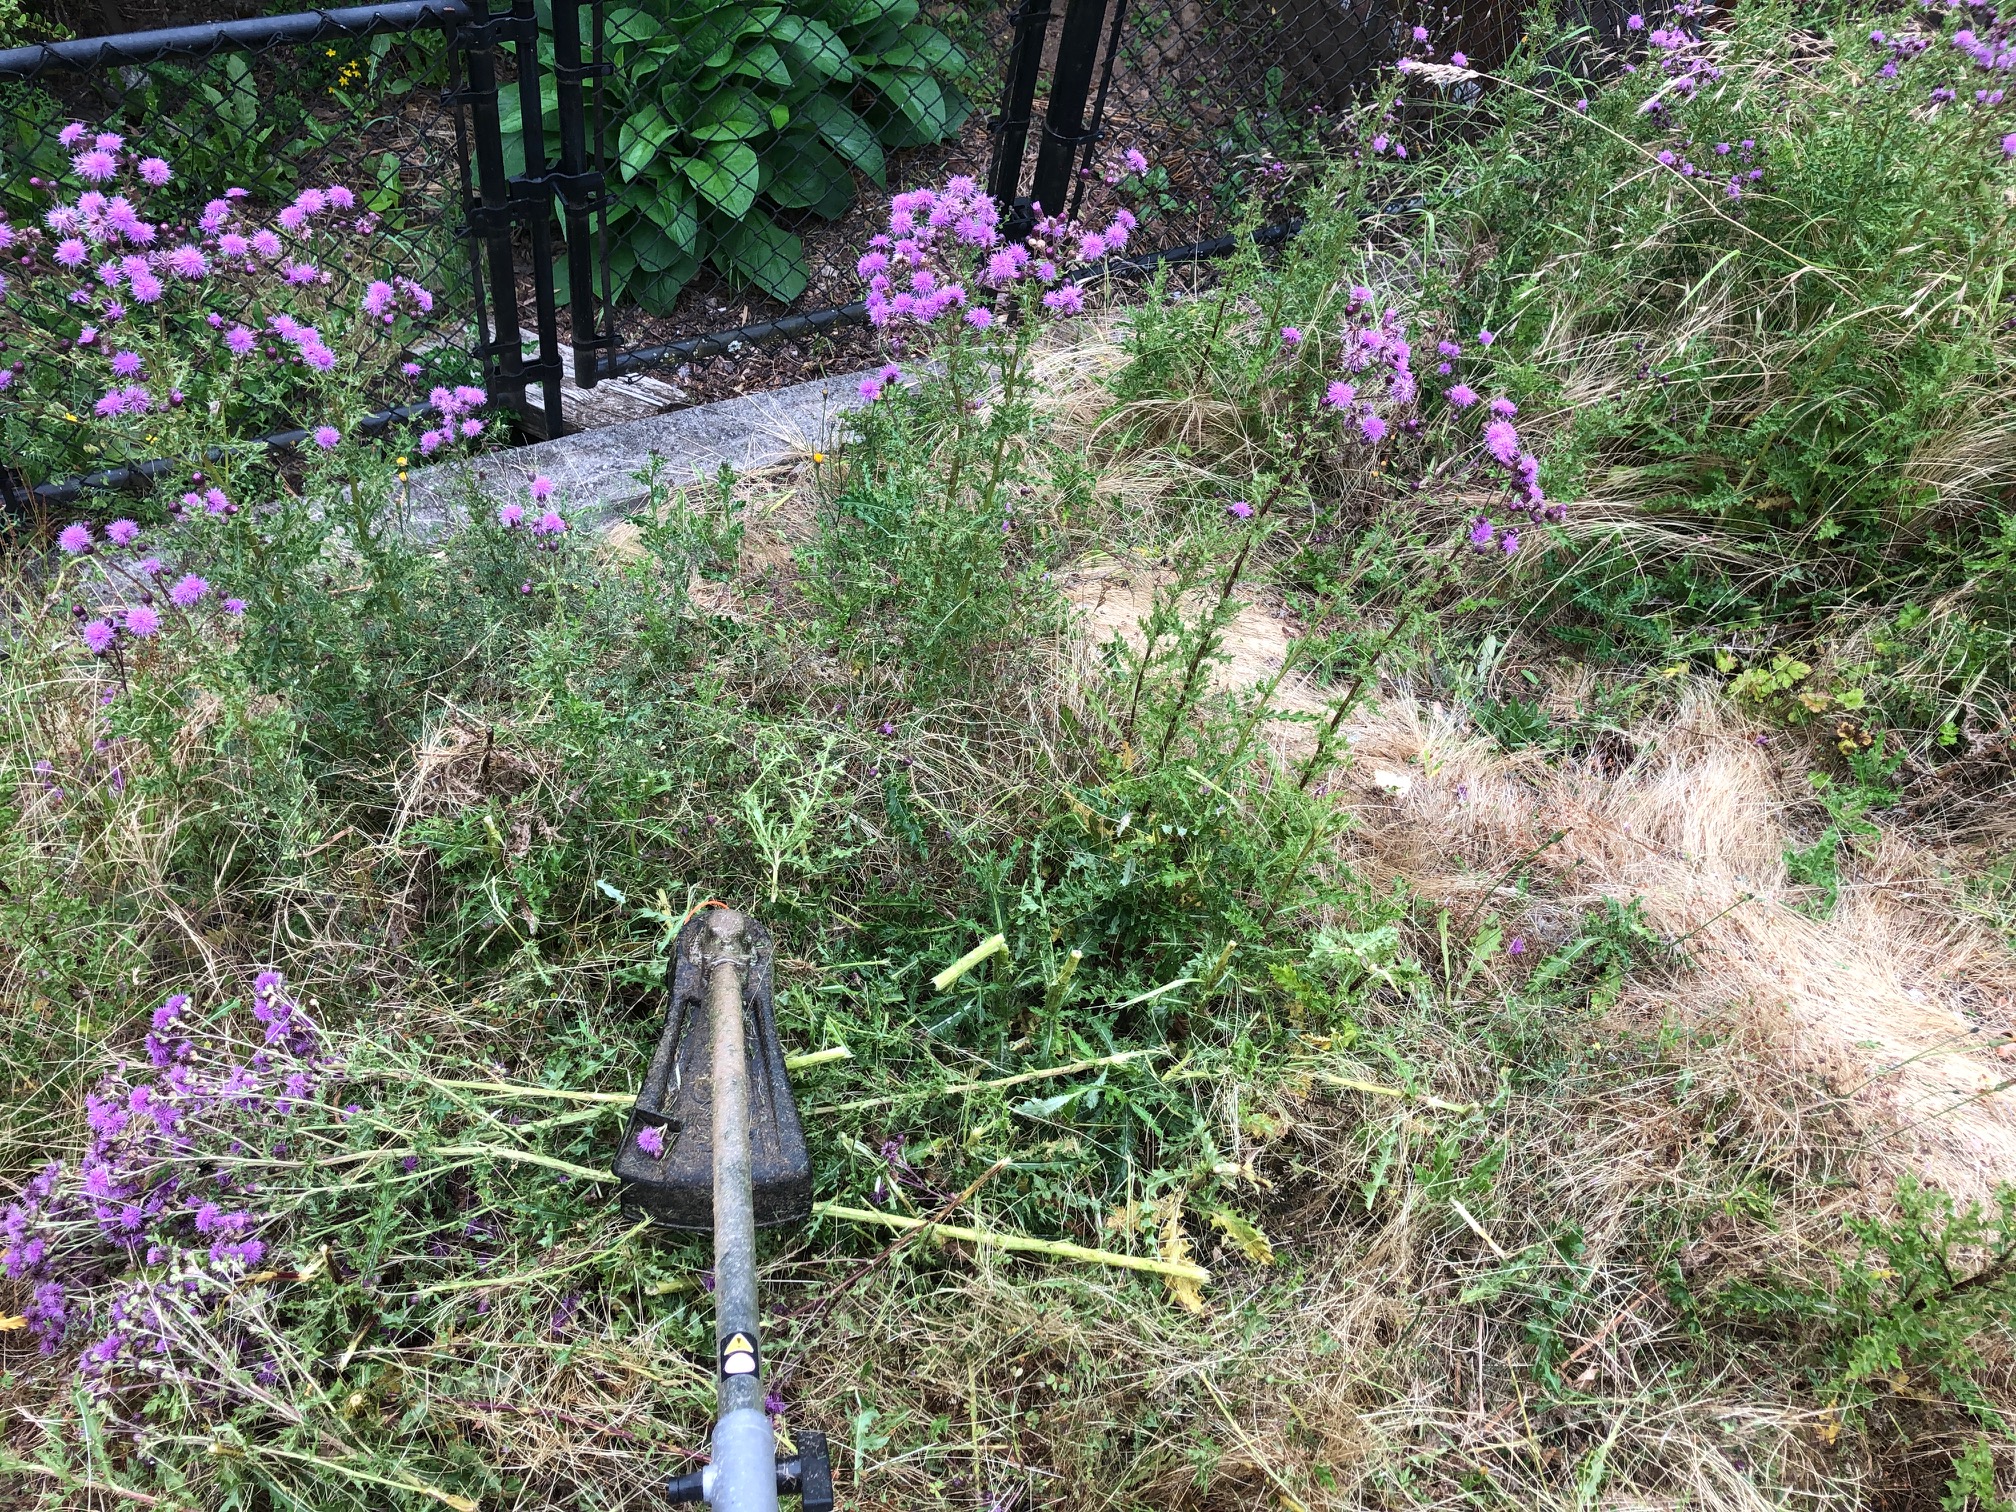
- Cut or mow as low as you can without scalping your lawn. In beds, cut stems at or slightly below soil level.
- Cut early, not when it flowers. A good rule is to cut when plants are about 6 to 10 inches tall, or anytime it has rebuilt enough leaf area to start “cashing in” sunlight again.
- Repeat often during active growth. In peak growing season, that may mean every 2 to 3 weeks. If it regrows faster, cut sooner.
Consistency matters more than intensity. Miss a month in summer and the colony thanks you for the vacation.
Part 2: Time a systemic herbicide for fall root kill
If you are willing to use an herbicide, a systemic product can be effective because it moves through the plant instead of just burning leaves. The timing is the secret handshake.
In late summer into fall, Canada thistle naturally shifts into storage mode and moves sugars from leaves down to the roots. Apply a systemic herbicide during this period and you have a better chance of moving the active ingredient down with that flow.
Best timing
- Late summer through early fall, when plants are healthy and actively growing.
- After a cut, wait until you have good regrowth (enough leaf surface to absorb spray), then treat.
- Choose a calm, dry day so spray stays where you put it.
Which herbicide, generally?
This depends heavily on where the thistle is growing.
- In lawns: you are usually looking for a selective broadleaf herbicide labeled for Canada thistle that will not harm turf when used as directed. Common active ingredients in these products may include 2,4-D, dicamba, clopyralid, or mixes.
- In non-turf areas (gravel, fence lines, cracks): some people use non-selective options (commonly glyphosate) as a spot treatment, but only where it is acceptable to kill surrounding plants.
- Pasture and larger properties: products may use actives like aminopyralid or clopyralid, and have specific grazing and manure restrictions.
Important: Always follow the label for the specific product you choose, including where it can be used (lawn vs. landscape beds), temperature limits, rain-free window, and reseeding rules.
Basic spray safety
- Wear gloves, long sleeves, and eye protection.
- Avoid drift near vegetables, roses, grapes, and other sensitive plants.
- Do not spray open blooms. If any thistle is flowering, cut blooms off first and treat regrowth. Also, spray when bees are not active, like early morning or evening.
Step-by-step schedules
Option A: Non-chemical schedule
- Spring: When shoots reach 6 to 10 inches, cut them to ground level.
- Late spring through summer: Cut again as soon as it rebuilds a decent set of leaves, often every 2 to 3 weeks in fast growth. Do not let the patch bloom.
- Fall: Keep cutting if it is still pushing growth. Expect improvement, not instant disappearance. Plan to repeat next year.
This method works best where you can cut regularly, like along fences, garden edges, and open areas you can mow.
Option B: Cut + fall systemic treatment
- Spring and summer: Cut or mow regularly to keep plants small and prevent flowering.
- Late summer: Stop cutting long enough to allow 10 to 14 days of leafy regrowth (enough surface to absorb spray).
- Early fall: Spot spray with a systemic herbicide labeled for Canada thistle and for your setting (lawn or beds).
- After treatment: Avoid mowing for the period listed on the label so the herbicide can move into the roots.
Do not be surprised if you need a second fall application or a spring follow-up the next year. Canada thistle plays the long game. You can too.
What success looks like
With Canada thistle, “working” often looks unimpressive at first. The patch may still sprout, but shoots get thinner, shorter, and slower to rebound after cutting. The outer edge stops marching. Then you start seeing gaps.
For established patches, it is common to need a full season to get real momentum, and 2 to 3 seasons to feel like you actually own that part of the yard again.
Containment tips
Keep it from going to seed
Canada thistle spreads most aggressively by roots, but seeds help it hop to new places. If you see buds or flowers, remove tops and dispose of them so seed does not spread.
Bag flowerheads and put them in the trash if that is recommended where you live. Avoid composting flowerheads unless your compost reliably gets hot enough to kill seeds.
Watch the edges
The outer ring of a patch is where new shoots appear. Patrol the perimeter and cut or spot treat those sprouts first. Shrinking the border is how you win space back.
Do not till through an active patch
Tilling can chop roots into pieces that are capable of sprouting, which can spread the problem. If you need to renovate an area, focus on control first, then replant or reseed once the thistle is clearly weakening.
What about vinegar, salt, or boiling water?
These can injure the top growth, but they rarely solve Canada thistle because the roots survive. Salt also damages soil structure and can harm surrounding plants for a long time. Boiling water is hard to apply deeply enough to matter and is risky around desirable plants.
If you want a low-chemical approach, repeated cutting is usually the better “simple but effective” option.
If Canada thistle is in garden beds
Garden beds raise the stakes because you cannot just broadcast spray.
- Start with cutting. Snip stems at soil level whenever they appear.
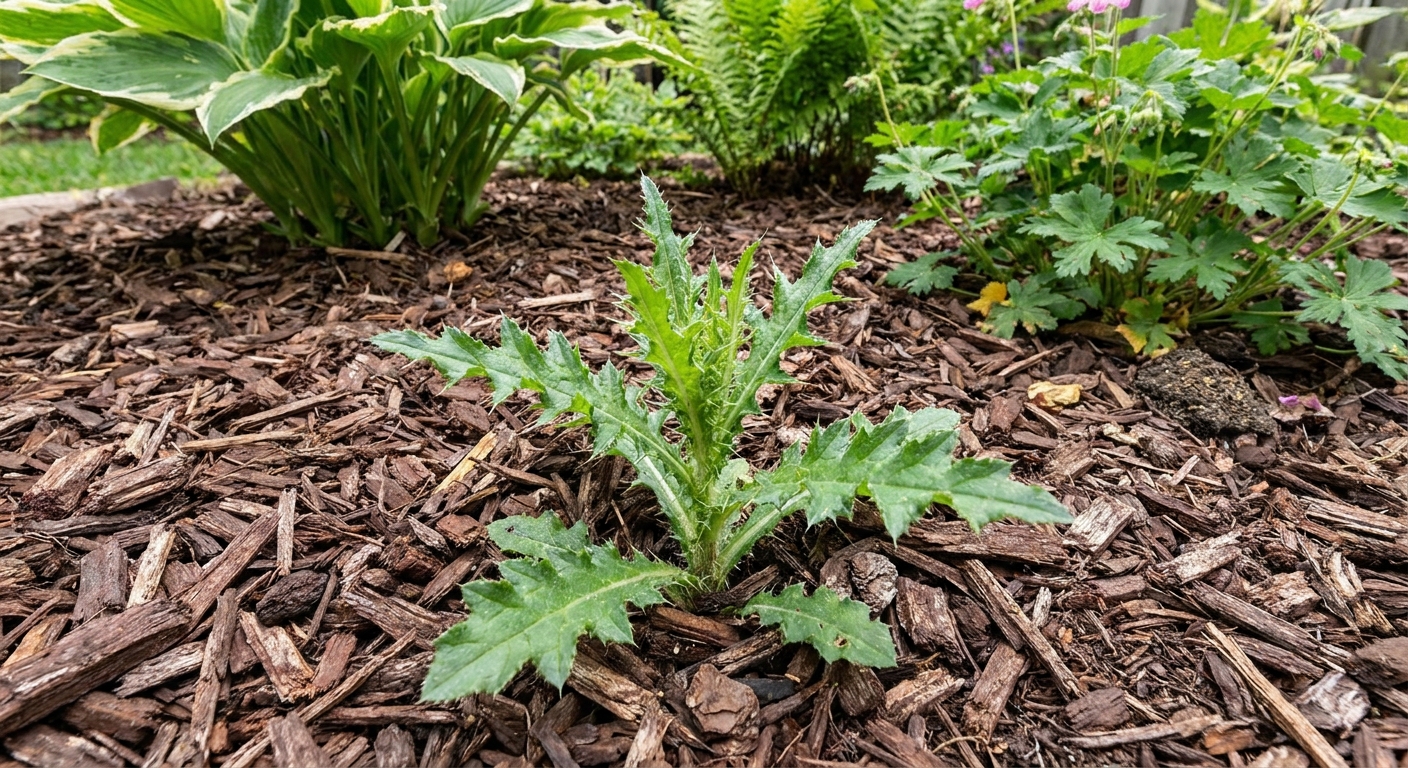
- Mulch helps, but it is not a magic wall. A thick mulch layer can reduce new shoots, but thistle can punch through. Keep cutting anything that makes it up.
- Consider careful spot treatment. If you use a systemic herbicide, treat individual leaves with precision to avoid drift. Some gardeners use a foam brush or glove-on-glove method to apply product to thistle leaves only, but the label must allow the application method you use.
In beds, the goal is often “no photosynthesis allowed” for long enough that the roots run out of savings.
Help your yard compete
Thistle loves open space and stressed turf. While you are cutting and treating, make the rest of the yard harder to invade.
- Thicken the lawn: overseed thin areas when the season is right for your grass type.
- Mow properly: keep turf at the recommended height for your variety so it shades the soil.
- Do not overwater bare edges: damp, disturbed soil is prime real estate for weeds.
FAQ
How long does it take to get rid of Canada thistle?
Expect a season of steady work to see a real reduction, and often more than one year for full control. The deeper and wider the root system, the longer the timeline.
Should I dig out the roots?
You can try, but it is hard to remove the entire creeping system. Digging can help with small, young infestations, but for established patches it often turns into whack-a-mole unless paired with repeated cutting and follow-up control.
When is the best time to spray?
Fall is a strong window because the plant is moving energy to the roots. Spray after there is enough regrowth to absorb herbicide, and then avoid mowing per label directions.
Will mowing alone kill it?
Frequent mowing can weaken Canada thistle significantly and sometimes control it over time, but it requires persistence. If mowing is infrequent, the plant can rebound and keep spreading.
The 30-Second Cheat Sheet
Essential takeaways for: How to Get Rid of Canada Thistle
Identify Canada thistle fast
- Usually shows up as a colony or patch, not a single plant.
- Spiny, lobed leaves and fairly smooth green stems.
- Leaves are alternate and often clasp the stem with little “ears.”
- Small purple-pink tufted flowers if it is allowed to bloom.
Why pulling backfires
- Canada thistle spreads by creeping roots.
- Pulling usually leaves root behind, so it resprouts and can throw more shoots, making it feel like it spread overnight.
Best non-chemical method
- Cut or mow when shoots hit 6 to 10 inches (or anytime it rebuilds serious leaf area).
- Repeat often all season (about every 2 to 3 weeks in peak growth).
- Do not let it flower.
Fastest route (for many yards): cut + fall systemic
- Cut regularly spring and summer to weaken the patch.
- In late summer, let it regrow for 10 to 14 days.
- Early fall, spot spray a systemic herbicide labeled for Canada thistle and your setting.
- After spraying, do not mow during the label’s waiting period.
Two rules that matter
- Consistency beats force. Multiple cuts beat one big dig.
- Timing beats volume. Fall works because the plant is moving sugars down to the roots.
💡 Tip: Scroll up to read the full article for detailed, step-by-step instructions.
⬆️ Back to top
About Grit
Content Creator @ Grit & Home
Grit is Grit & Home’s little blue clay courier, delivering big questions about the place you call home. Expect practical ideas, a raised eyebrow, and a satchel full of curiosity.